Overview
This page explains how to send emails using the three email sending methods provided by Spread. Before sending emails, make sure to review the email sending method that matches your purpose.What to check before sending
Before sending emails through Spread, review the following points carefully.- Emails are only meaningful if they reach the recipient’s inbox. Spread is designed with delivery reliability as the top priority, and therefore uses a low HTML/CSS-based email format.
- Do not send cold emails to recipients who have not given consent. Sending bulk cold emails may lead to legal issues and can damage your domain reputation, making future email delivery difficult.
- Large lists that have not been emailed for a long time require prior management. If you are sending emails to thousands or tens of thousands of subscribers after a long period, list warm-up and list cleaning are strongly recommended. For more details, refer to Managing lists safely.
- Avoid unnecessary styling. Spread applies minimal styling to reduce the likelihood of emails being classified as spam or promotions by major email services such as Gmail and Naver Mail.
- Be cautious when using keywords sensitive to spam filters. Words such as “free,” “discount,” “special,” and “offer” should only be used when necessary and minimized in general emails.
Email recipients are set by ‘list’. Before sending, create a recipient list and learn how to set it as recipients in Create a List and Set Recipients.
Quick navigation
How to send an One-off Campaign
Step 1. Create a new campaign
From the left sidebar of the Spread app, click
One-off Campaigns, then click the + New campaign button at the top to create a new campaign.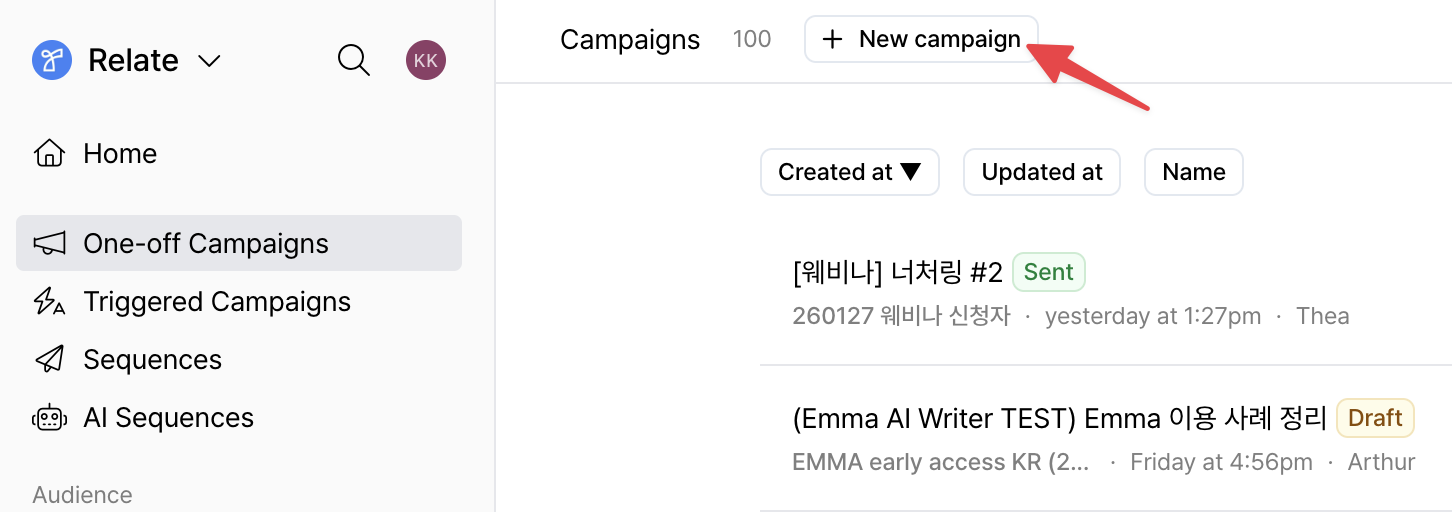
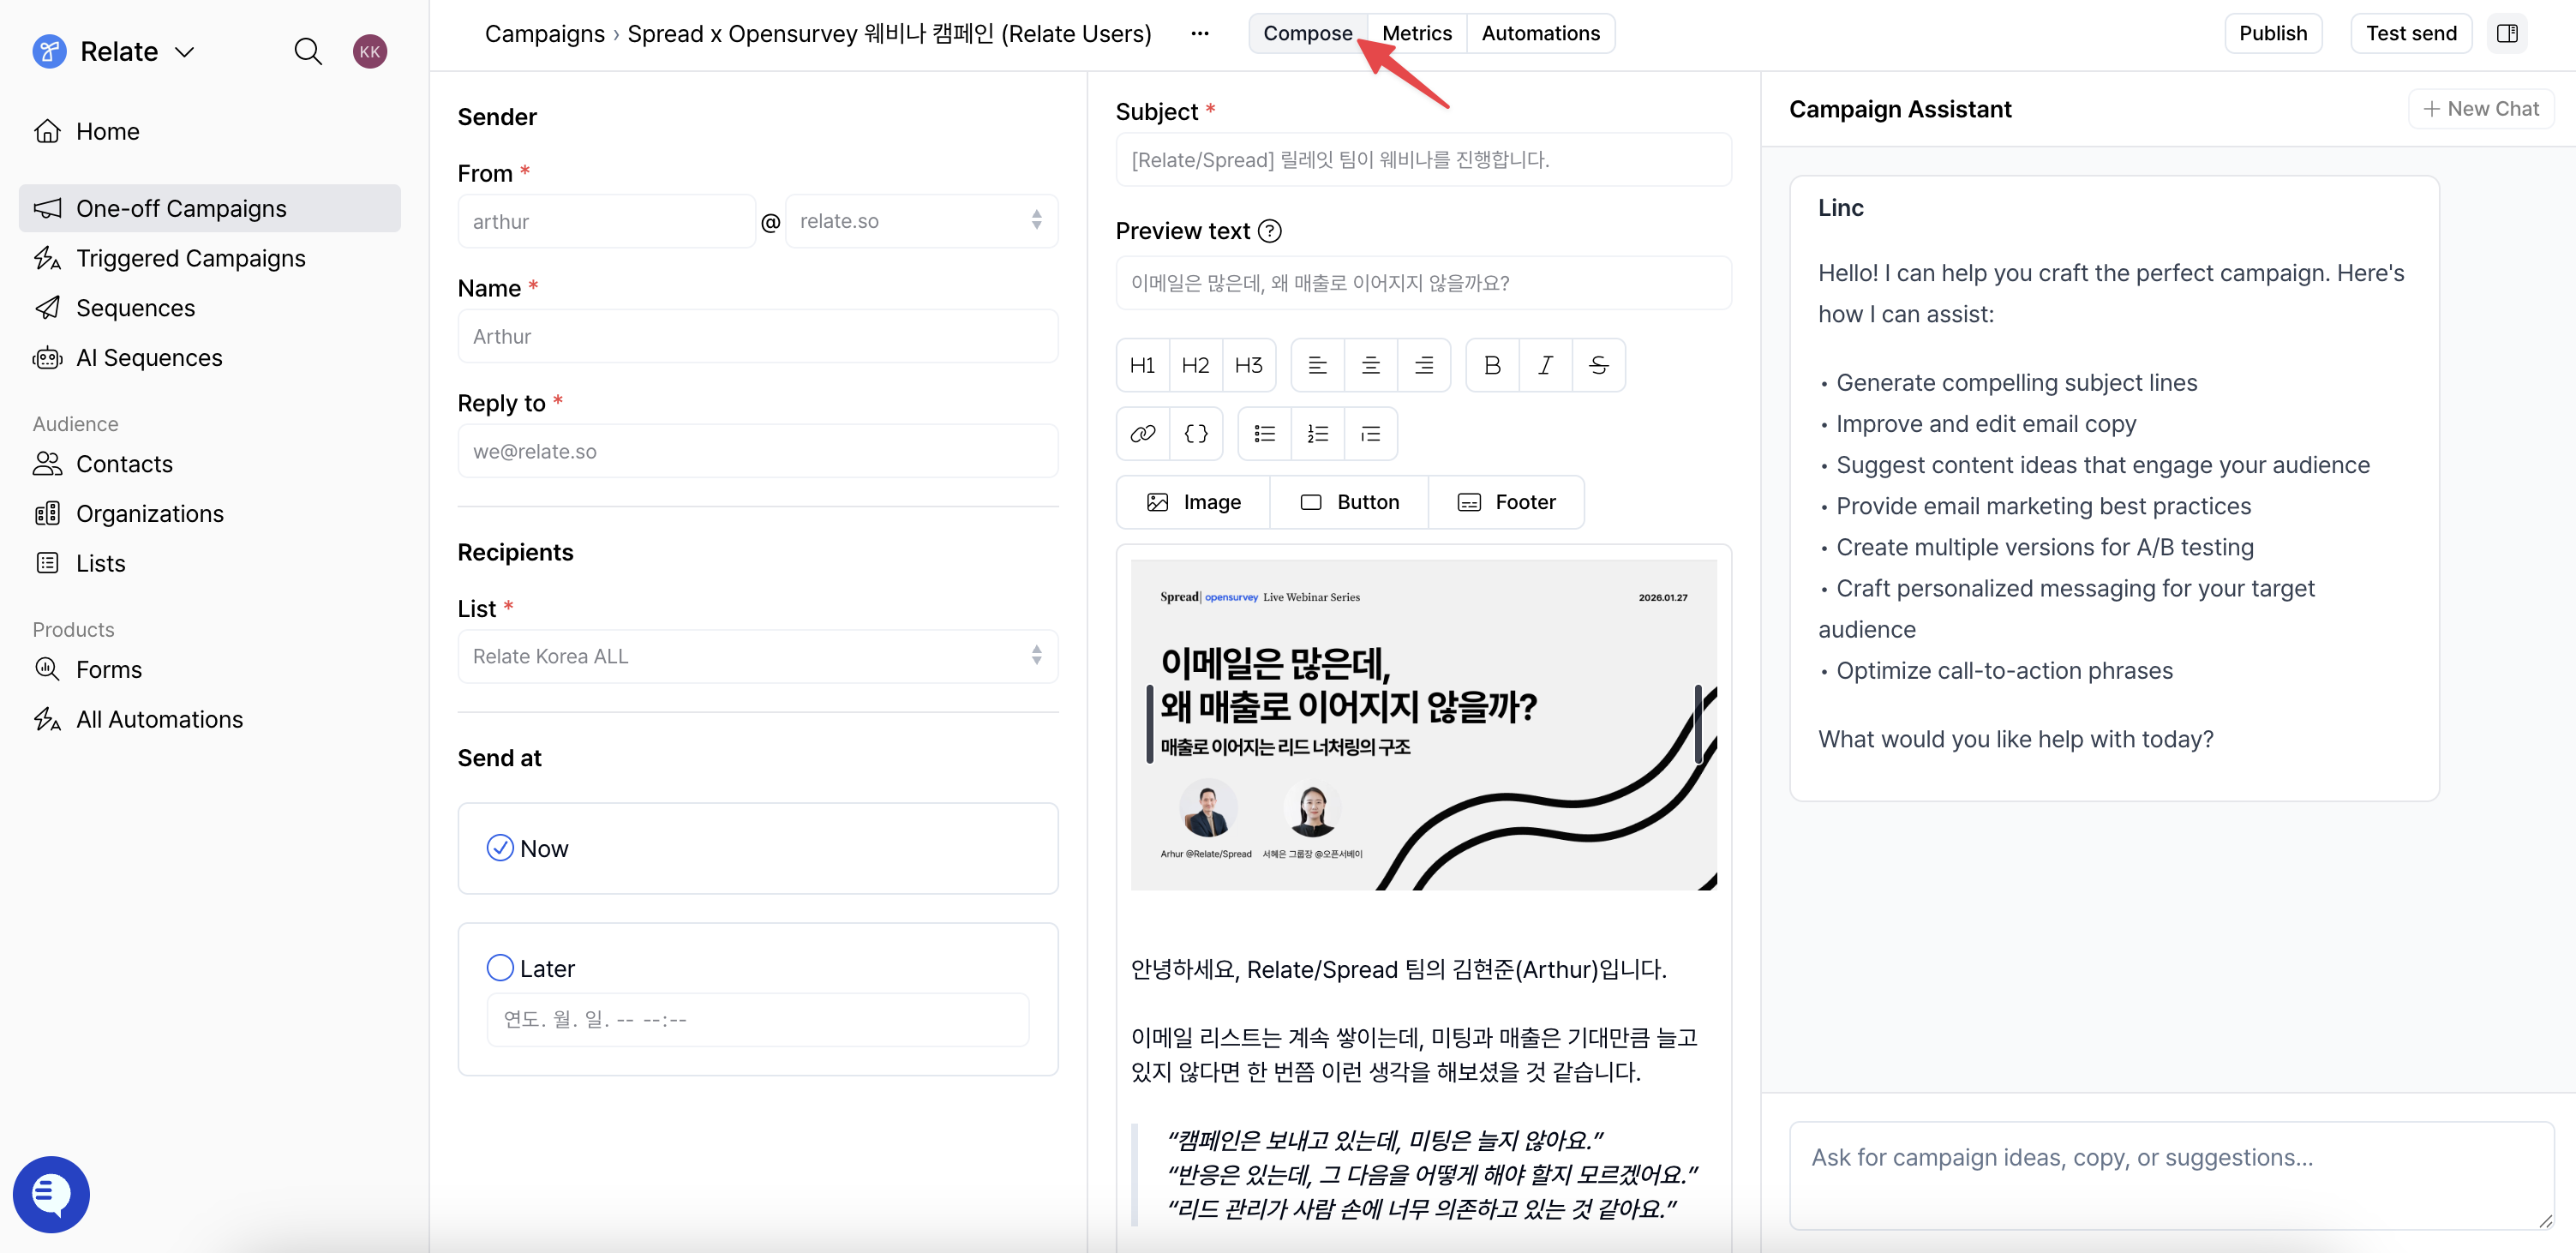
Step 2. Write the campaign
Click theCompose tab at the top of the created campaign to write the one-off campaign.
-
Sender
From: Set the sender email address used to send the campaign.Name: Enter the sender name displayed to recipients.Reply to: Set the email address that will receive replies.
-
Recipients
List: Select the list that contains the leads who will receive the email.- If no list exists yet, you must create a list before sending a campaign.
-
Send at
Now: Send the campaign immediately.Later: Send the campaign at the specified date and time.
-
Subject
- Enter the email subject displayed to recipients.
-
Preview text
- A short line displayed after the subject in the recipient’s inbox.
You can summarize the email or highlight key topics or benefits. - If left empty, part of the email body will be displayed instead.
- A short line displayed after the subject in the recipient’s inbox.
Writing the email body
Spread provides an editor that allows you to write emails similarly to writing in Notion.- You can apply various text styles using the toolbar at the top of the editor, such as headings, bullet lists, and numbered lists.
- You can also type
/in the editor to access text styling, button, and image options. - Images can be added, resized, and repositioned.
- You can add Call-to-Action (CTA) elements using the
Buttonfeature.- If buttons or links are included, you can review email opens and link clicks after sending in Email Metrics.
If you want to personalize emails with recipient information
If you want to personalize emails with recipient information
By using Variables (mail merge variables), you can insert recipient or company information into emails for personalization.
Even when sending the same content, recipient names, company names, and job titles are automatically applied to deliver more natural and tailored messages.Variables can be used anywhere in the email subject and body,
and are automatically replaced based on each lead’s information at send time.Below is a list of the main Variables provided by Spread.
{{full_name}}: Recipient’s full name{{first_name}}: Recipient’s first name{{last_name}}: Recipient’s last name{{title}}: Recipient’s job title{{email}}: Recipient’s email address{{phone}}: Recipient’s phone number{{organization}}: Company name{{domain}}: Company website URL{{number_of_contacts}}: Number of contacts registered for the company{{sender_name}}: Sender’s name{{sender_email}}: Sender’s email address
Email footer settings
Spread recommends including a footer in all emails. Footer content can be configured per campaign, and the default footer includes the following.- The reason the recipient is receiving the email
- Company name
- Company address
- An unsubscribe button that allows recipients to opt out directly
[[enter text here]], is recognized as an unsubscribe link.
Removing branding
ThePowered by Spread footer can only be removed on paid plans.You can change your plan by clicking
Workspace settings in the Spread app.For more information, please contact us at we@spread.so.
Step 3. Send the campaign
-
Click
Sendin the top-right corner to send the campaign based on the configured send time. -
Click the adjacent
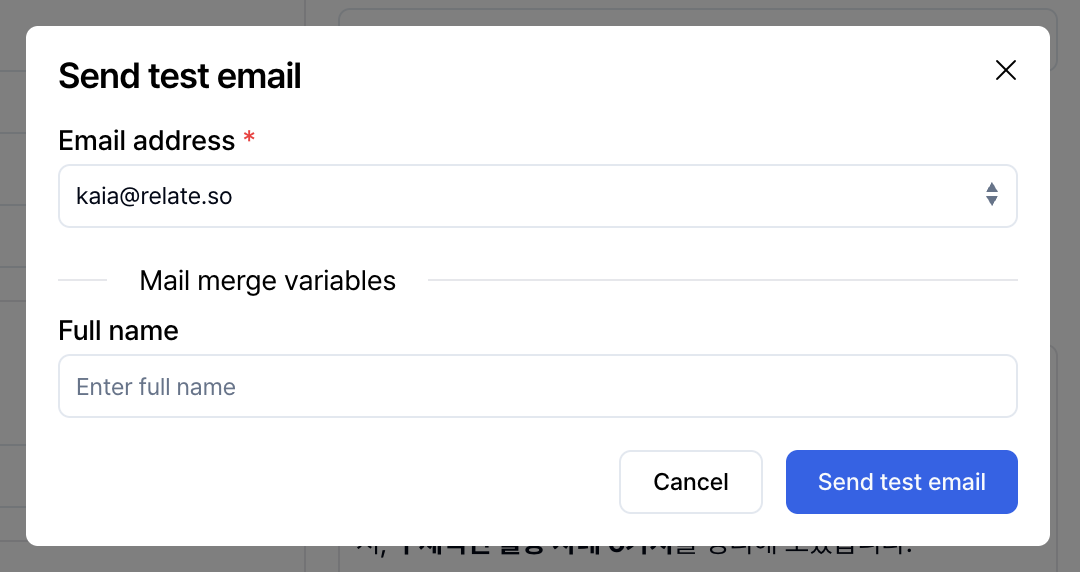
Test sendbutton to send a test email to the email address of a workspace member. Use this to review content and layout before sending the campaign to actual leads.
In the
Automations tab at the top of an one-off campaign, you can configure leads to be automatically added to a new destination list based on their email responses and status.
This allows you to connect the post-campaign lead flow naturally to the next step.For detailed automation usage, refer to the Spread | Emma features guide.How to send a Triggered Campaign
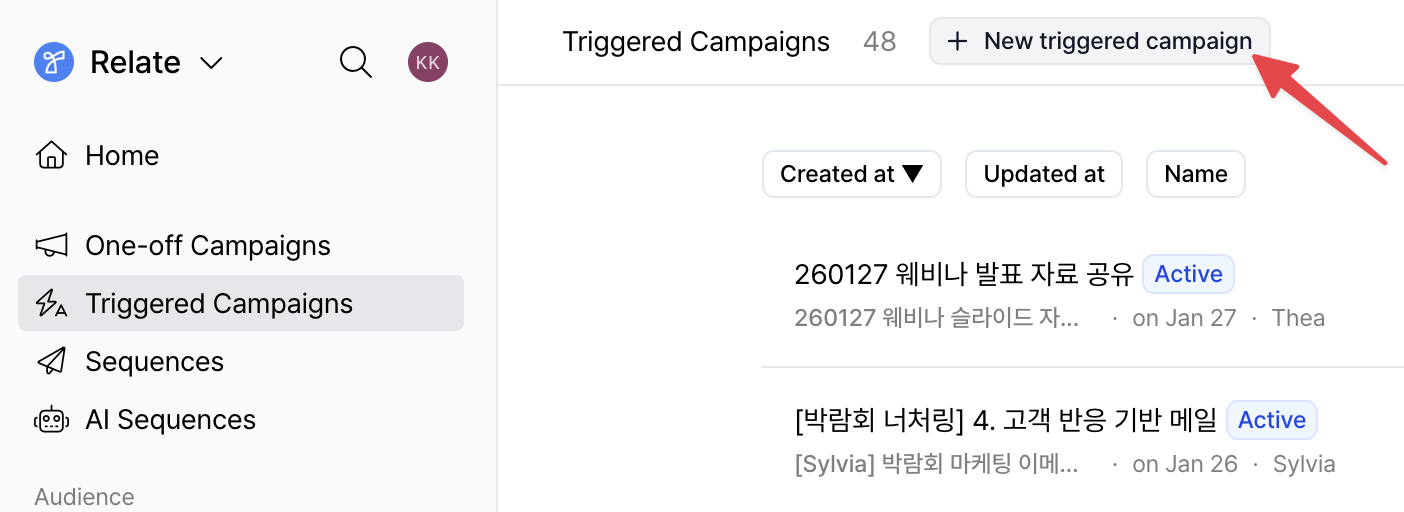
Step 1. Create a new triggered campaign
From the left sidebar of the Spread app, clickTriggered Campaigns, then click the + New triggered campaign button at the top to create a new triggered campaign.
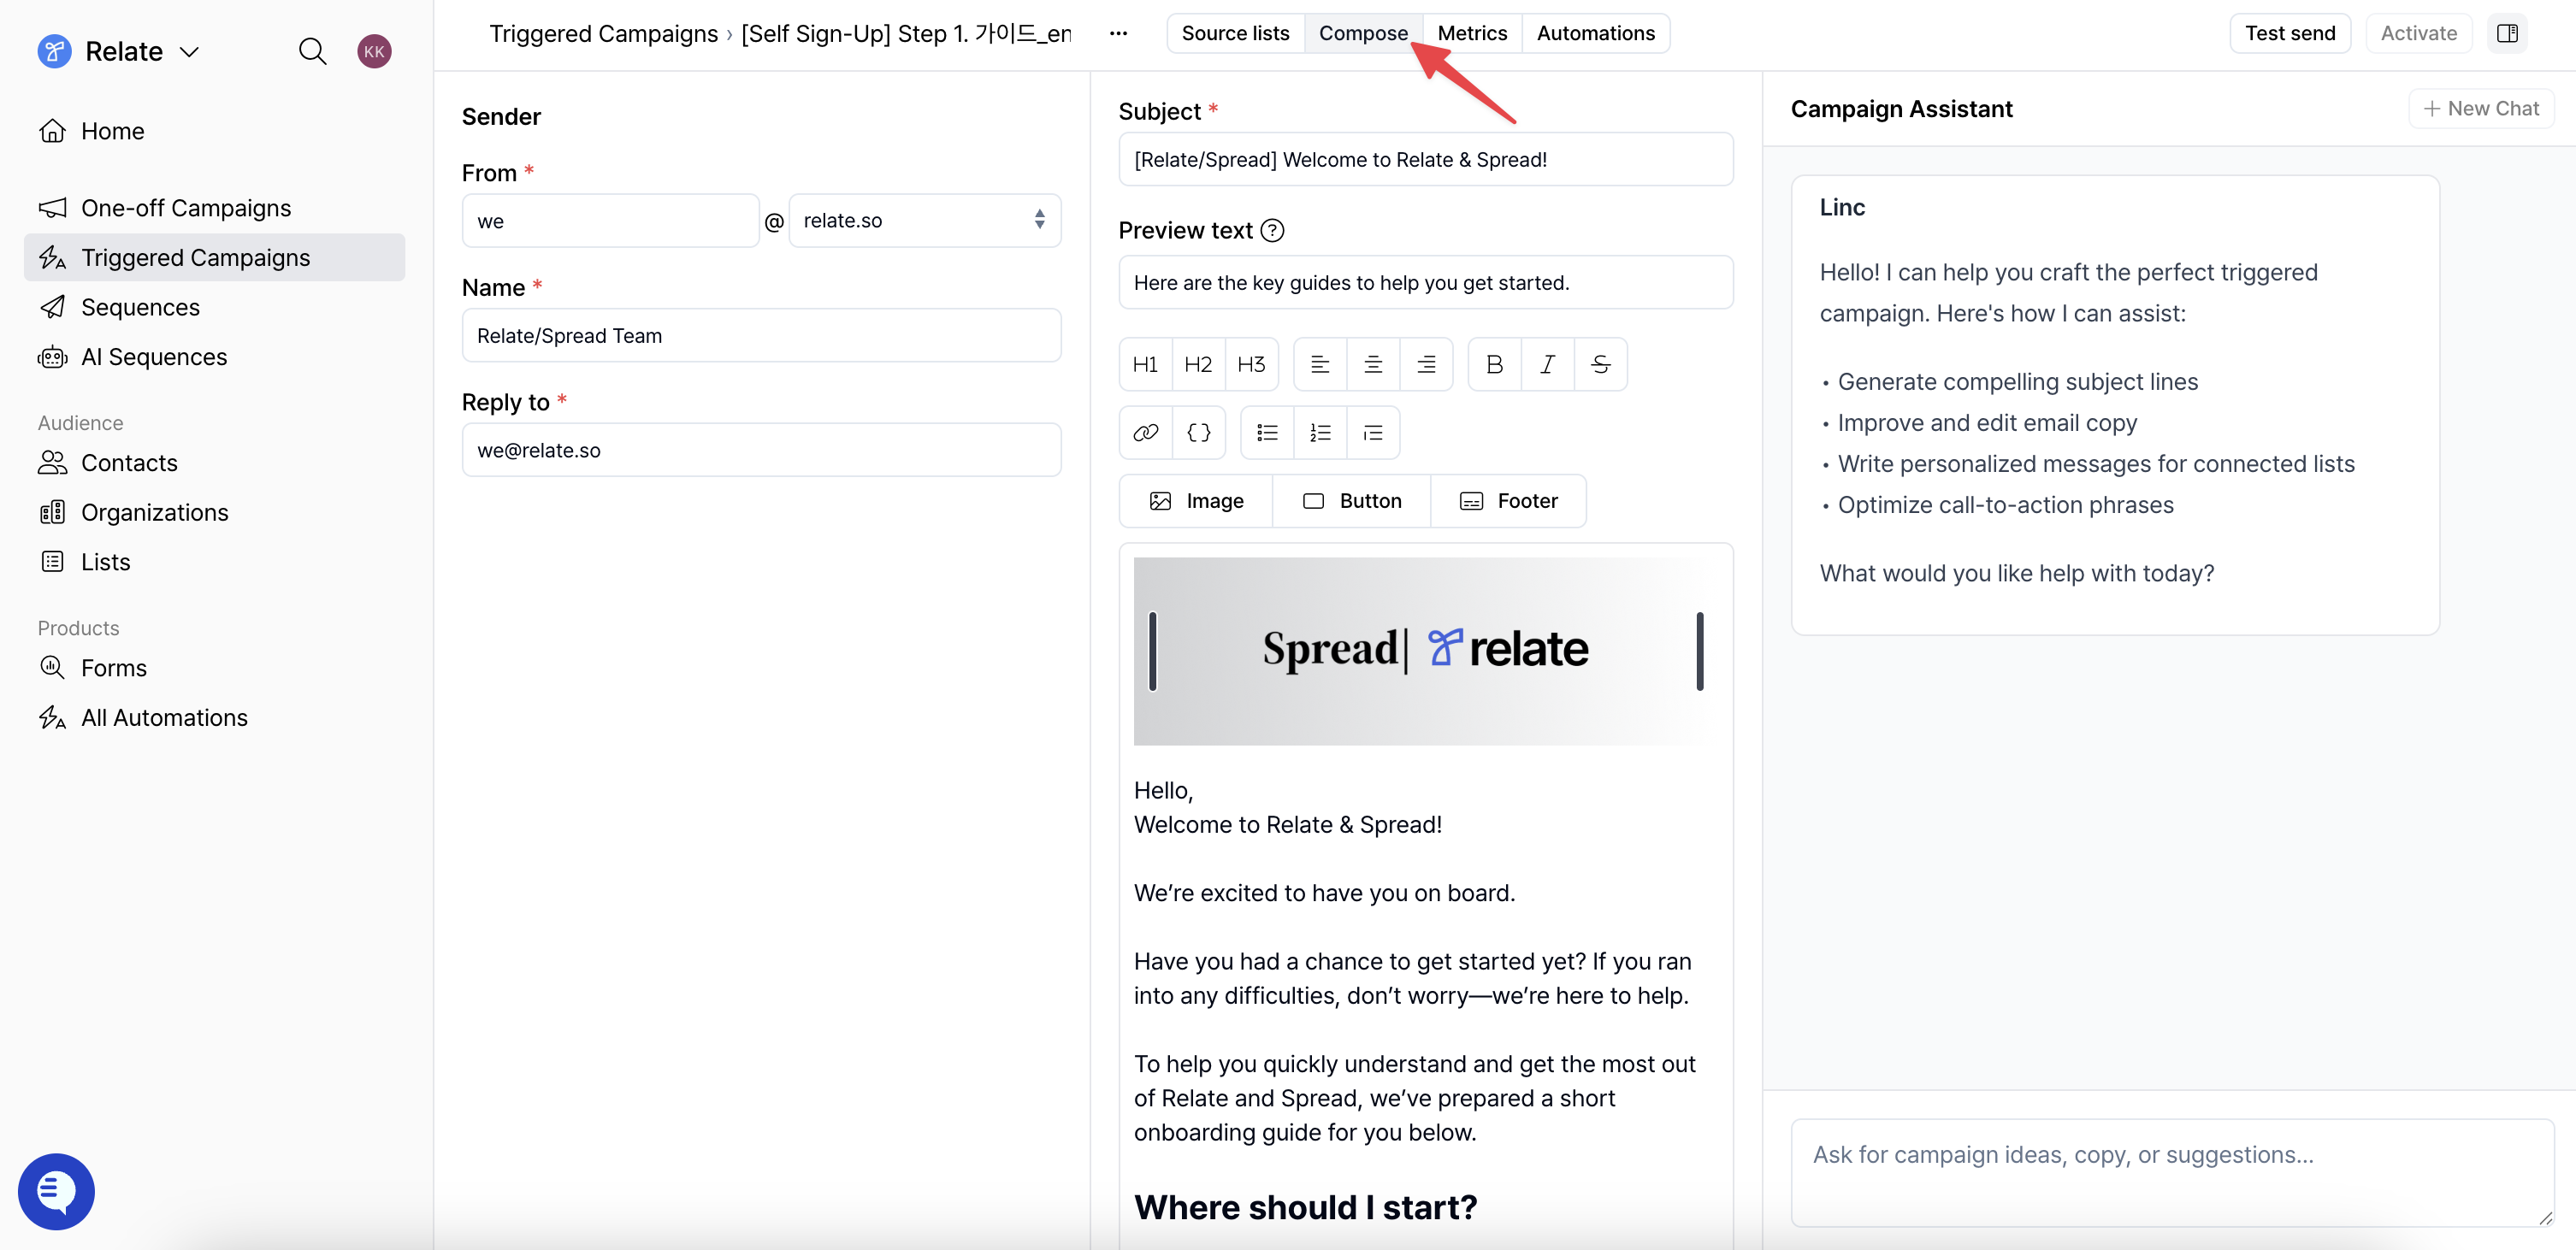
Step 2. Write the triggered campaign email
Click theCompose tab at the top of the created triggered campaign to write the email.
- Sender
From: Set the sender email address used to send the email.Name: Enter the sender name displayed to recipients.Reply to: Set the email address that will receive replies.
- Subject
- Enter the email subject displayed to recipients.
- Preview text
- A short line displayed after the subject in the recipient’s inbox. You can summarize the email or highlight key topics or benefits.
- If left empty, part of the email body will be displayed instead.
Unlike One-off Campaigns, Triggered Campaigns are sent based on the source list, so you do not set recipients or send time here. This is explained in Step 3.
Step 3. Connect the source list
A triggered campaign starts sending based on the moment a lead is added to the source lists.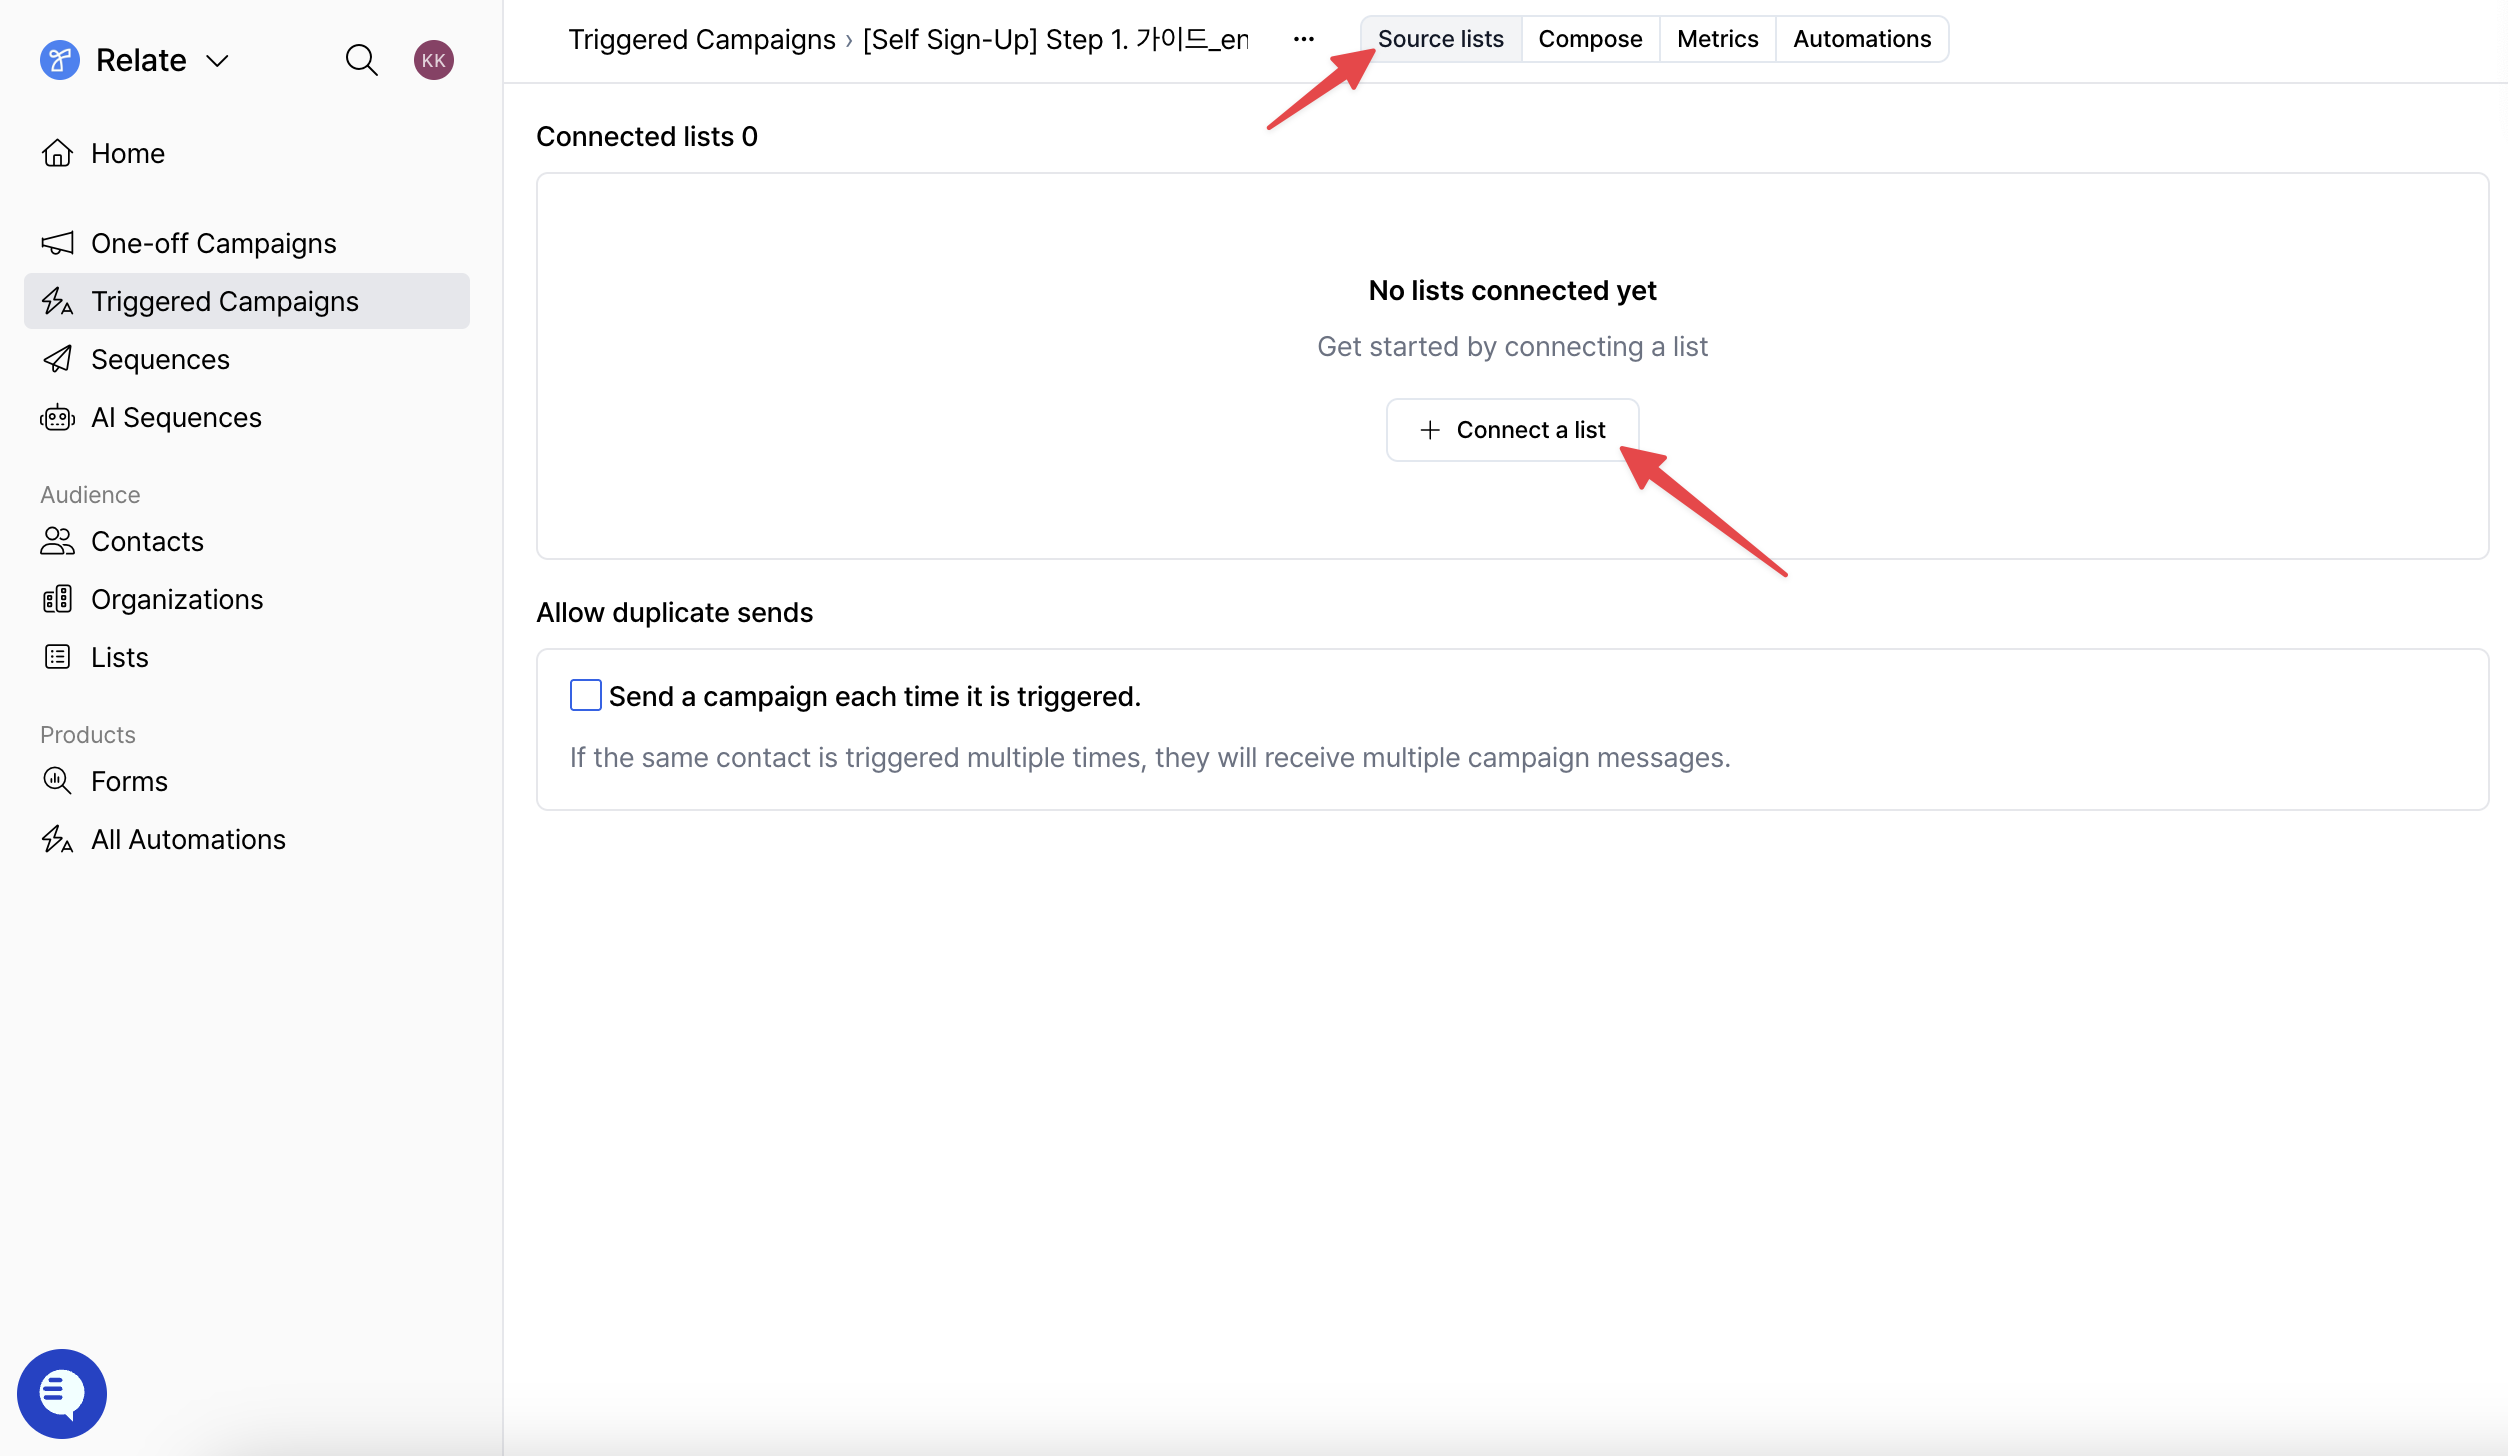
Source lists tab at the top, then click the + Connect a list button to connect the list that will trigger this triggered campaign.
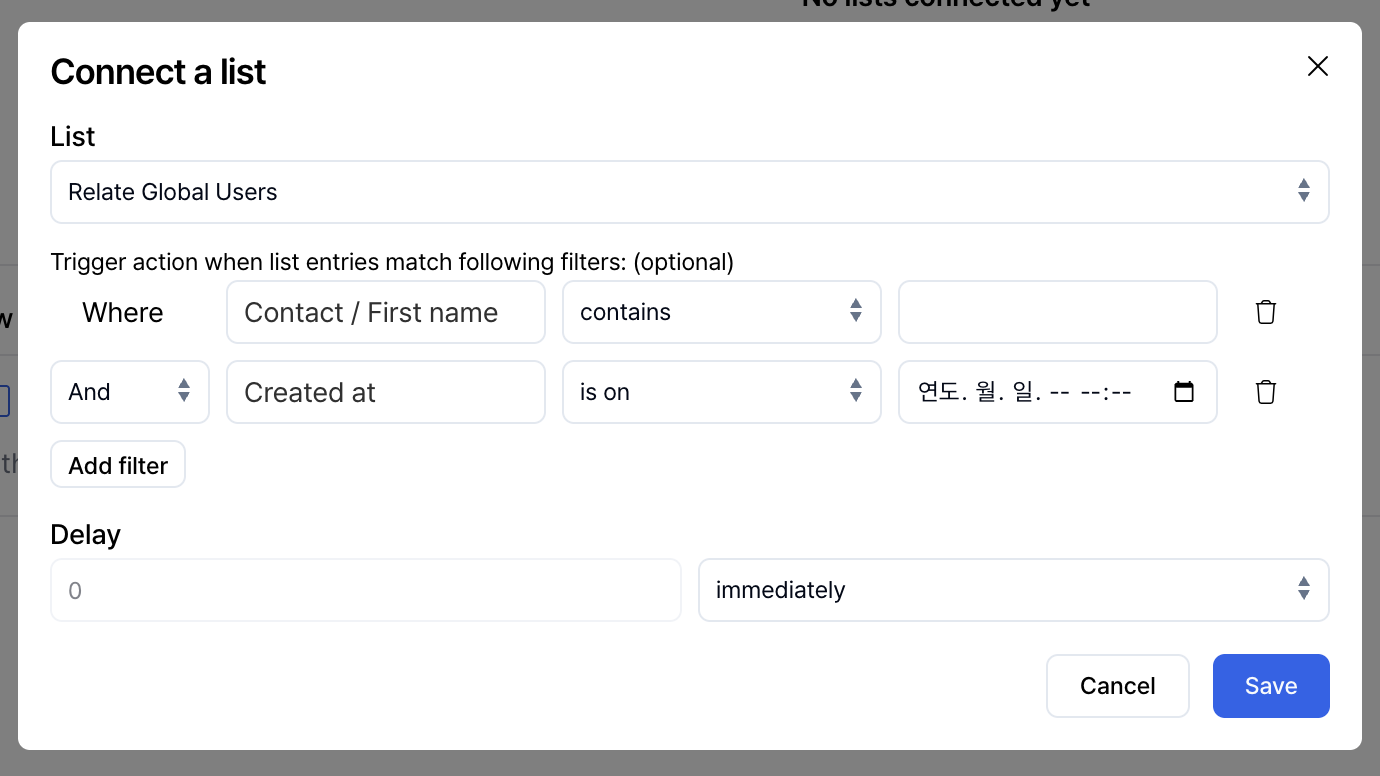
- List: Select the list that will be used as the starting point for starting automation.
- Filter (optional): Configure the triggered campaign to run only for leads that match specific field values (name, email, etc.) within the list.
- Delay (Send timing): Send immediately after a lead is added, or send after a set delay (minutes, hours, or days).
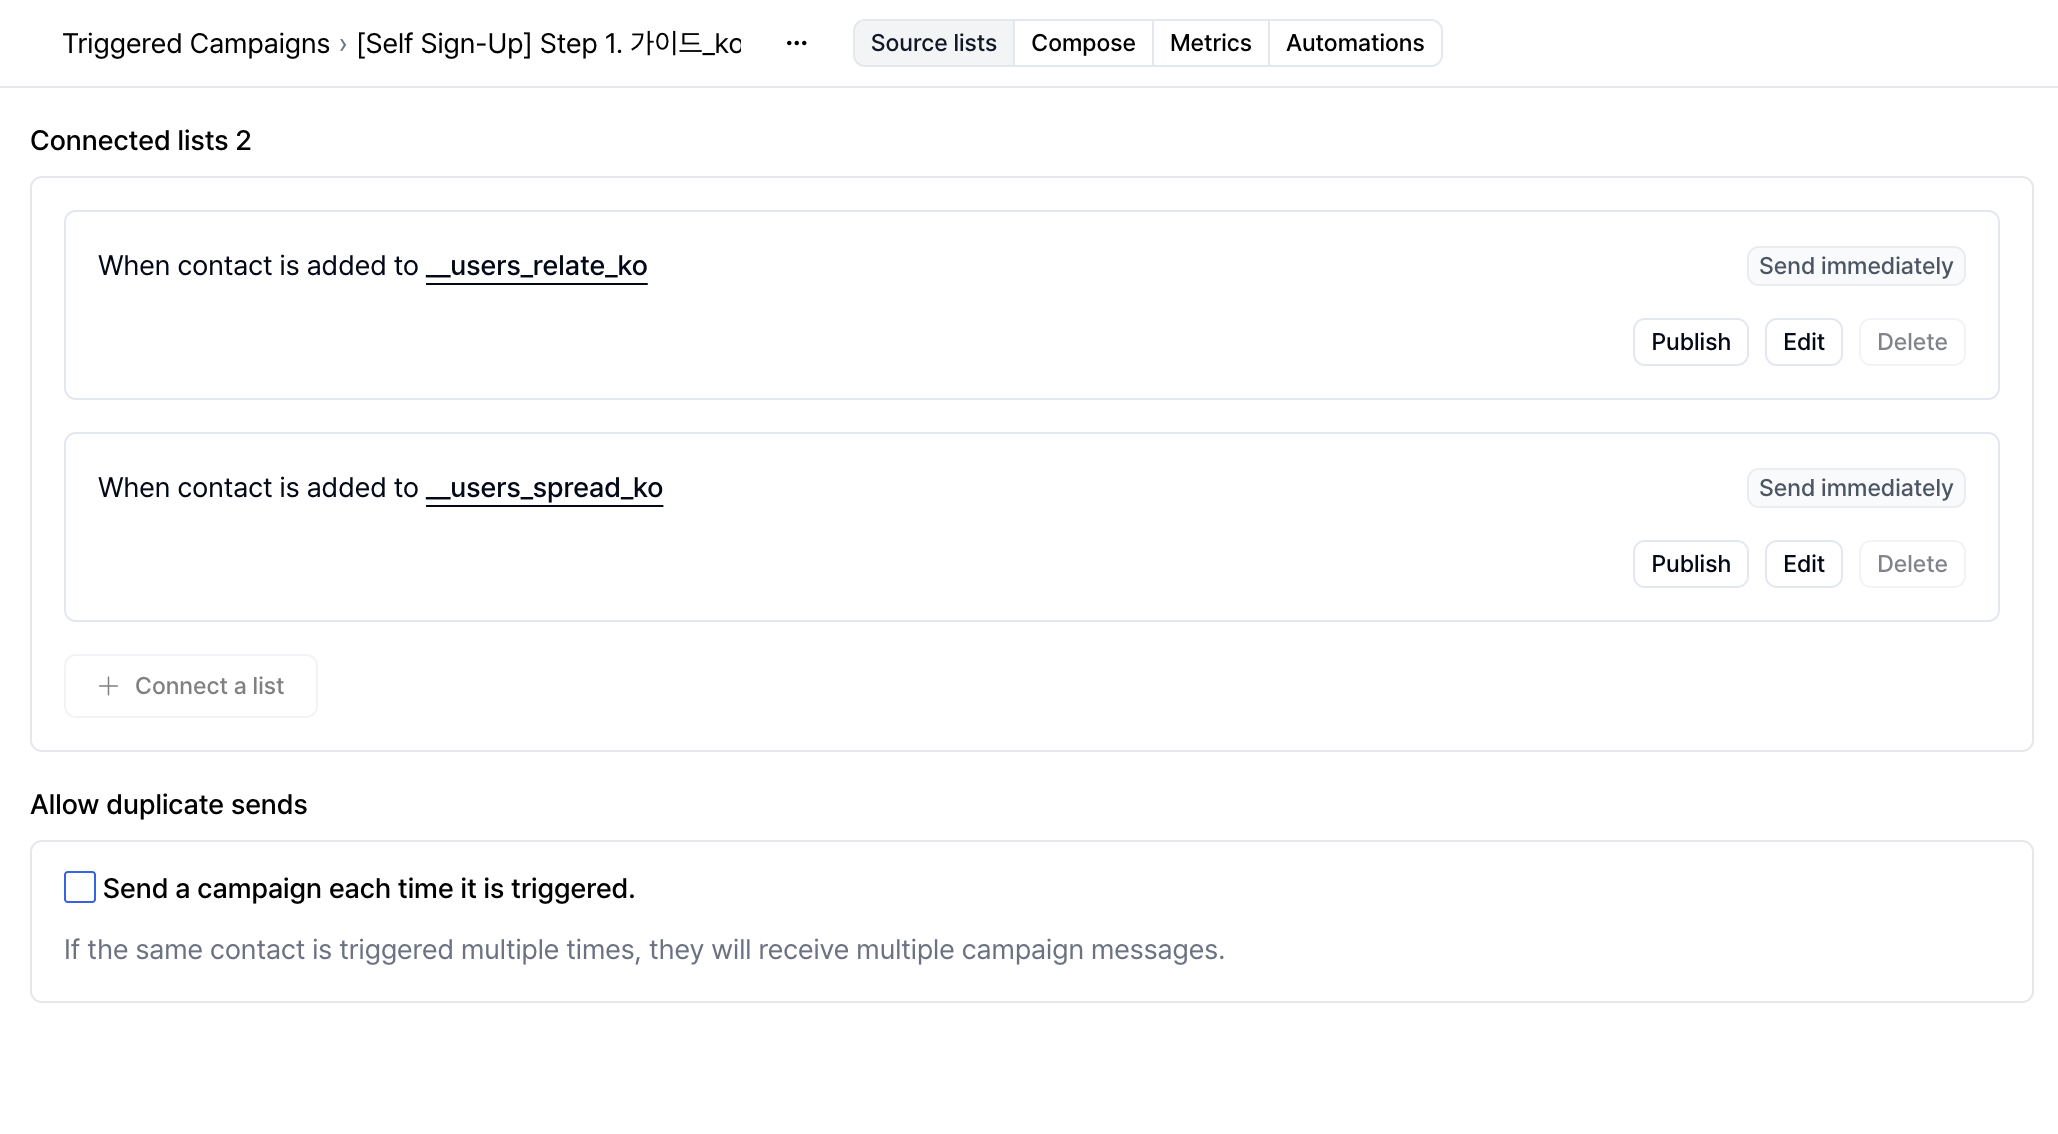
For example, you can start the same triggered campaign for leads coming in through different paths, such as a list for website signups and a list for leads who submitted a specific form. Using the
Allow duplicate sends option at the bottom,
you can configure whether to send the triggered campaign again when the same lead meets multiple source list conditions.
If this option is disabled,
each lead receives the same triggered campaign only once.
Step 4. Publish the triggered campaign
-
Click
Activatein the top-right corner. After activation, each time a lead is added to the source list, the triggered campaign will be sent automatically based on the configured timing. -
Click
Stopto pause the automation. -
Using
Test sendworks the same as the campaign test send described above.
Step 5. Review the automation flow
In theAutomations tab at the top, you can review the flow of the triggered campaign visually.
With Spread | Emma, you can automatically connect the next sending flow based on email responses.
For example, if a lead’s link clicks exceed a certain threshold,
the lead is automatically moved to a pre-configured destination list,
and that destination list can then be connected as the starting point for another triggered campaign or sequence.
For more details, refer to the Spread | Emma features.
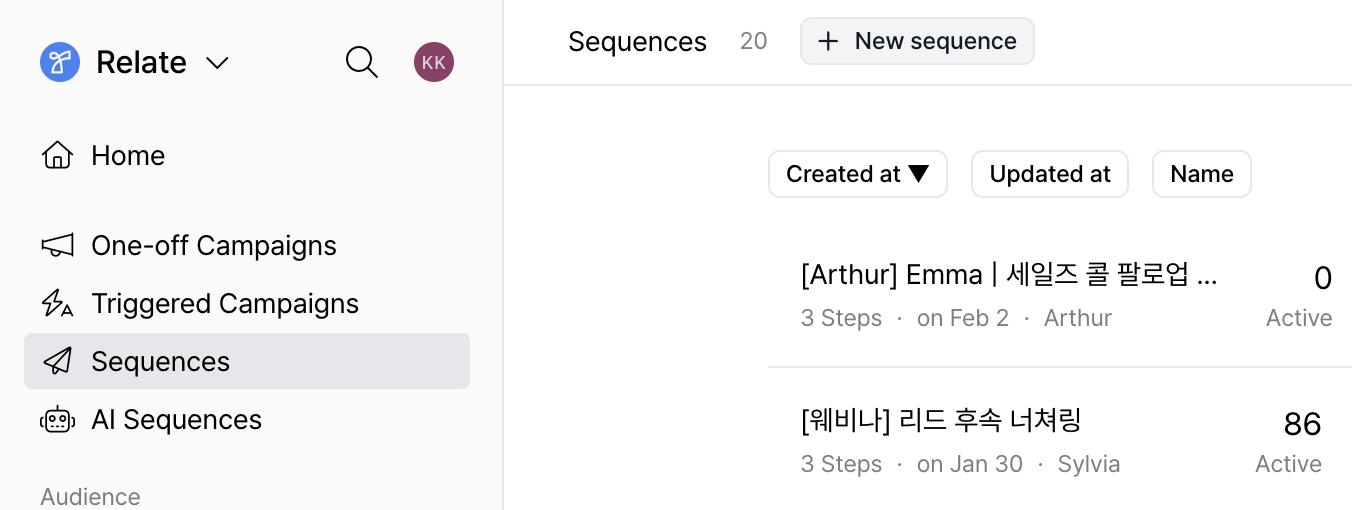
How to send Sequences
Step 1. Create a new sequence
From the left sidebar of the Spread app, selectSequences, then click the + New sequence button at the top to create a new sequence.
Step 2. Write each step in the sequence
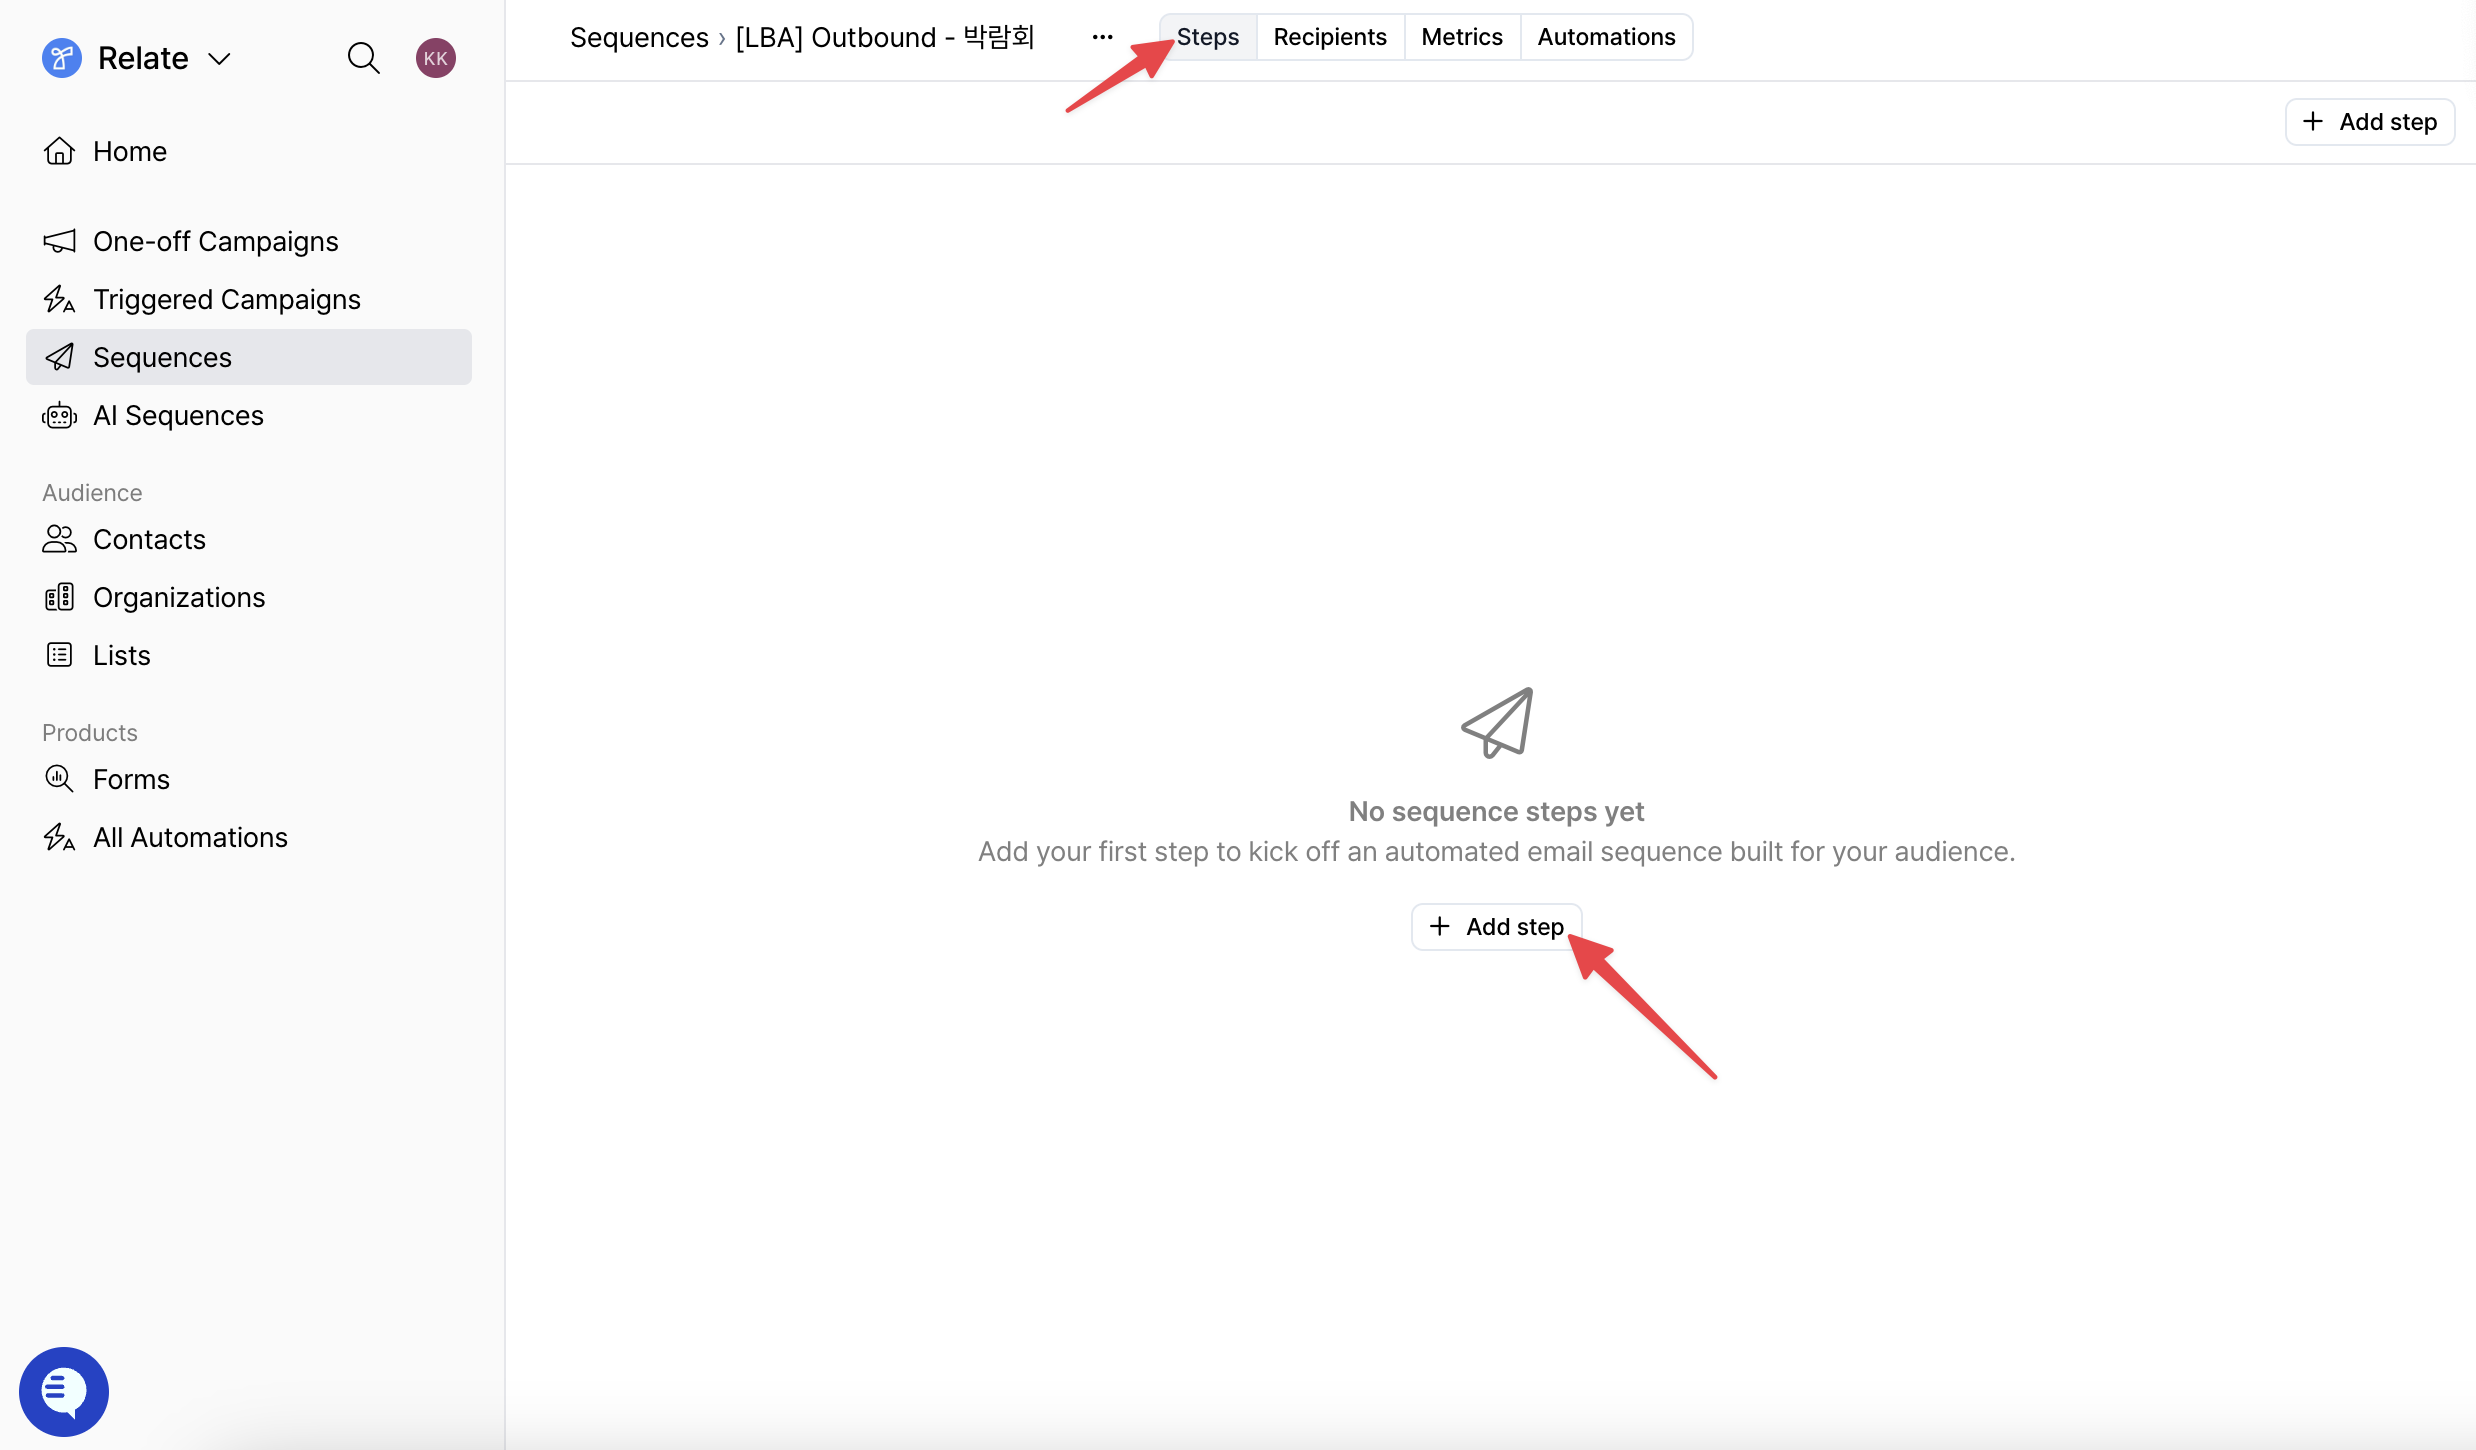
Steps tab at the top of the created sequence, click the + Add step button to write each step of the sequence.
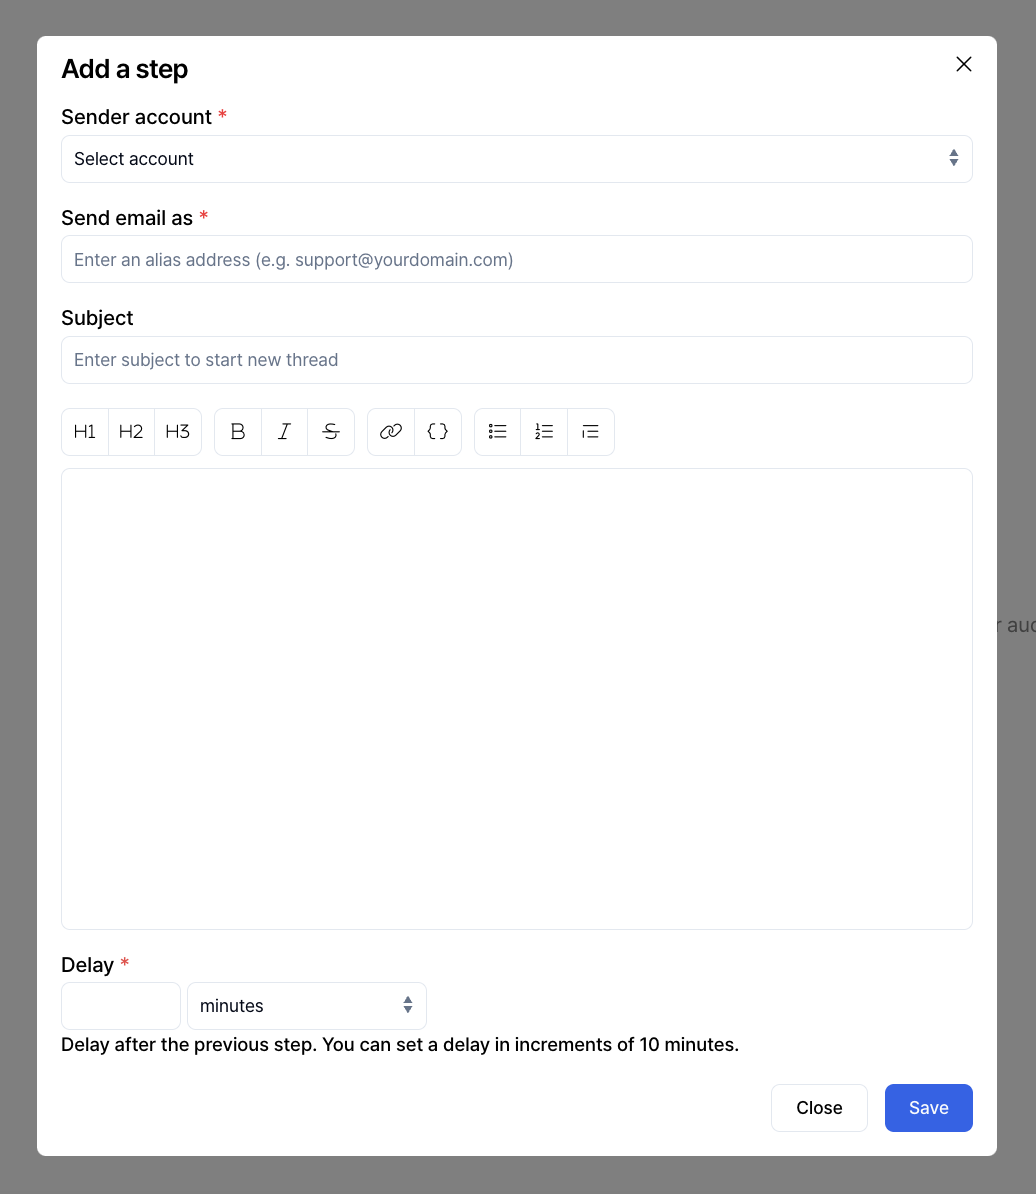
- Sender account: Select the connected email account that will actually send the sequence. This account determines the mailbox used for delivery and reply handling.
- Send email as: Set the email address that will appear in the From field for this step. You can use an alias address (e.g. support@yourdomain.com) to control how the sender is displayed to recipients.
- Subject and body: Write the email content to be sent for this step. The editor toolbar works the same as described in the One-off Campaigns writing section above.
- Delay (Send timing): Set the interval so the sequence is sent a certain number of minutes, hours, or days after the previous step.
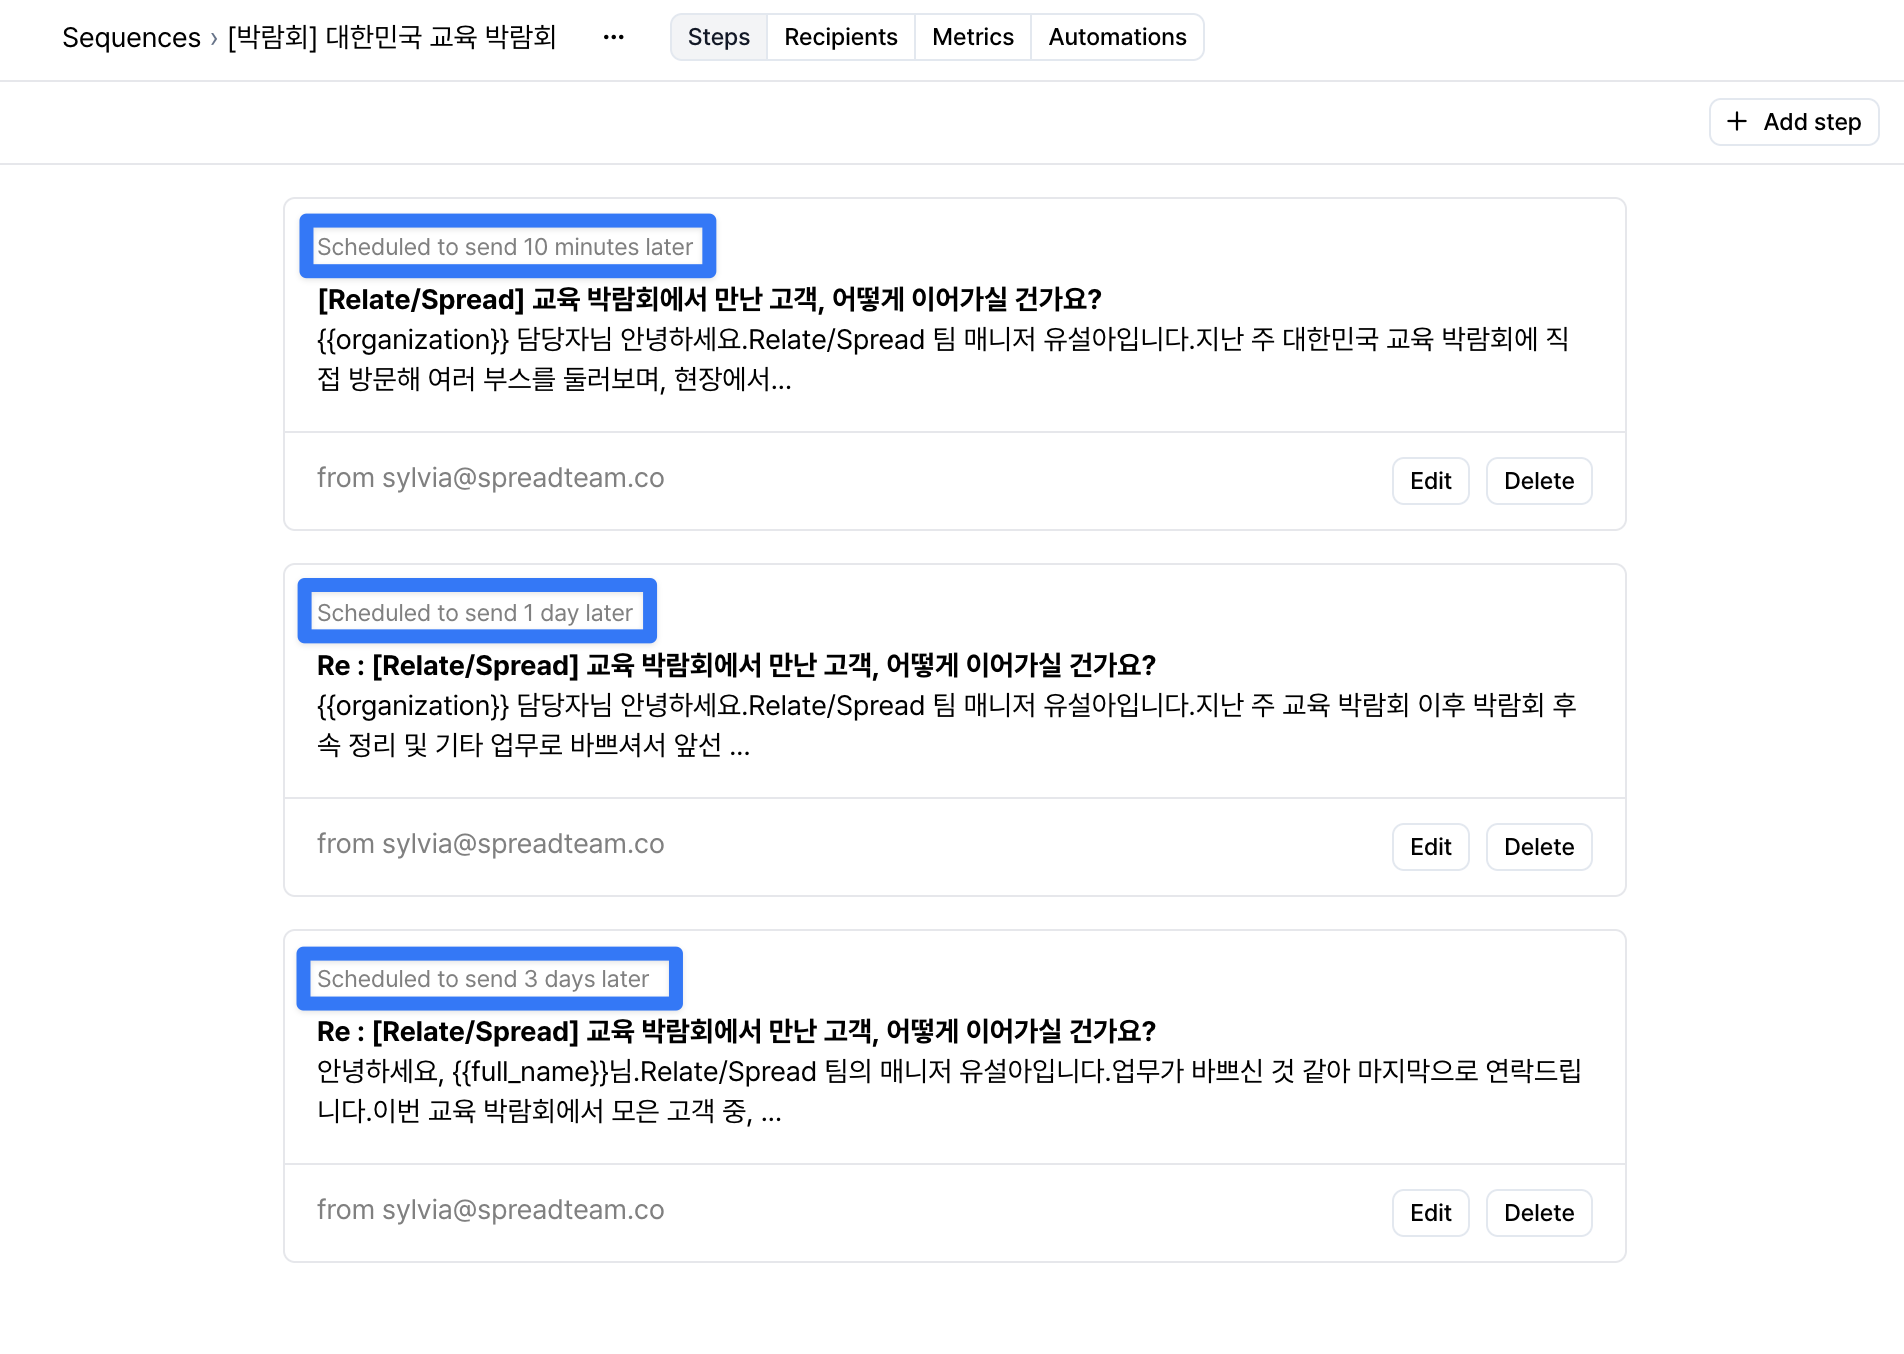
- You can send the first email 10 minutes after a lead is added to the sequence,
- send the second follow-up email 1 day later, and
- send the final reminder email 3 days later.
Step 3. Configure recipients
In theRecipients tab at the top, click the + Add from contacts button to add individual leads who will receive the sequence.
Step 4. Review the automation flow
In theAutomations tab at the top, you can review the flow of the configured sequence visually.The structure and review method are the same as described for Triggered Campaigns above.