Overview
On this page, we walk through real-world scenarios to show how Spread | Emma automation works in practice, based on the previously explained How It Works and Feature Details. Using concrete automation examples, you can see how leads are categorized after they come in, which emails are sent at each stage, and how those interactions ultimately turn into sales opportunities. This section helps you understand the full automation flow from lead intake to follow-up and conversion.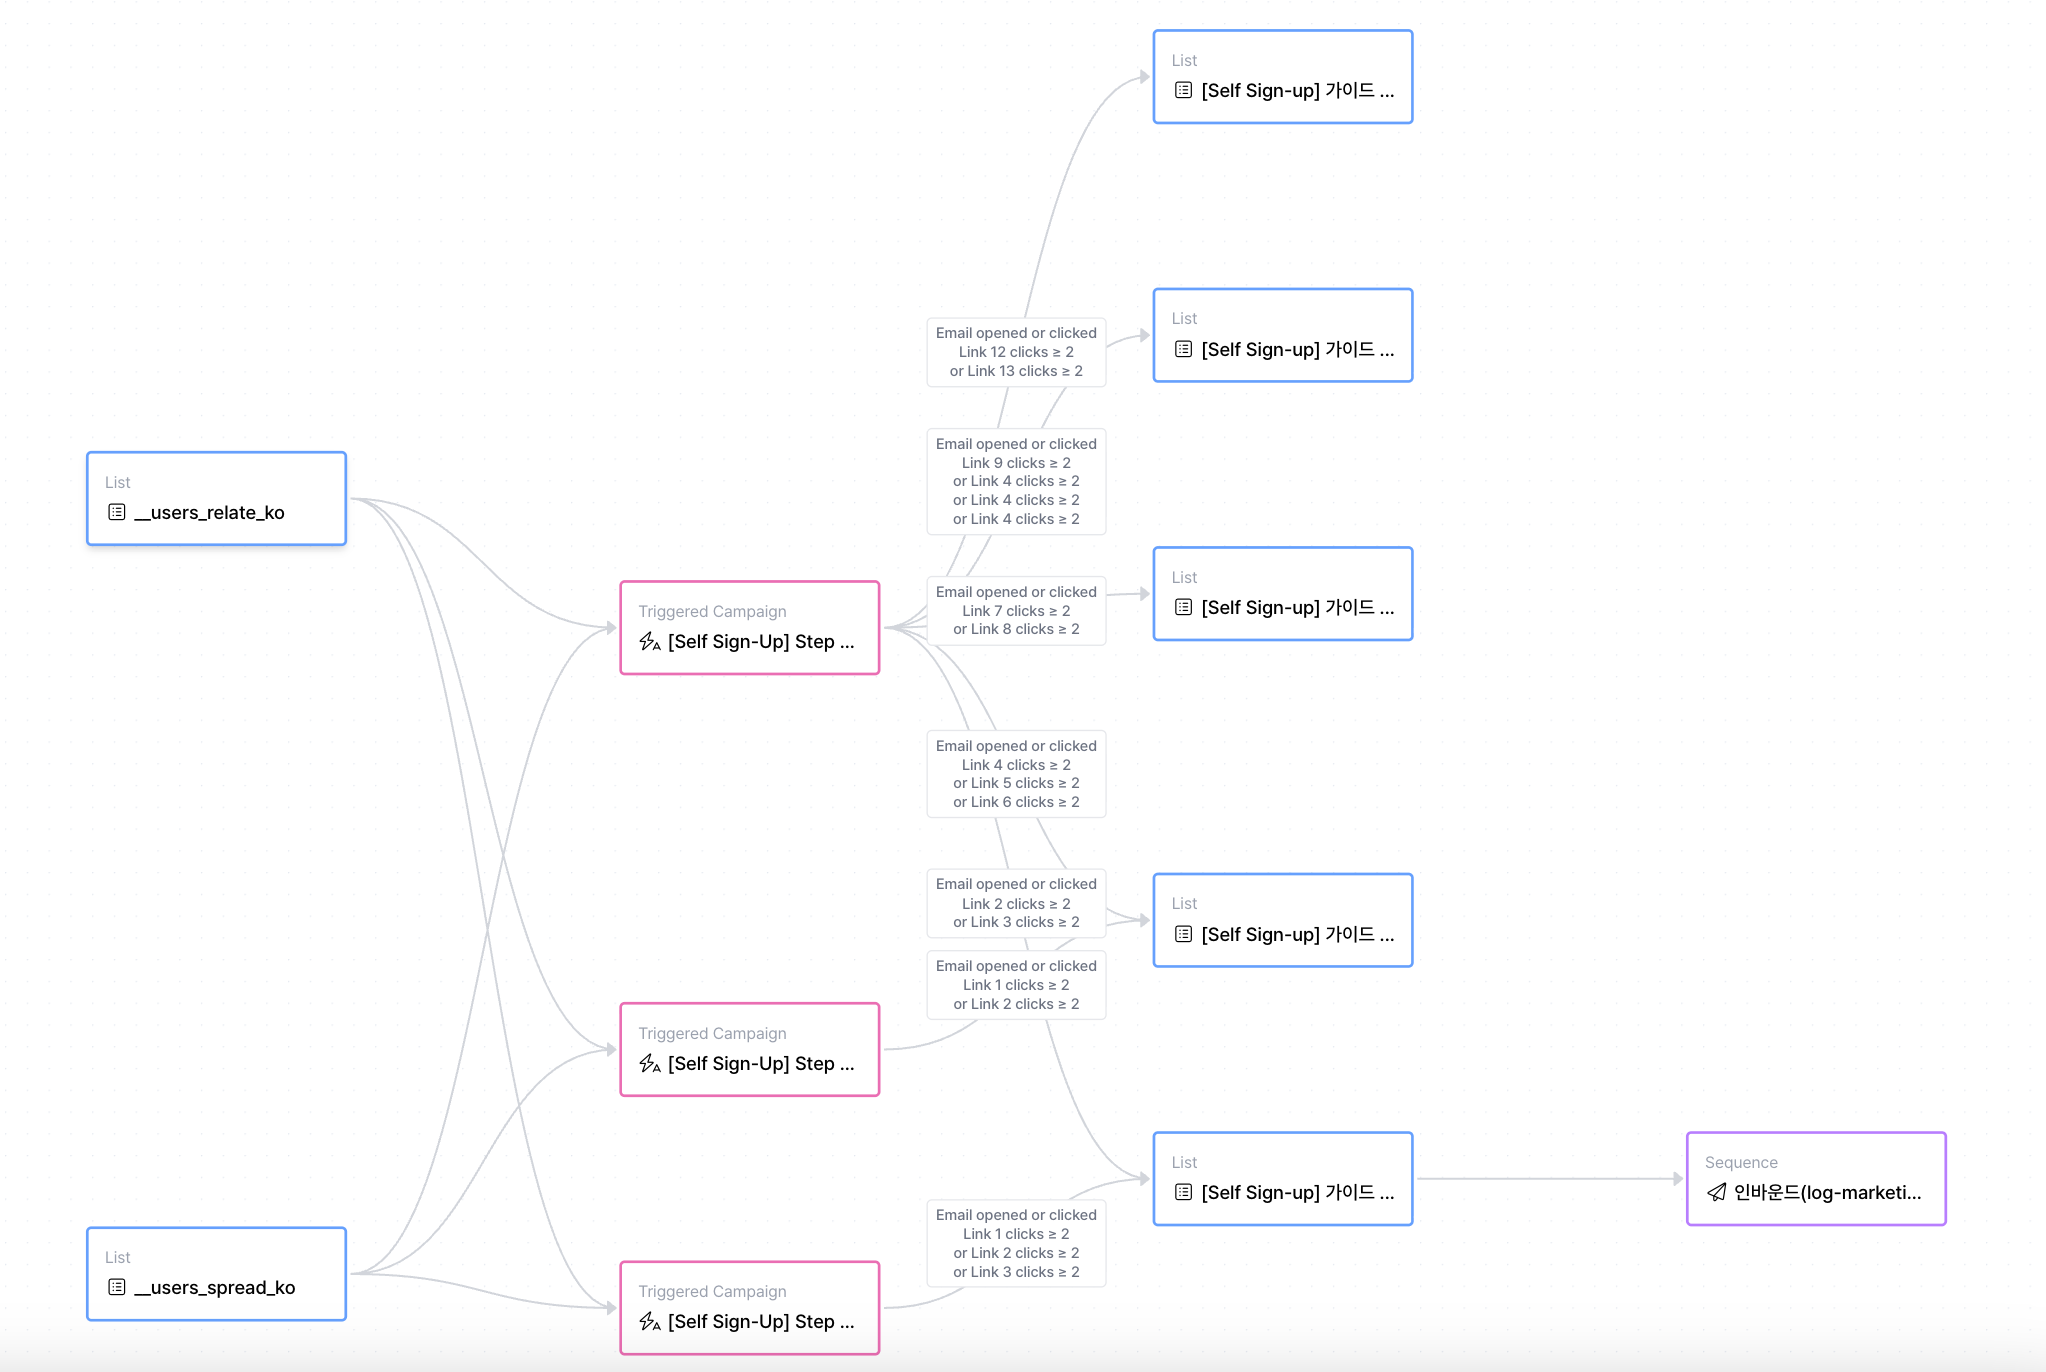
Scenario: Receiving an inbound inquiry
A team operating Product A is receiving inbound inquiries through a website contact form. Based on the interest level and responses of the inquiring customers, they want to automatically continue follow-up emails and sales actions.
Step 1. Inbound inquiries are automatically collected
When a customer submits the Product A inquiry form, the lead is automatically added to theProduct A Inbound List.
This list functions as Emma’s source list.
Step 2. Product A onboarding content is automatically sent
When a lead is added to theProduct A Inbound List, a triggered campaign that sends Product A onboarding content starts immediately.
Onboarding content is a set of triggered campaigns designed to deliver product context and usage value to leads who are encountering Product A for the first time.
Example onboarding content composition
- Welcome introduction material (sent immediately): Along with confirmation of the Product A inquiry, briefly introduces what problems the product solves.
- Product A guide document (sent after 1 day): Explains Product A’s core features and basic usage flow.
- Product A use cases (sent after 2 days): Shows how Product A is used in real situations through actual customer examples.
STEP 3. Leads move to destination lists based on email response conditions
When onboarding content is sent starting from the A Product inbound list, Emma automatically routes leads into different next flows based on predefined destination lists and conditions. Leads that meet the configured triggers and conditions (such as email opens or clicks) are automatically moved to their corresponding destination lists.Destination list example (1): High-interest Product A SQL List
A destination list designed to collect leads that show strong interest in Product A.
- Trigger: When the email is opened/clicked
- Condition: Clicked the Product A use case link 3 or more times
Destination list example (2): Product A MQL List Requiring Additional Explanation
A list for leads who checked the email but have not yet taken active actions.
- Trigger: When the email is opened/clicked
- Condition: Clicked a specific link 2 or more times and total click count is 3 or fewer
Destination list example (3): Product A Unsubscribe List
- Trigger: Email unsubscribe
- Condition: None
STEP 4. The next flow starts based on leads added to each destination list
Each destination list is used as the source list for the next automation flow.(1) Product A MQL List Requiring Additional Explanation → Nurturing content
Leads added to this list are connected to an automated nurturing content flow designed to increase interest and understanding of Product A. At this stage, one-off campaigns that include newsletters are sent at regular intervals.
(2) High-interest Product A SQL List → SQL conversion
Leads added to this list are automatically connected to sales follow-up emails as a sequence.
[Example: Product A sales follow-up sequence]
- Day 0: Send Product A meeting proposal email
- Day 2: Send reminder email if no reply
- Day 5: Send final follow-up message
- If replied → Proceed with meeting
- If no reply → Additional follow-up or move to a nurturing flow (lead recycling)