> ## Documentation Index
> Fetch the complete documentation index at: https://www.spread.so/docs/llms.txt
> Use this file to discover all available pages before exploring further.
# Meetings
> Easily connect with customers from meeting booking to final confirmation.
## Overview
Spread Meetings is a meeting scheduling feature similar to Calendly.
It allows customers to book meetings directly at available times through a calendar linked booking link.
 ## Getting Started with Spread Meetings
### Step 1. Connect your calendar
To use Spread Meetings, you must connect one of the following calendars: **Google, Outlook, or Apple Calendar**.
Only time slots without existing events in the connected calendar are shown as available, so meetings can be opened without scheduling conflicts.
Follow these steps to connect your calendar:
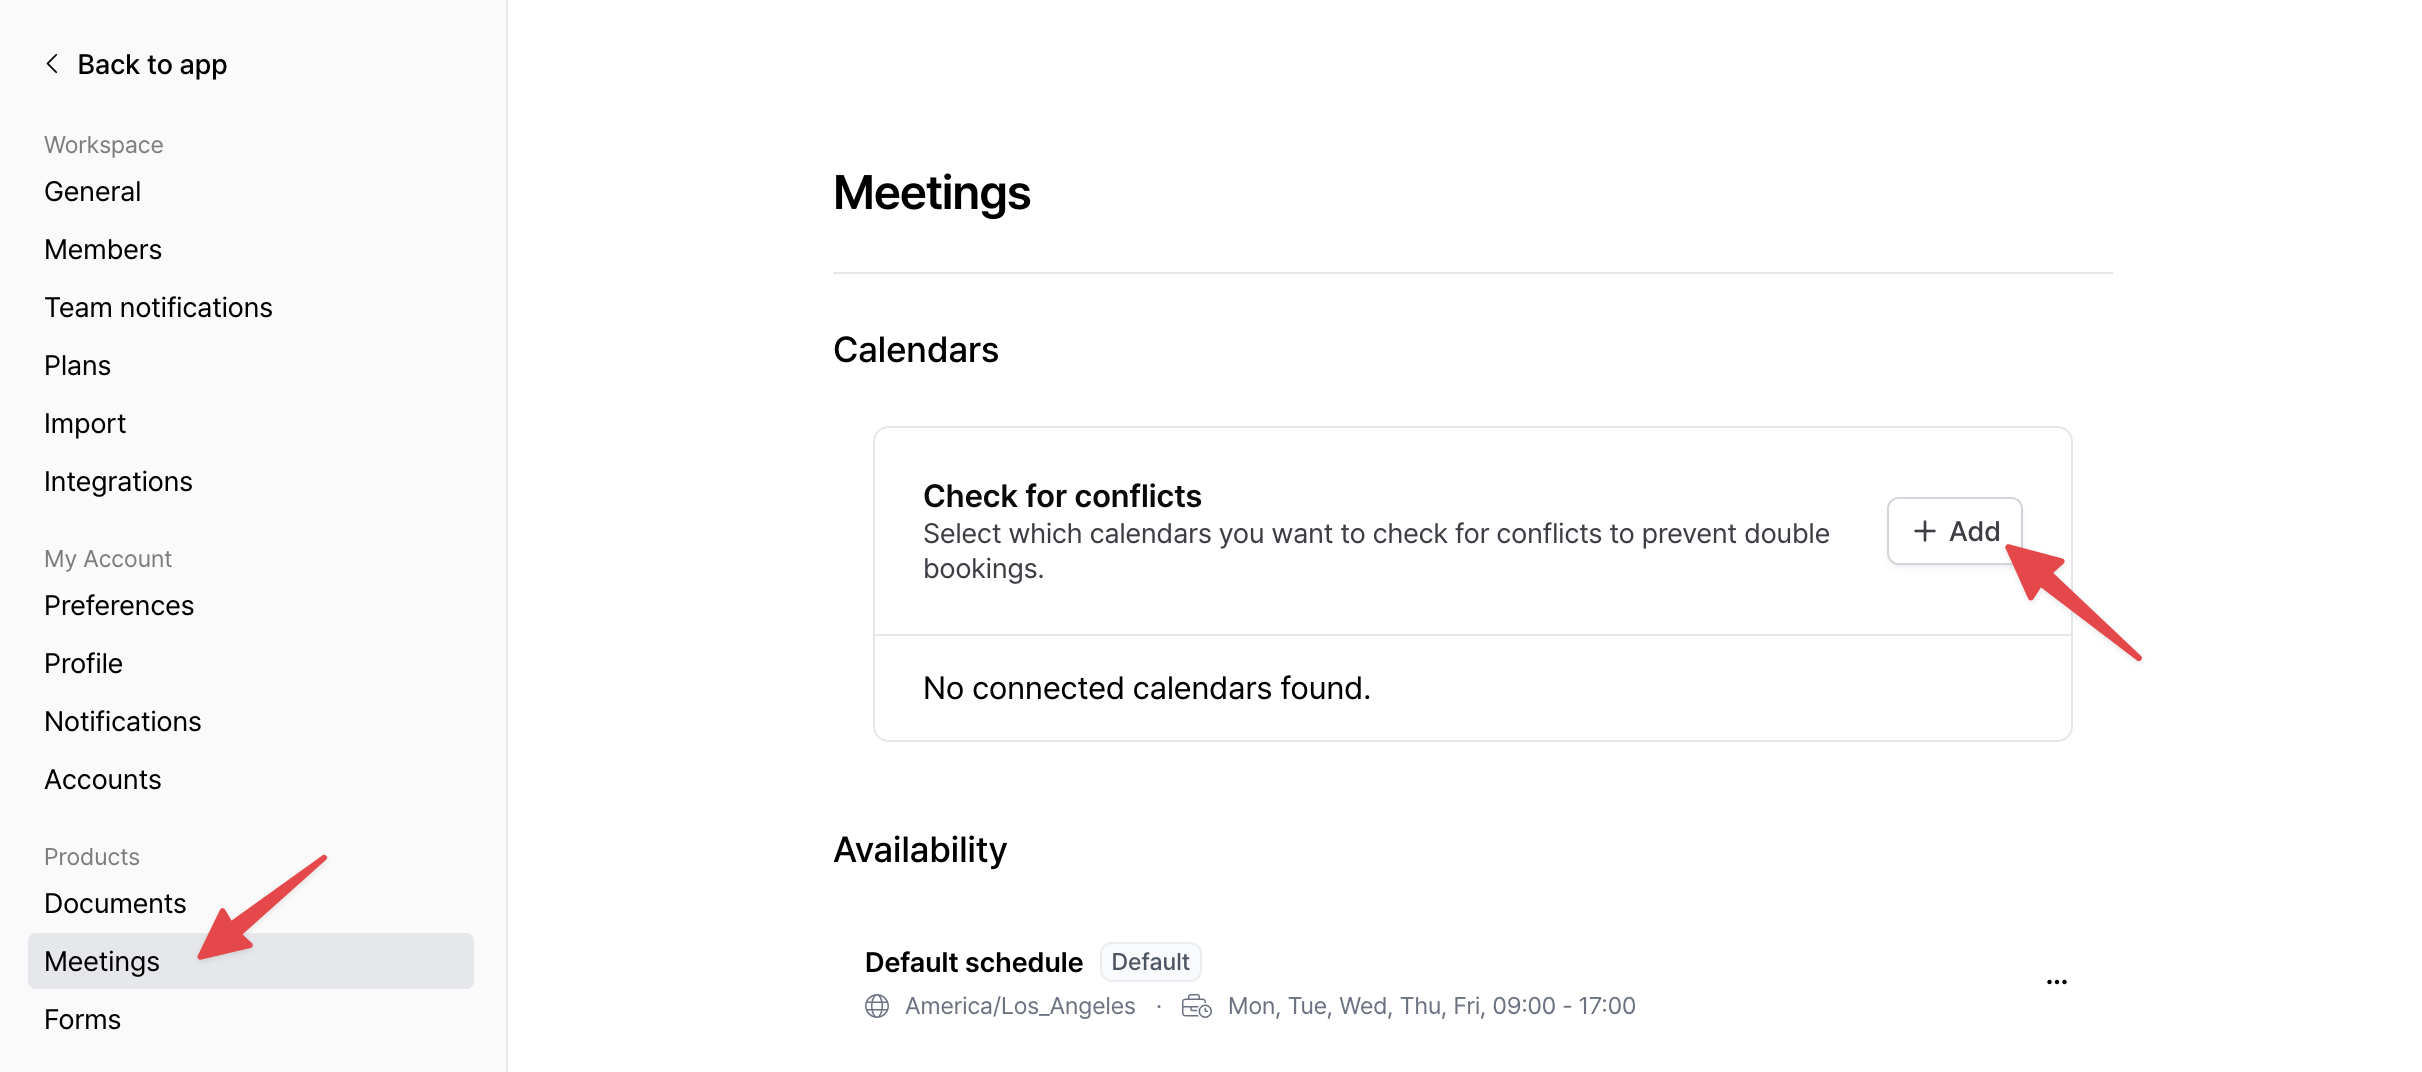
1. Go to `Workspace Settings` in the top left corner of the Spread app.
2. Click `Meetings` in the left sidebar.
3. Click the `+ Add` button and select the calendar you want to connect (Google, Outlook, Apple Calendar).
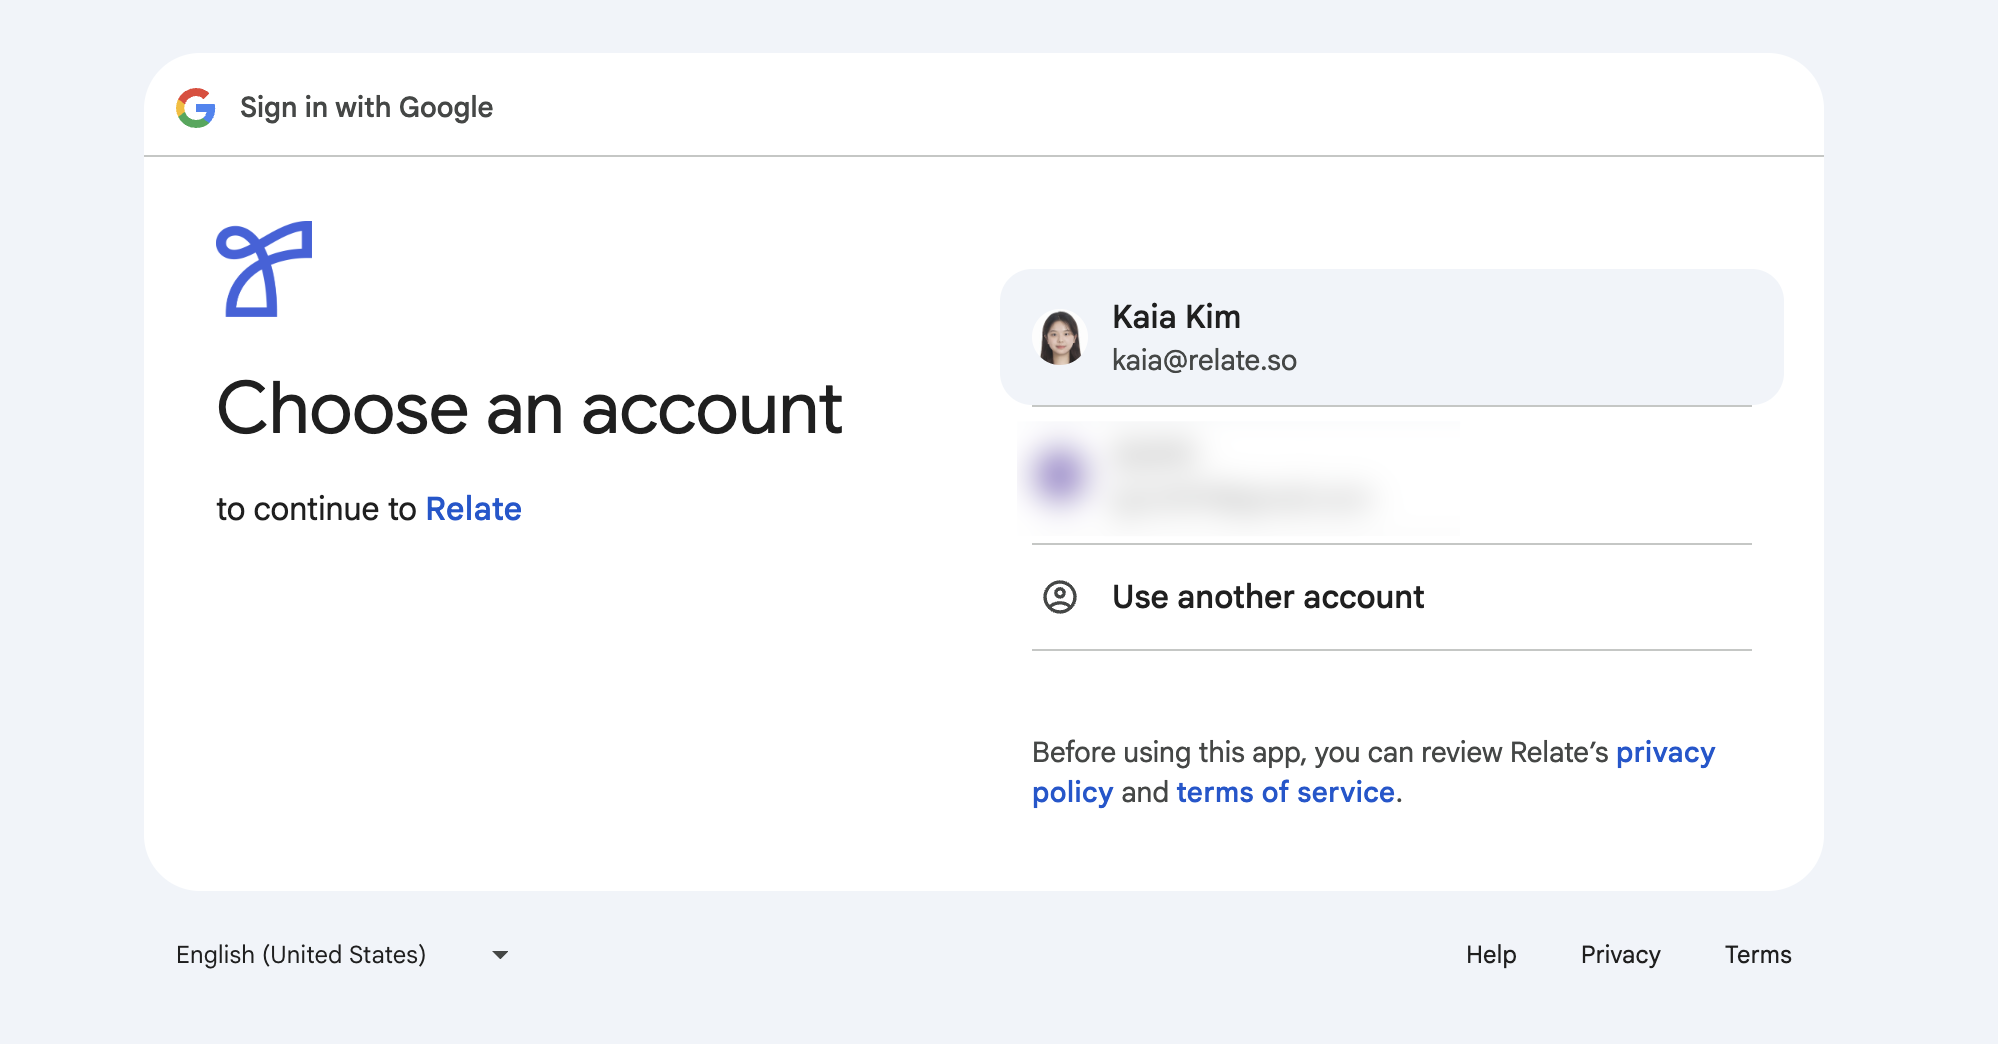
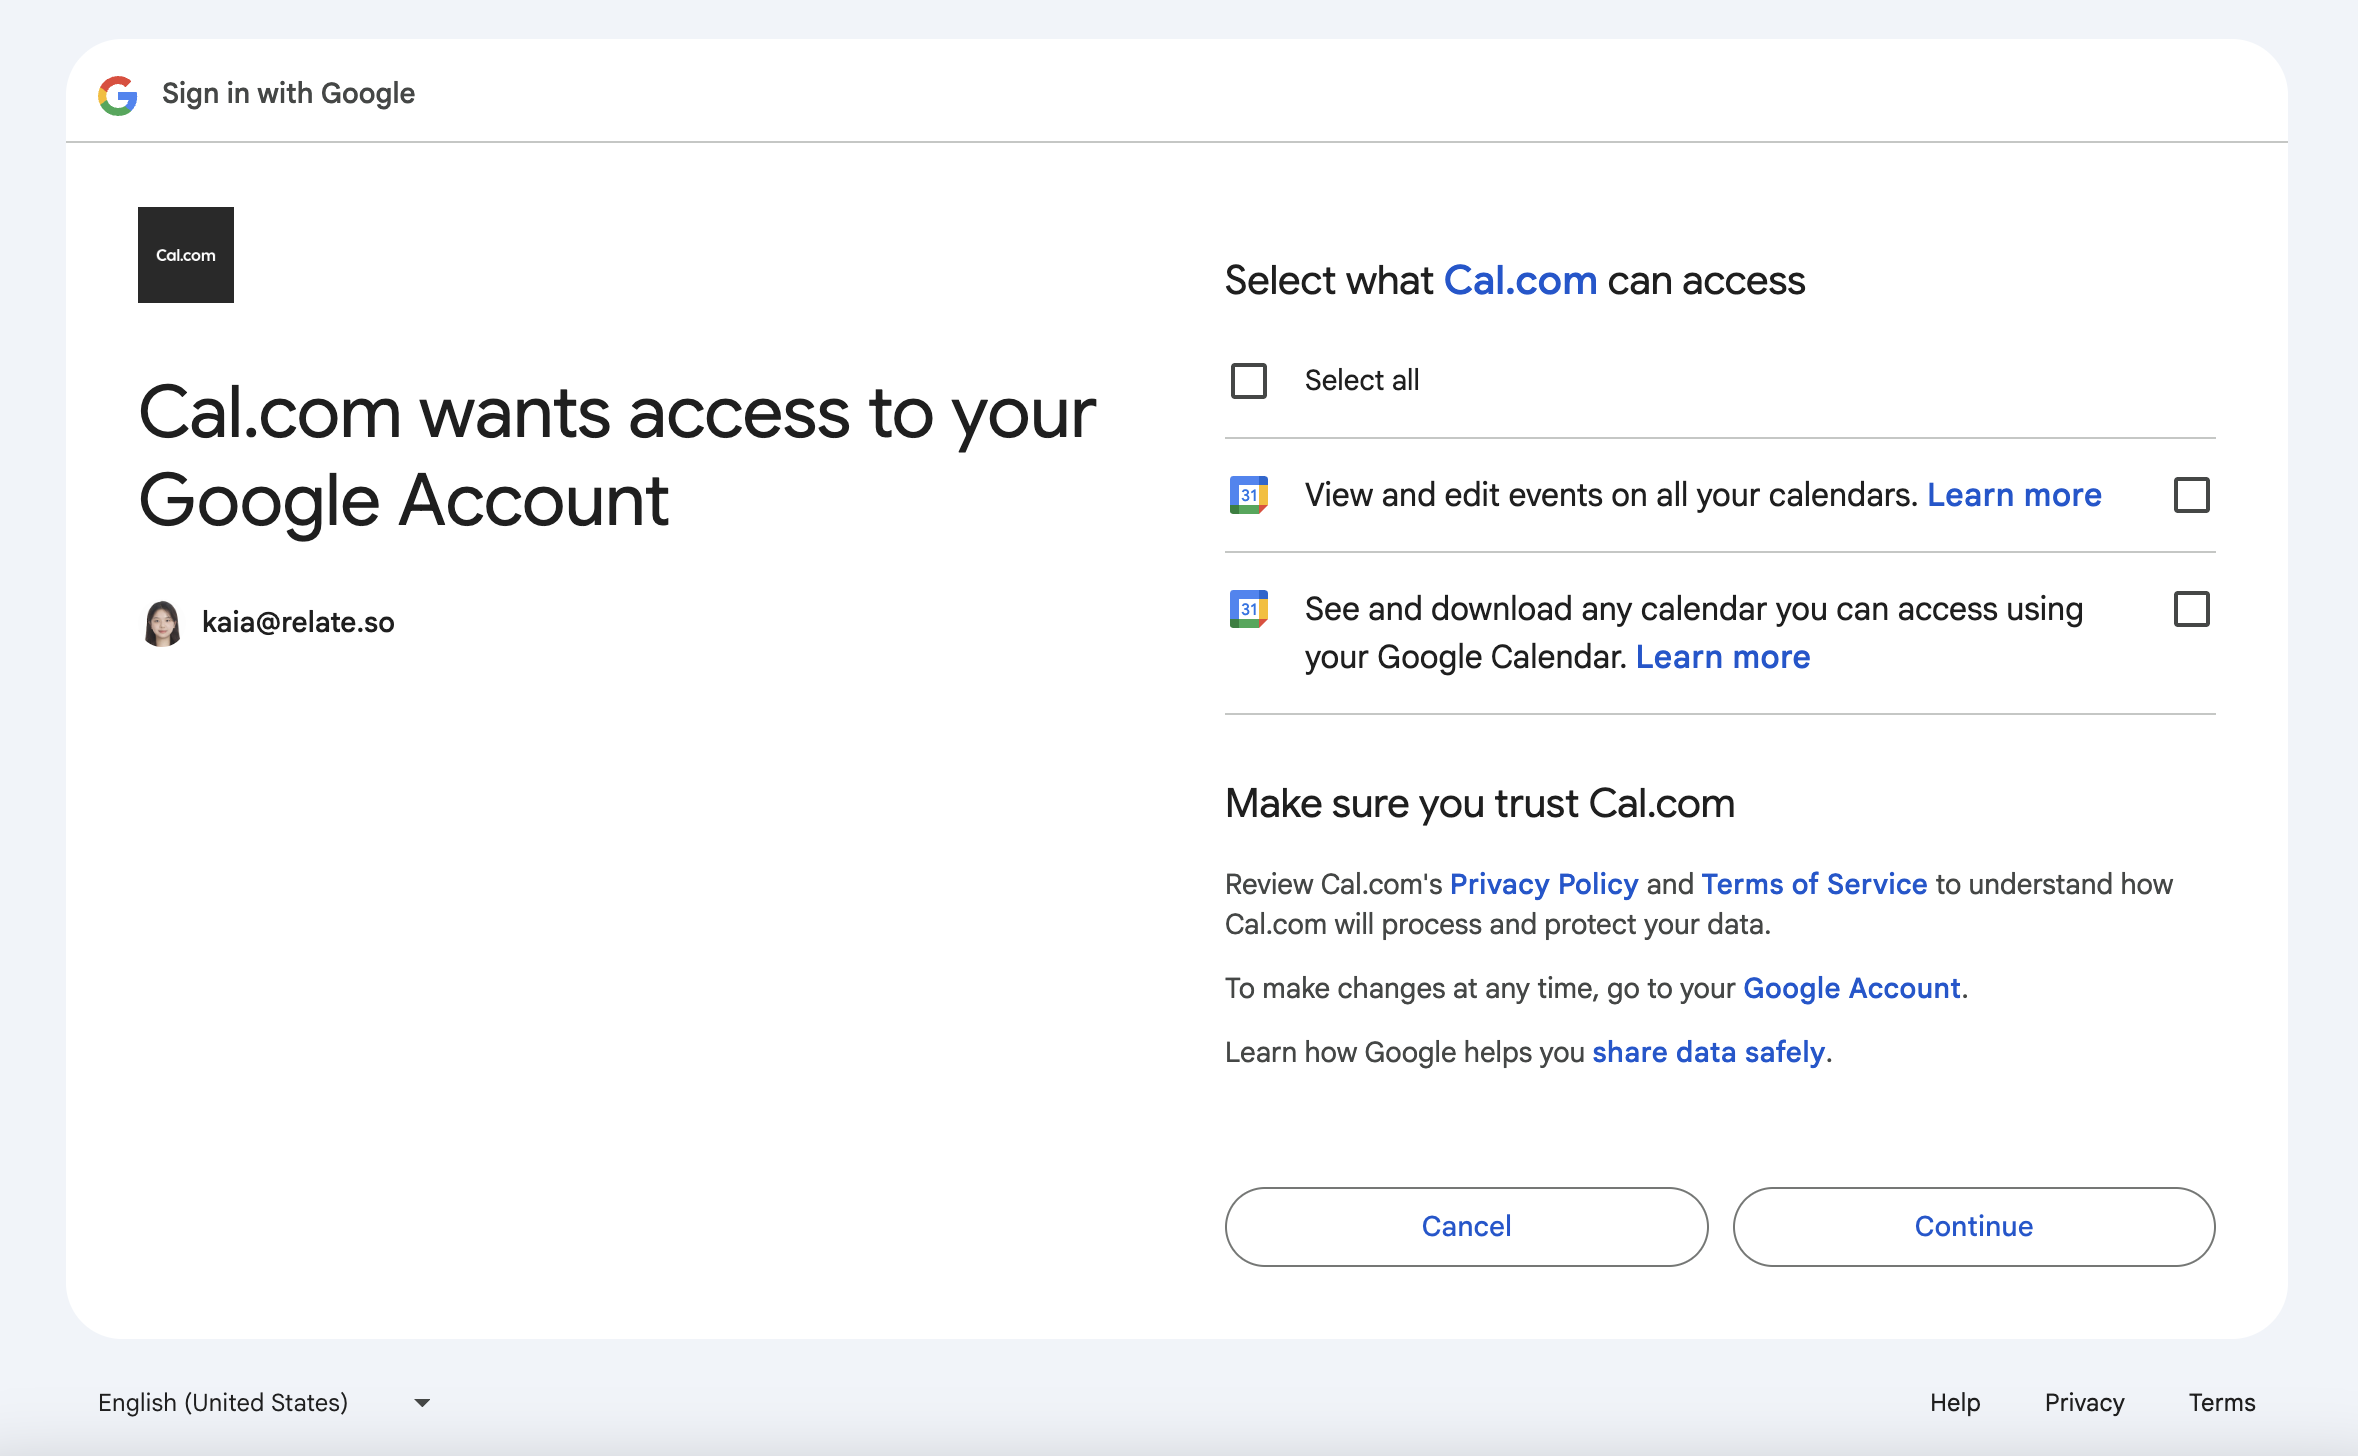
4. Select your calendar account and allow access to Cal.com.
Cal.com is a scheduling platform that automatically coordinates availability with external users. It is built into Spread and can be used without separate registration.
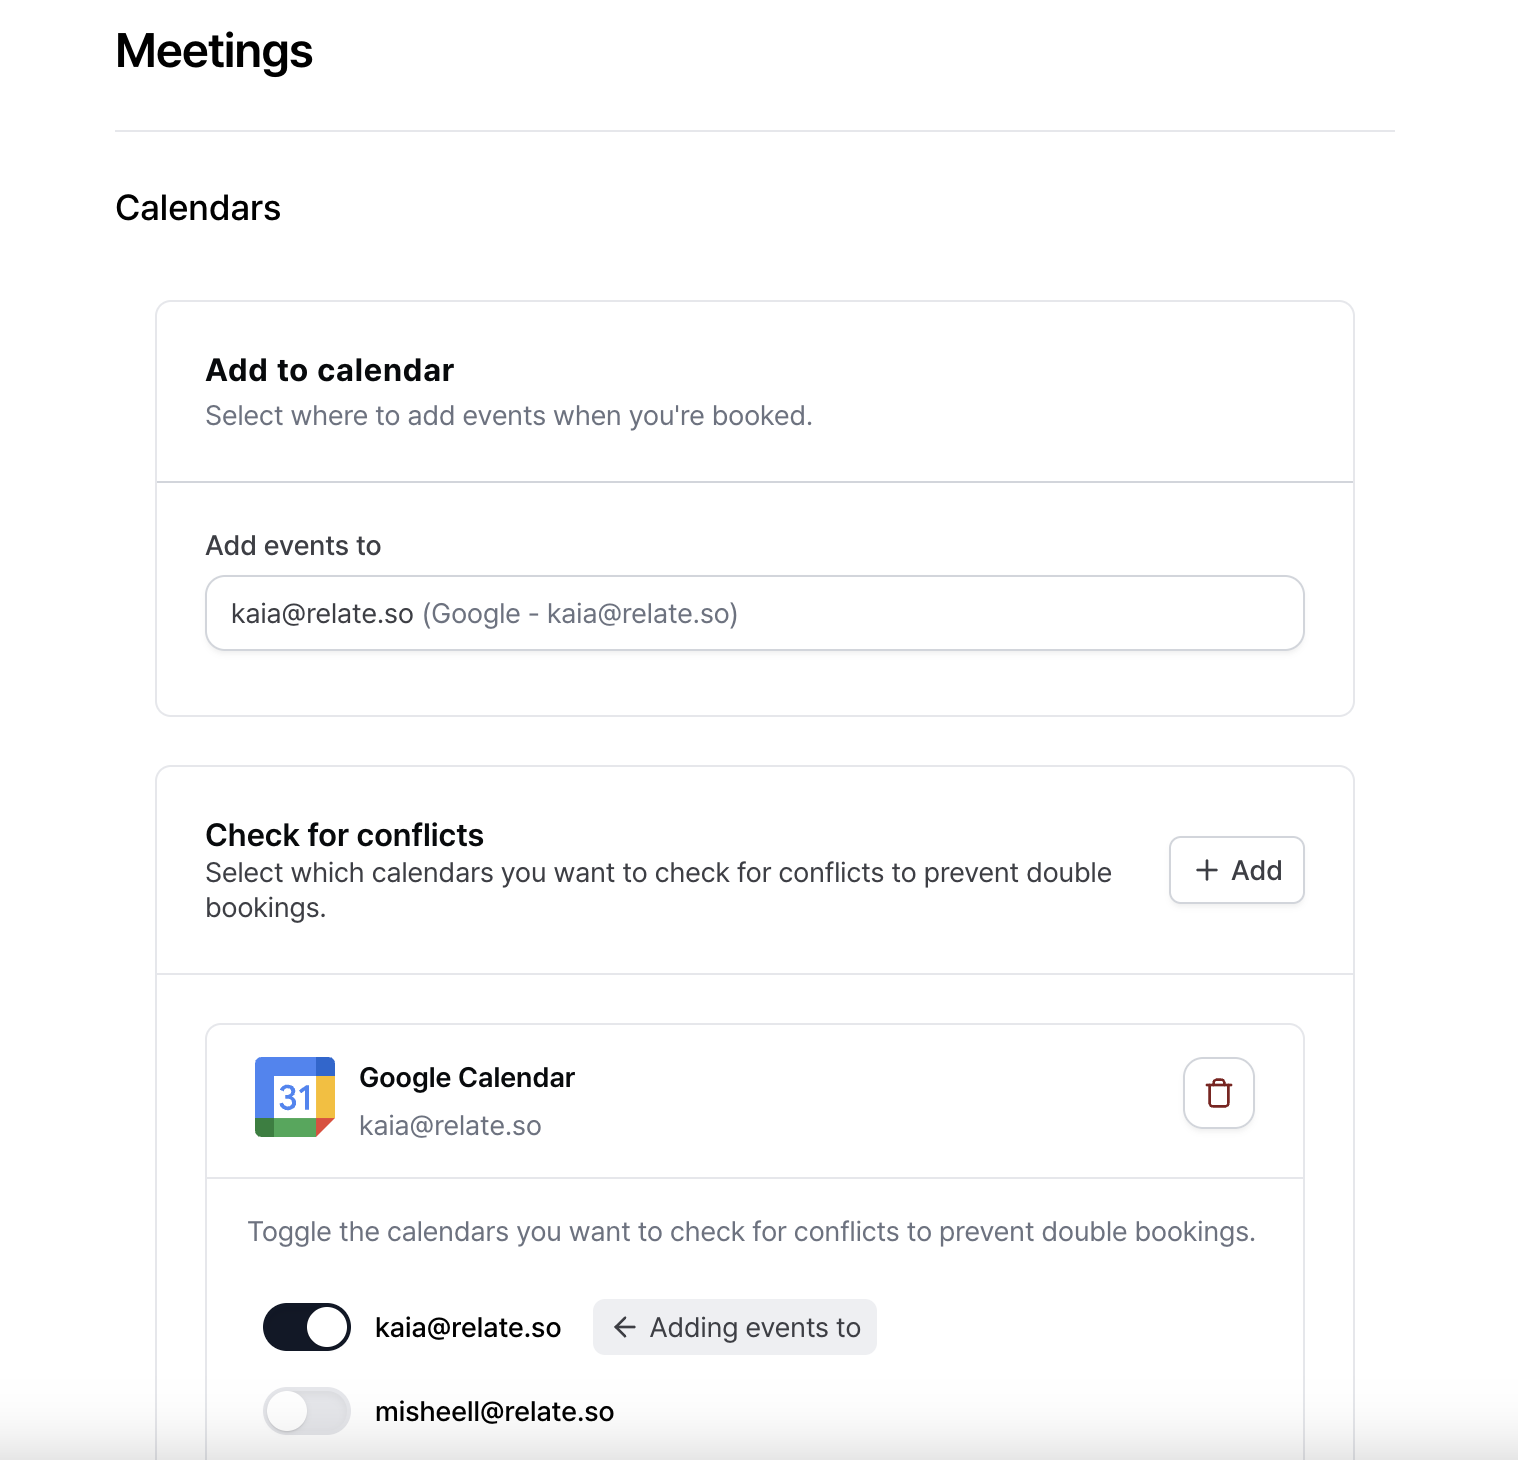
Once the connection is complete, the connected calendar account will be displayed as shown below.
Using `Add events to`, you can choose which calendar will receive booked meetings. For example, you can select your own Google Calendar or a teammate’s calendar. Booked meetings will automatically be added to the selected account.
If your calendar account does not appear correctly, check the following:
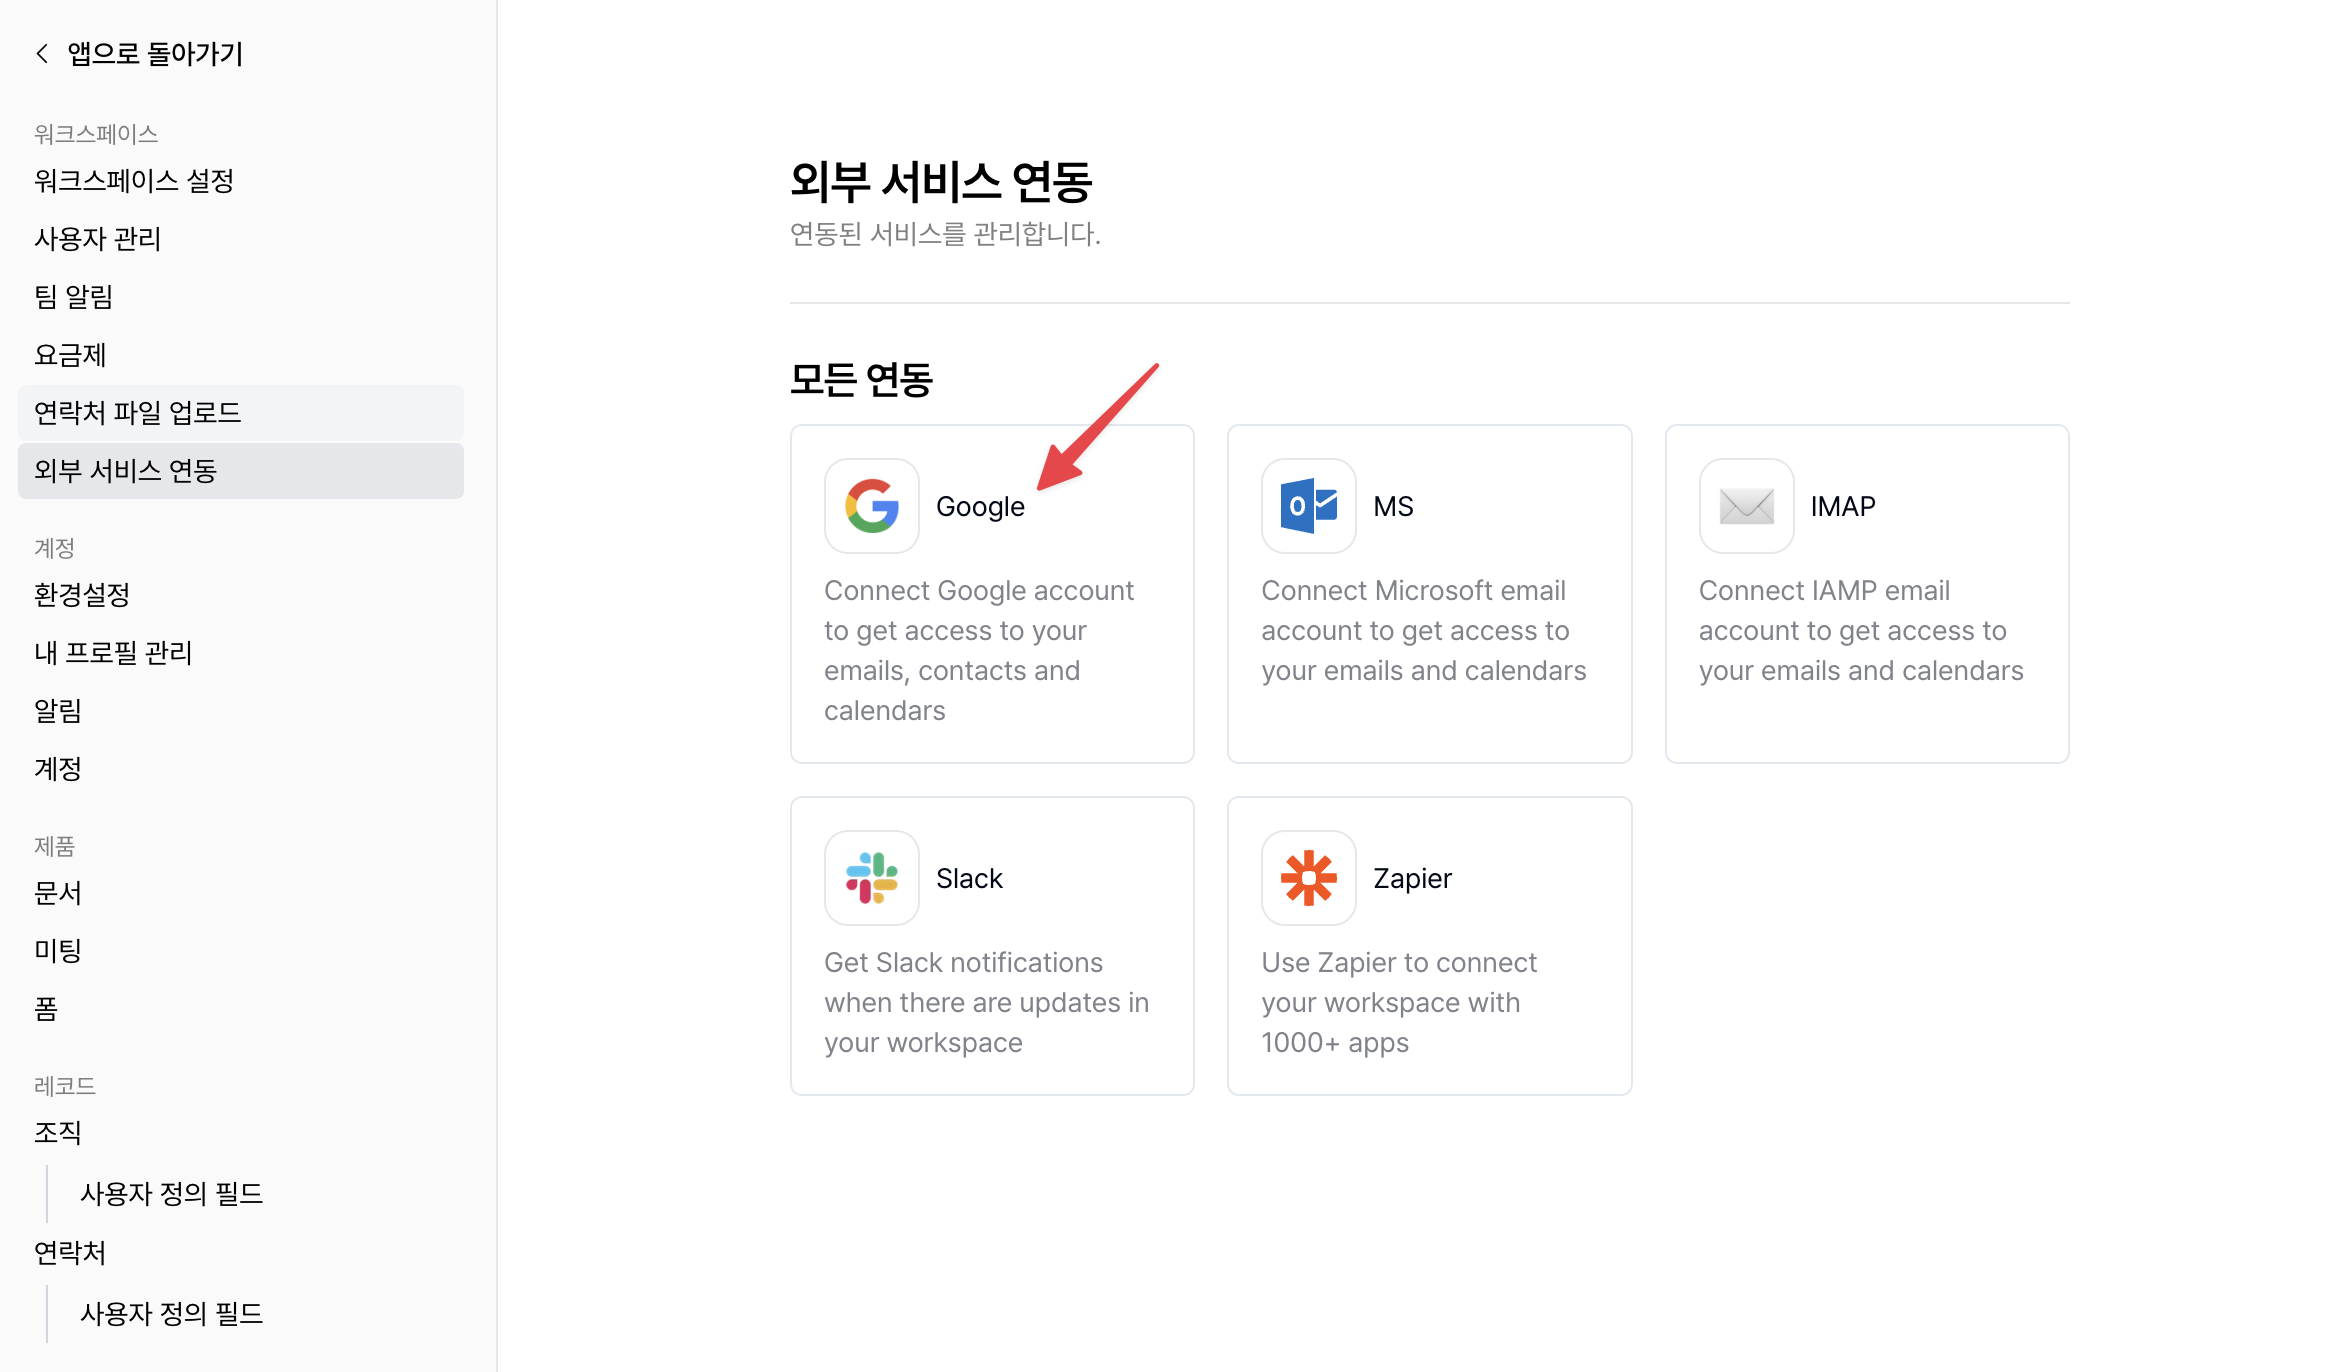
1. Go to `Workspace Settings` → `External Integrations` and confirm that your Google account is connected.
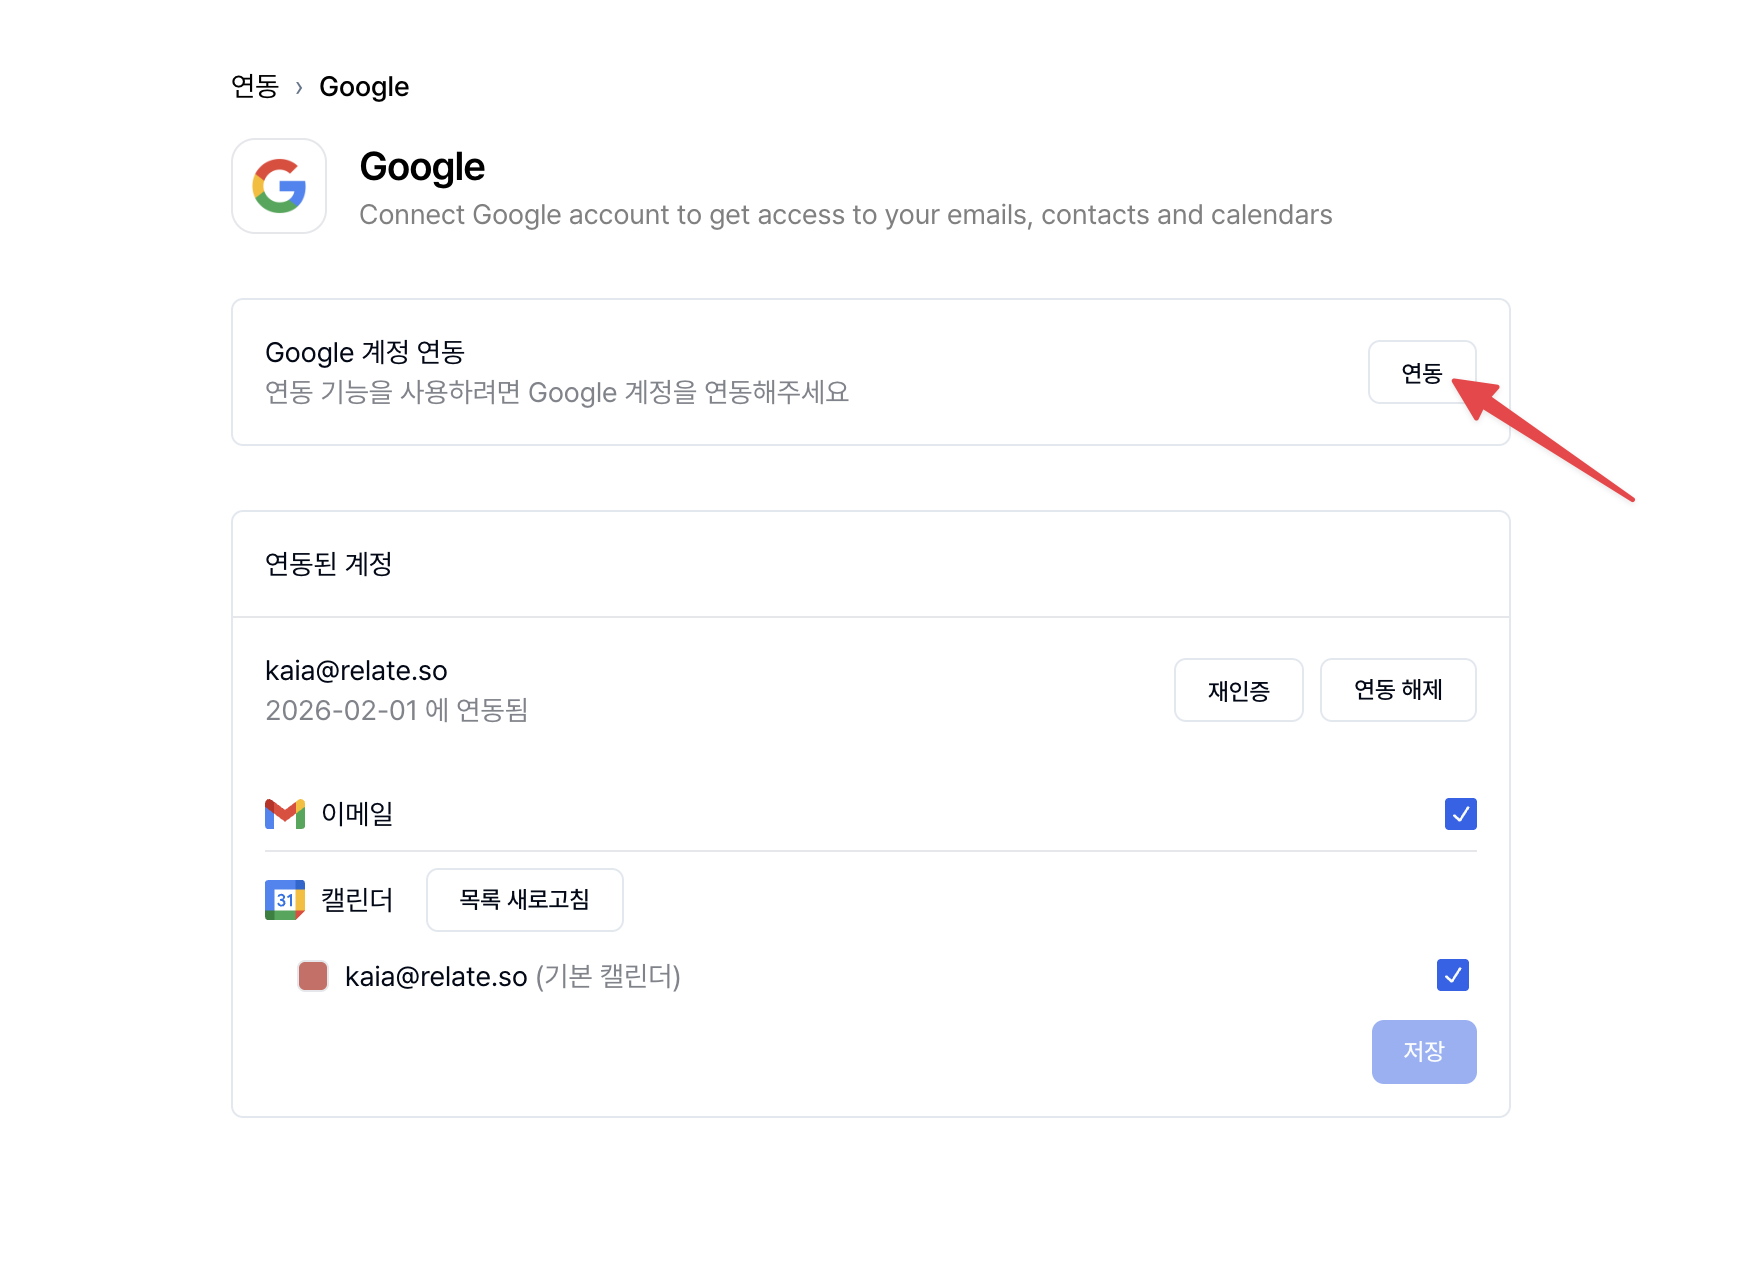
2. If Google is not connected, click `Connect` to link your Google account.
3. When connecting your Google account, make sure to allow **calendar access permissions**.
4. Once connected, the linked Google calendar account will automatically appear in the selection list.
## Getting Started with Spread Meetings
### Step 1. Connect your calendar
To use Spread Meetings, you must connect one of the following calendars: **Google, Outlook, or Apple Calendar**.
Only time slots without existing events in the connected calendar are shown as available, so meetings can be opened without scheduling conflicts.
Follow these steps to connect your calendar:
1. Go to `Workspace Settings` in the top left corner of the Spread app.
2. Click `Meetings` in the left sidebar.
3. Click the `+ Add` button and select the calendar you want to connect (Google, Outlook, Apple Calendar).
4. Select your calendar account and allow access to Cal.com.
Cal.com is a scheduling platform that automatically coordinates availability with external users. It is built into Spread and can be used without separate registration.
Once the connection is complete, the connected calendar account will be displayed as shown below.
Using `Add events to`, you can choose which calendar will receive booked meetings. For example, you can select your own Google Calendar or a teammate’s calendar. Booked meetings will automatically be added to the selected account.
If your calendar account does not appear correctly, check the following:
1. Go to `Workspace Settings` → `External Integrations` and confirm that your Google account is connected.
2. If Google is not connected, click `Connect` to link your Google account.
3. When connecting your Google account, make sure to allow **calendar access permissions**.
4. Once connected, the linked Google calendar account will automatically appear in the selection list.
### Step 2. Configure basic Spread Meetings settings
After completing Step 1, scroll down to find the Availability section and the Conferencing Apps section.
#### 2-1. Set Availability
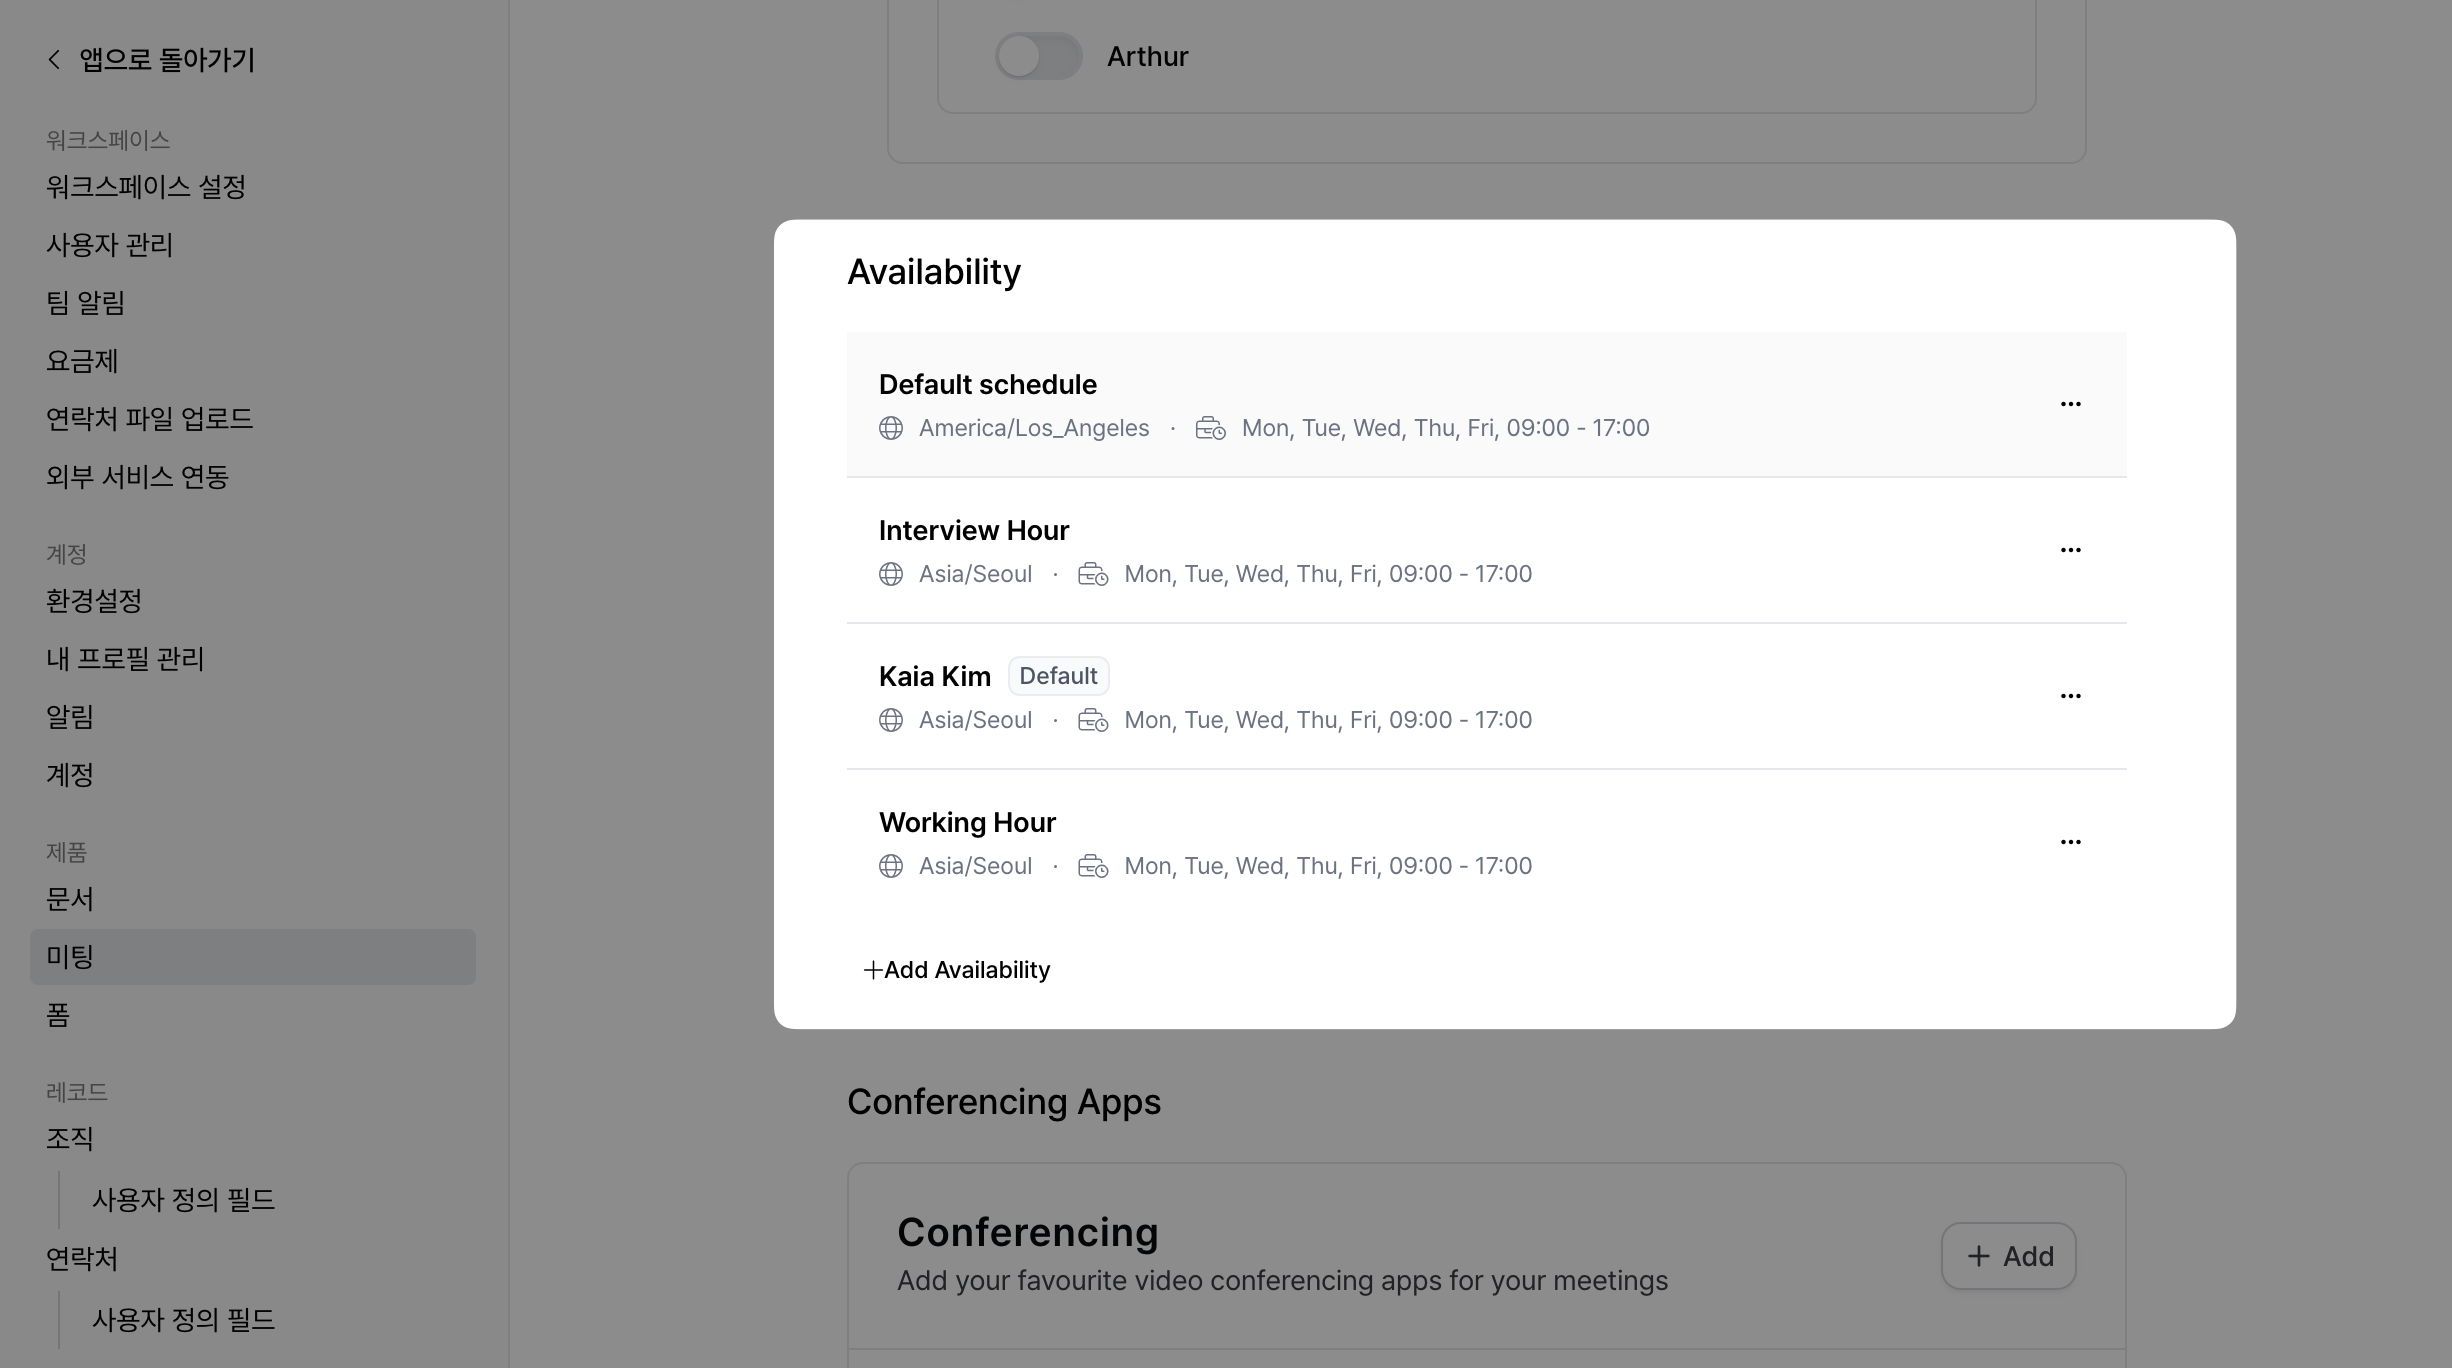
Availability allows each user account to define available time slots.
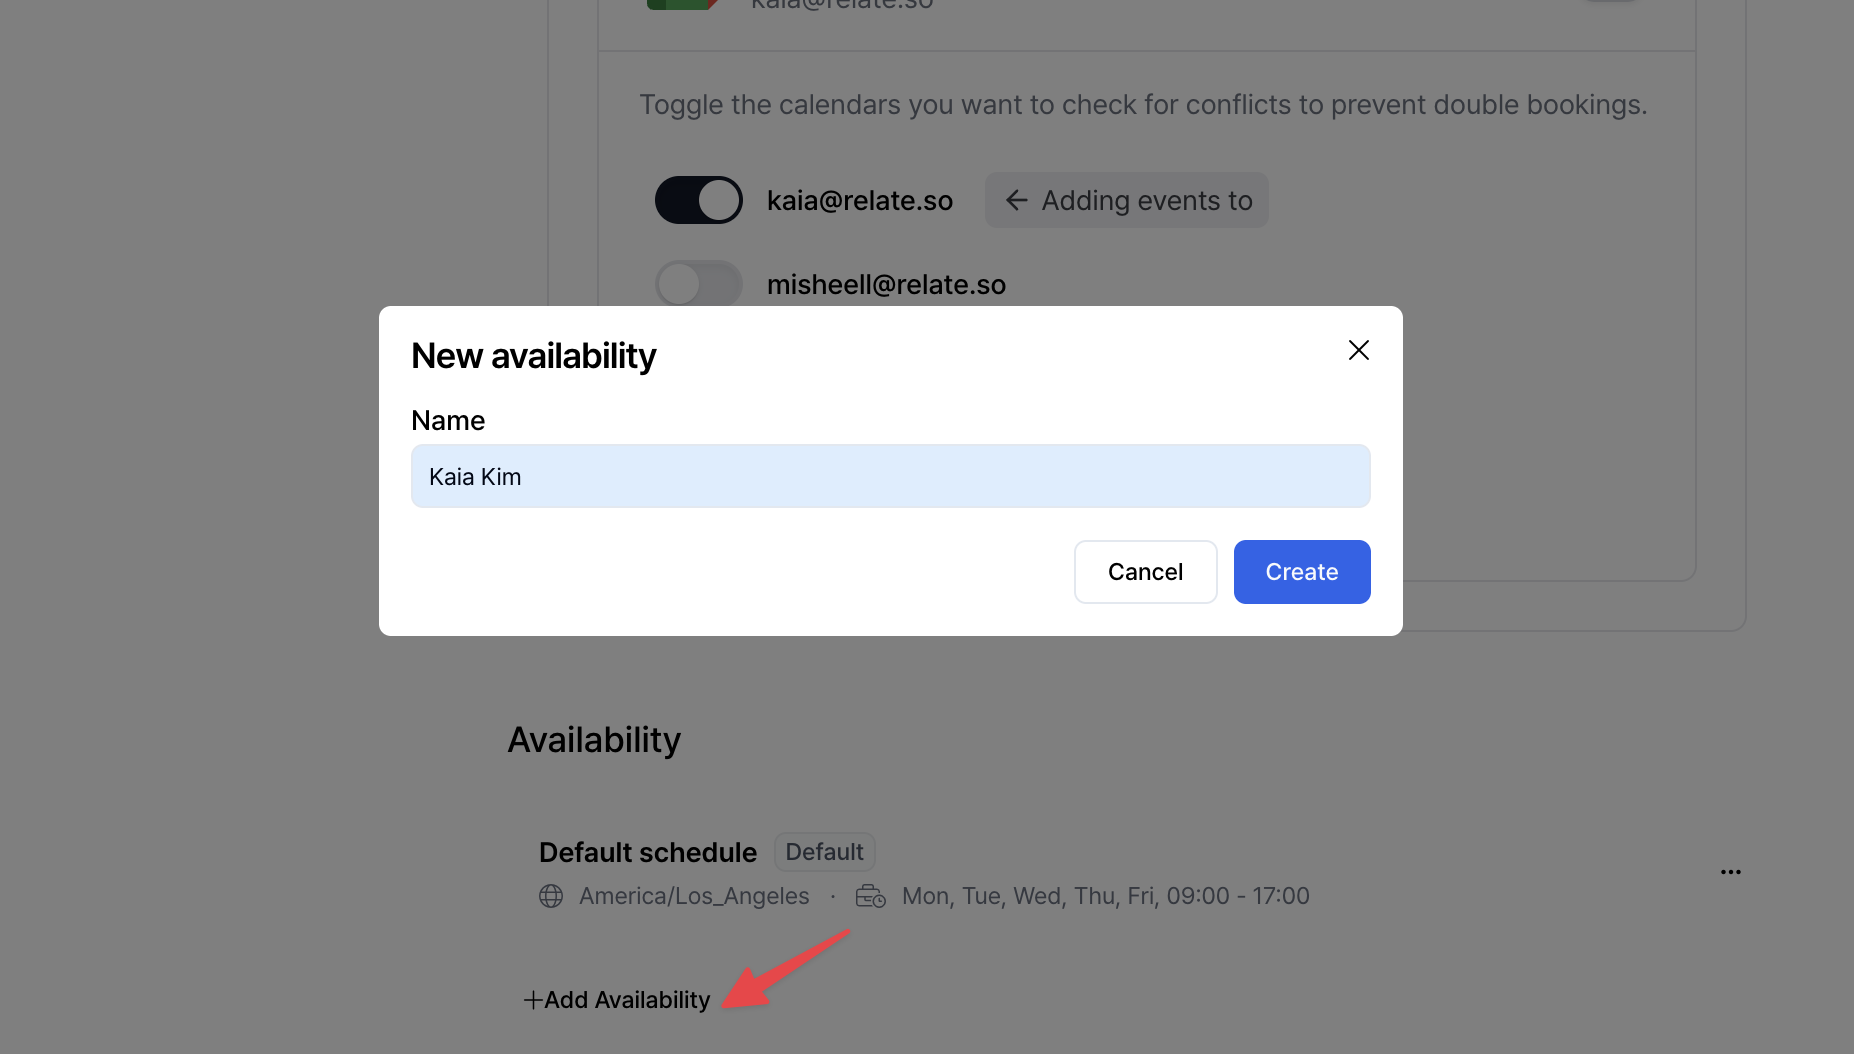
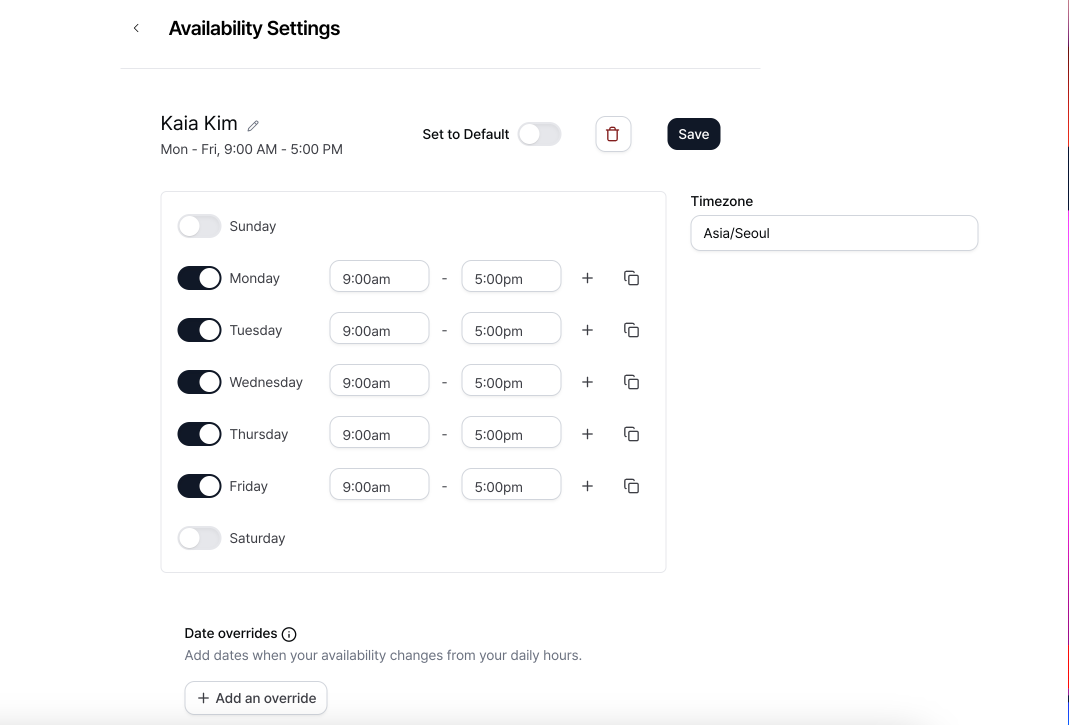
Click `+ Add Availability` to create a new schedule. Enter a schedule name or calendar name. A time configuration window will appear as shown below.
* Use the toggle to enable or disable meeting availability by day of the week, and set available time ranges for each day.
* Use the `+` button to add multiple time ranges per day, and set the reference time zone under `Timezone`.
* Activate `Set to Default` to apply this Availability as the default setting.
Click `Save` when finished.
You can create multiple Availability schedules if needed. Create different Availability settings depending on the meeting type, and select the appropriate one when creating a meeting scheduler.
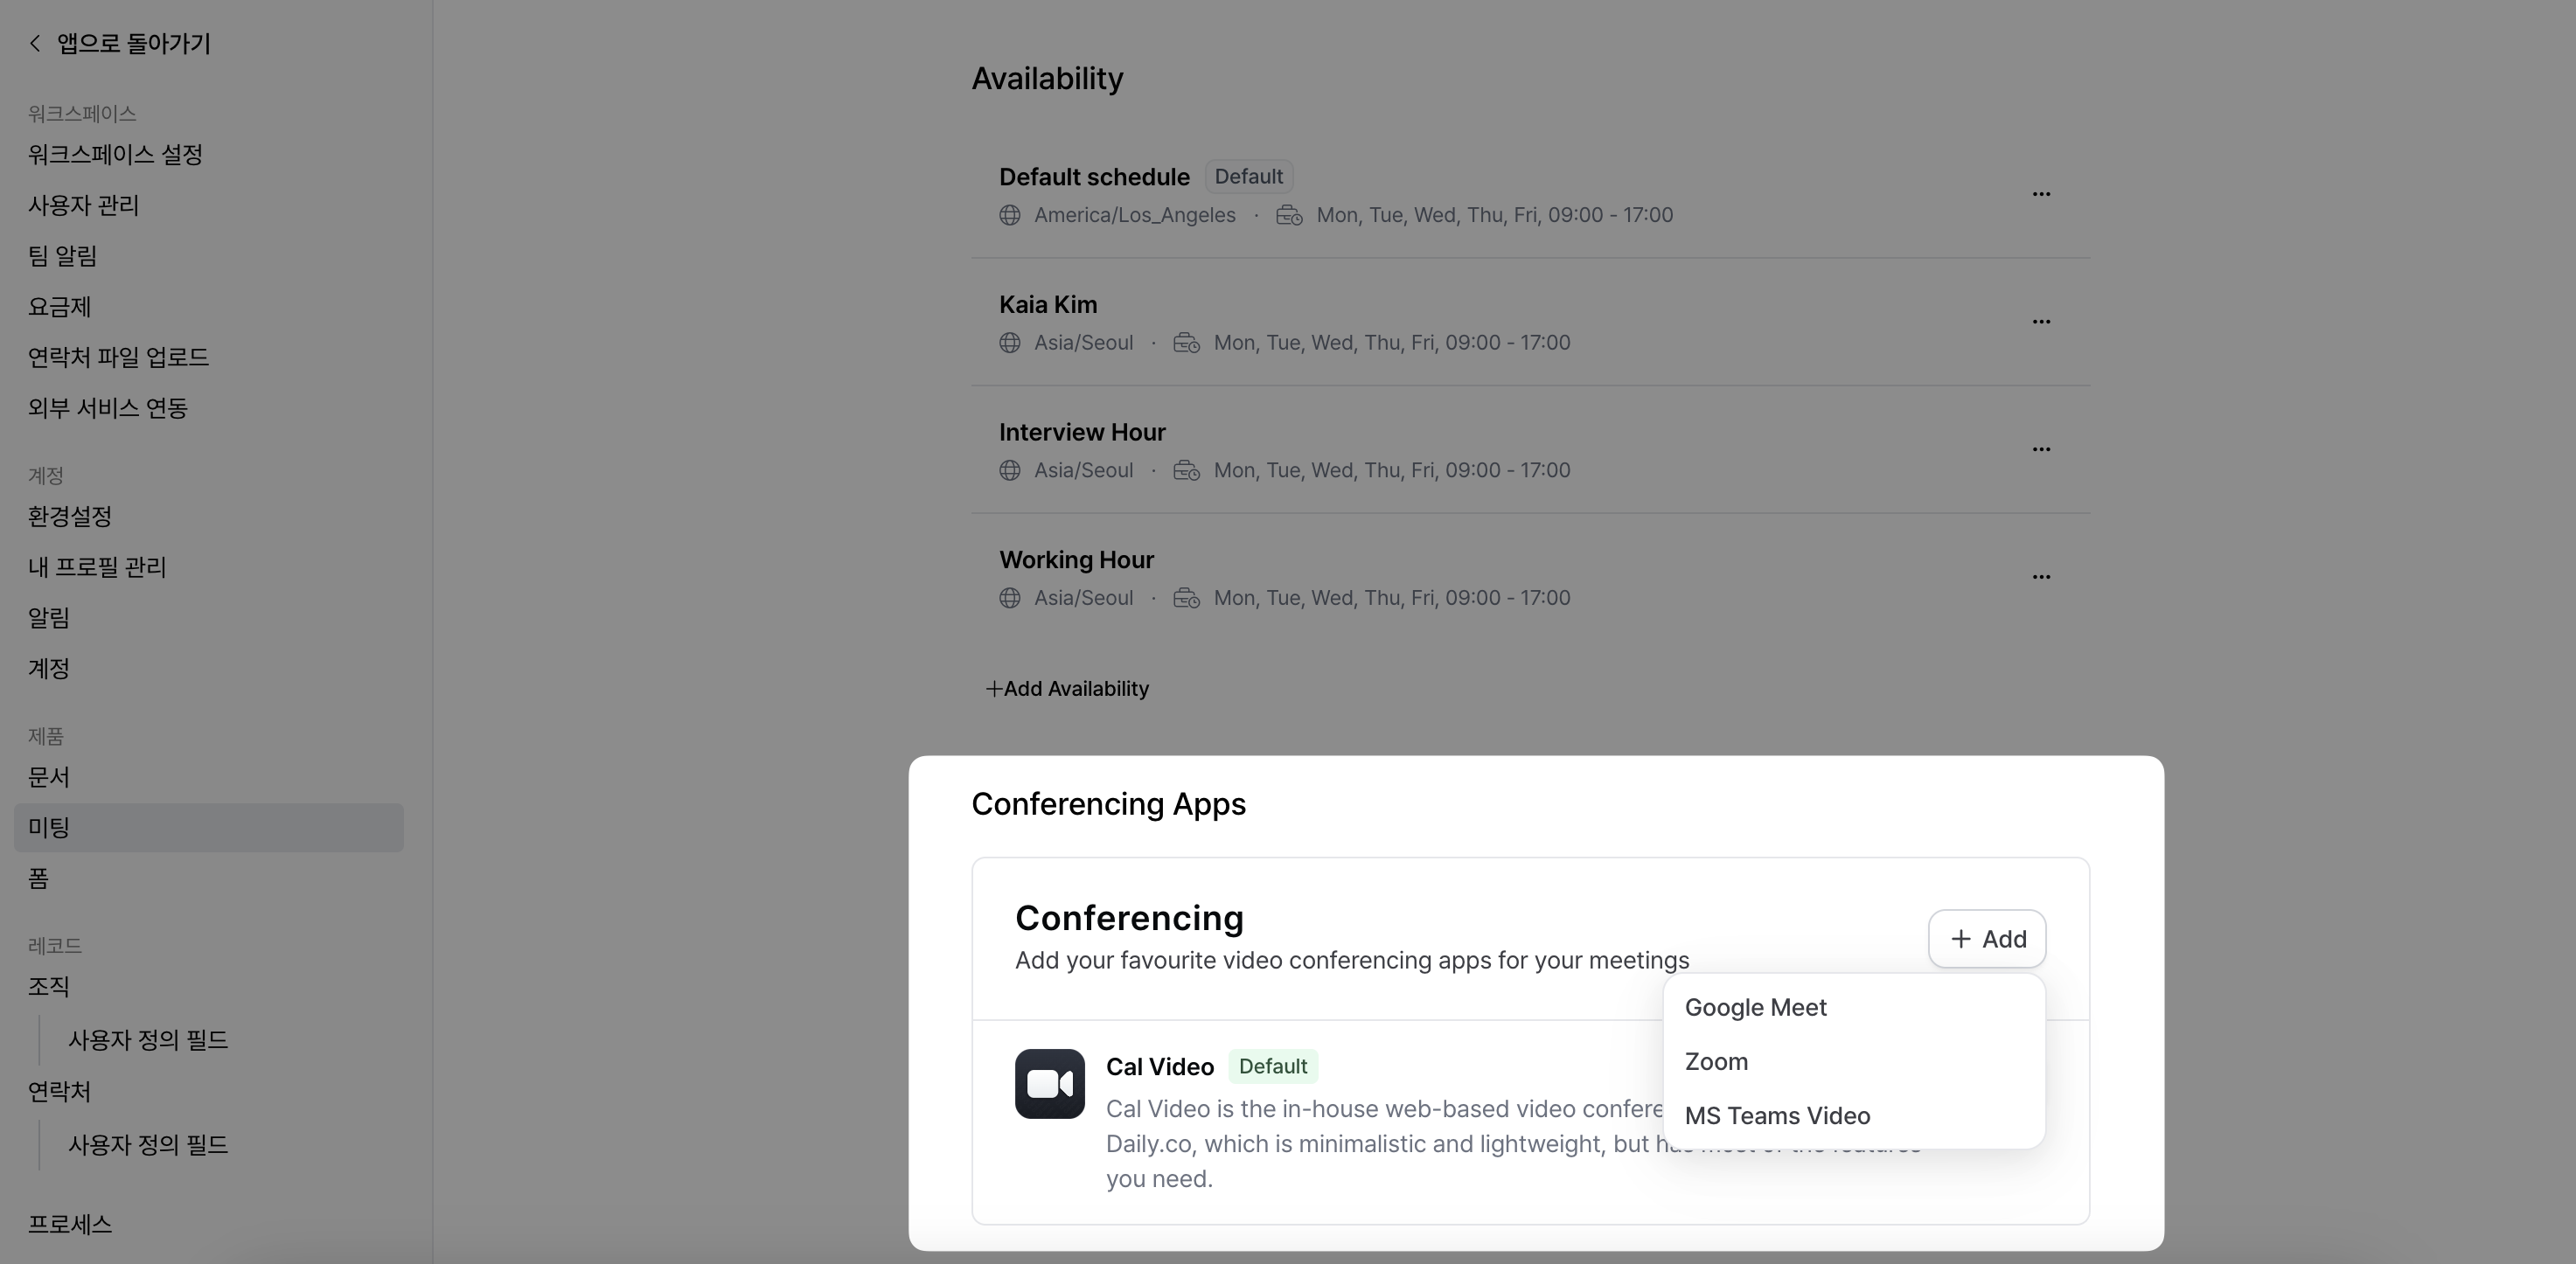
#### 2-2. Configure Conferencing Apps
As the final step of the basic setup, select the app to use for video meetings.
By default, Cal.com video conferencing is enabled. You can also integrate and use Google Meet, Zoom, or Microsoft Teams Video.
## Create a Meeting Scheduler
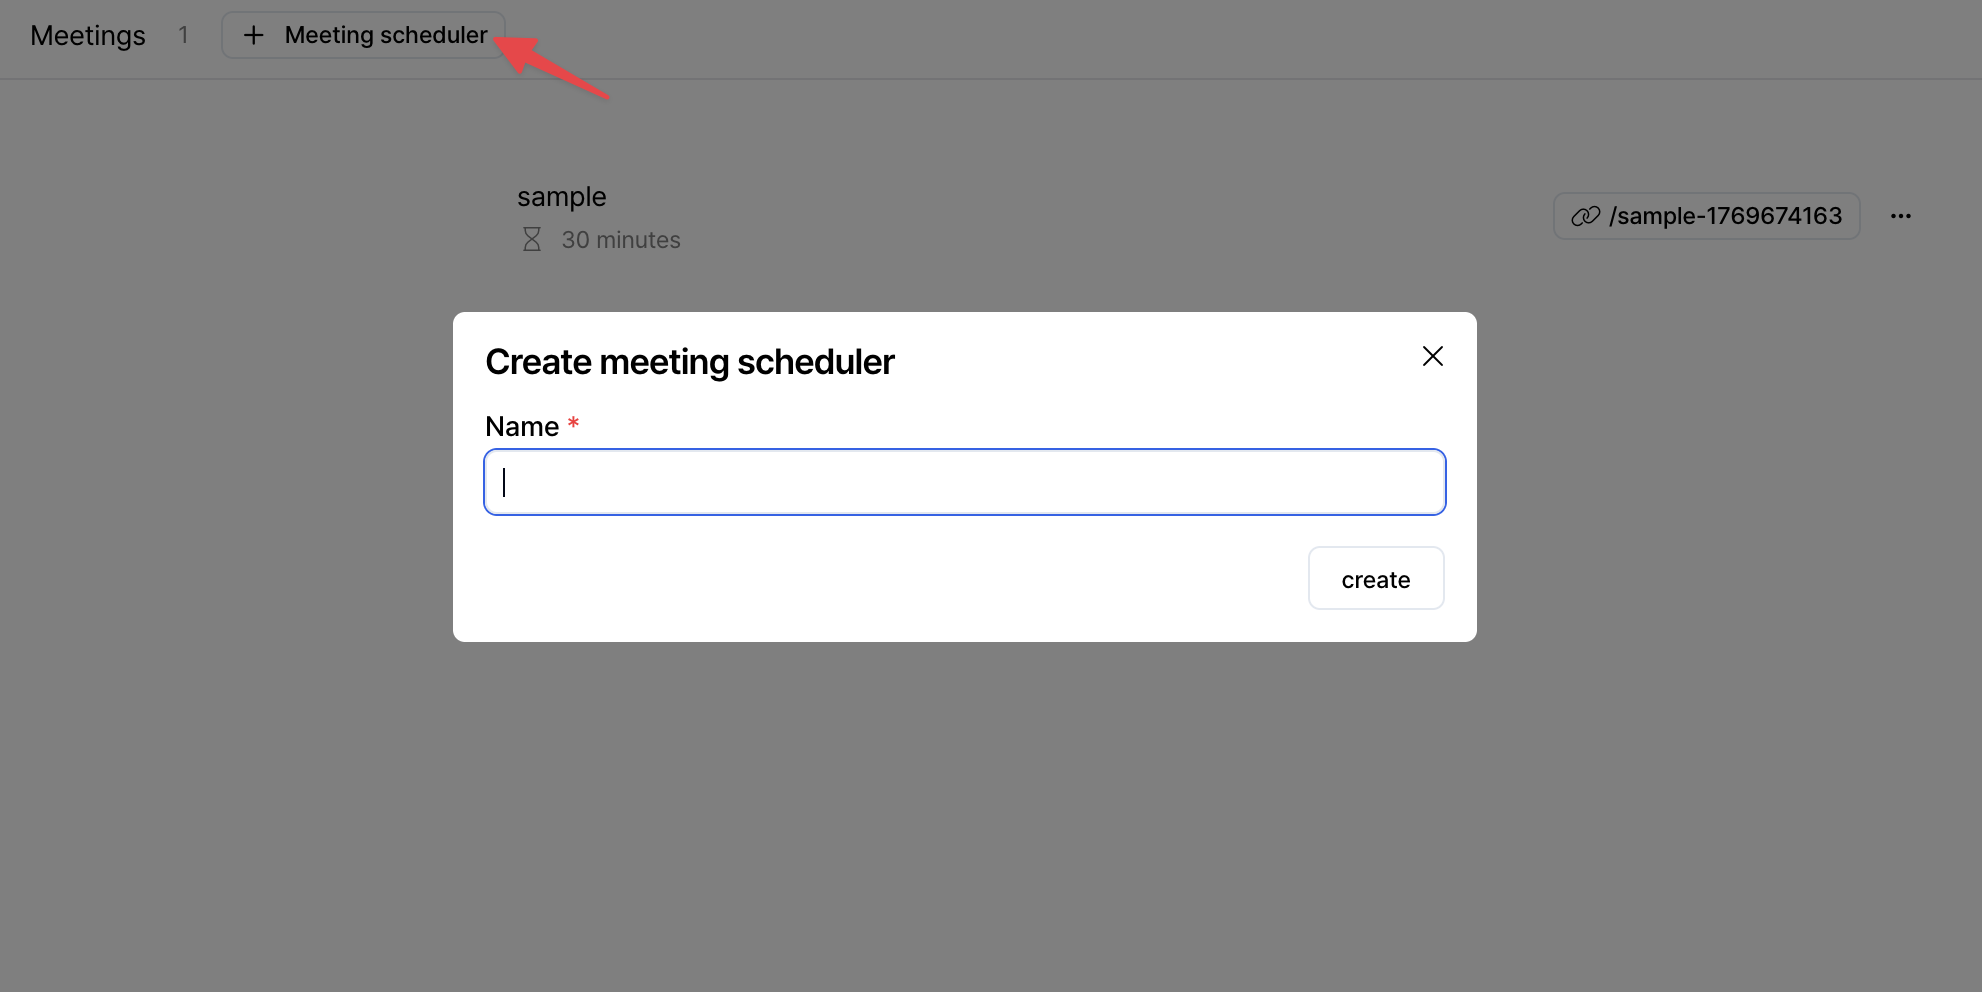
After connecting your calendar and completing the basic settings, return to the Spread app and select `Meetings` from the left sidebar.
Click the `+ Meeting scheduler` button at the top to create a new meeting scheduler.
### Basics
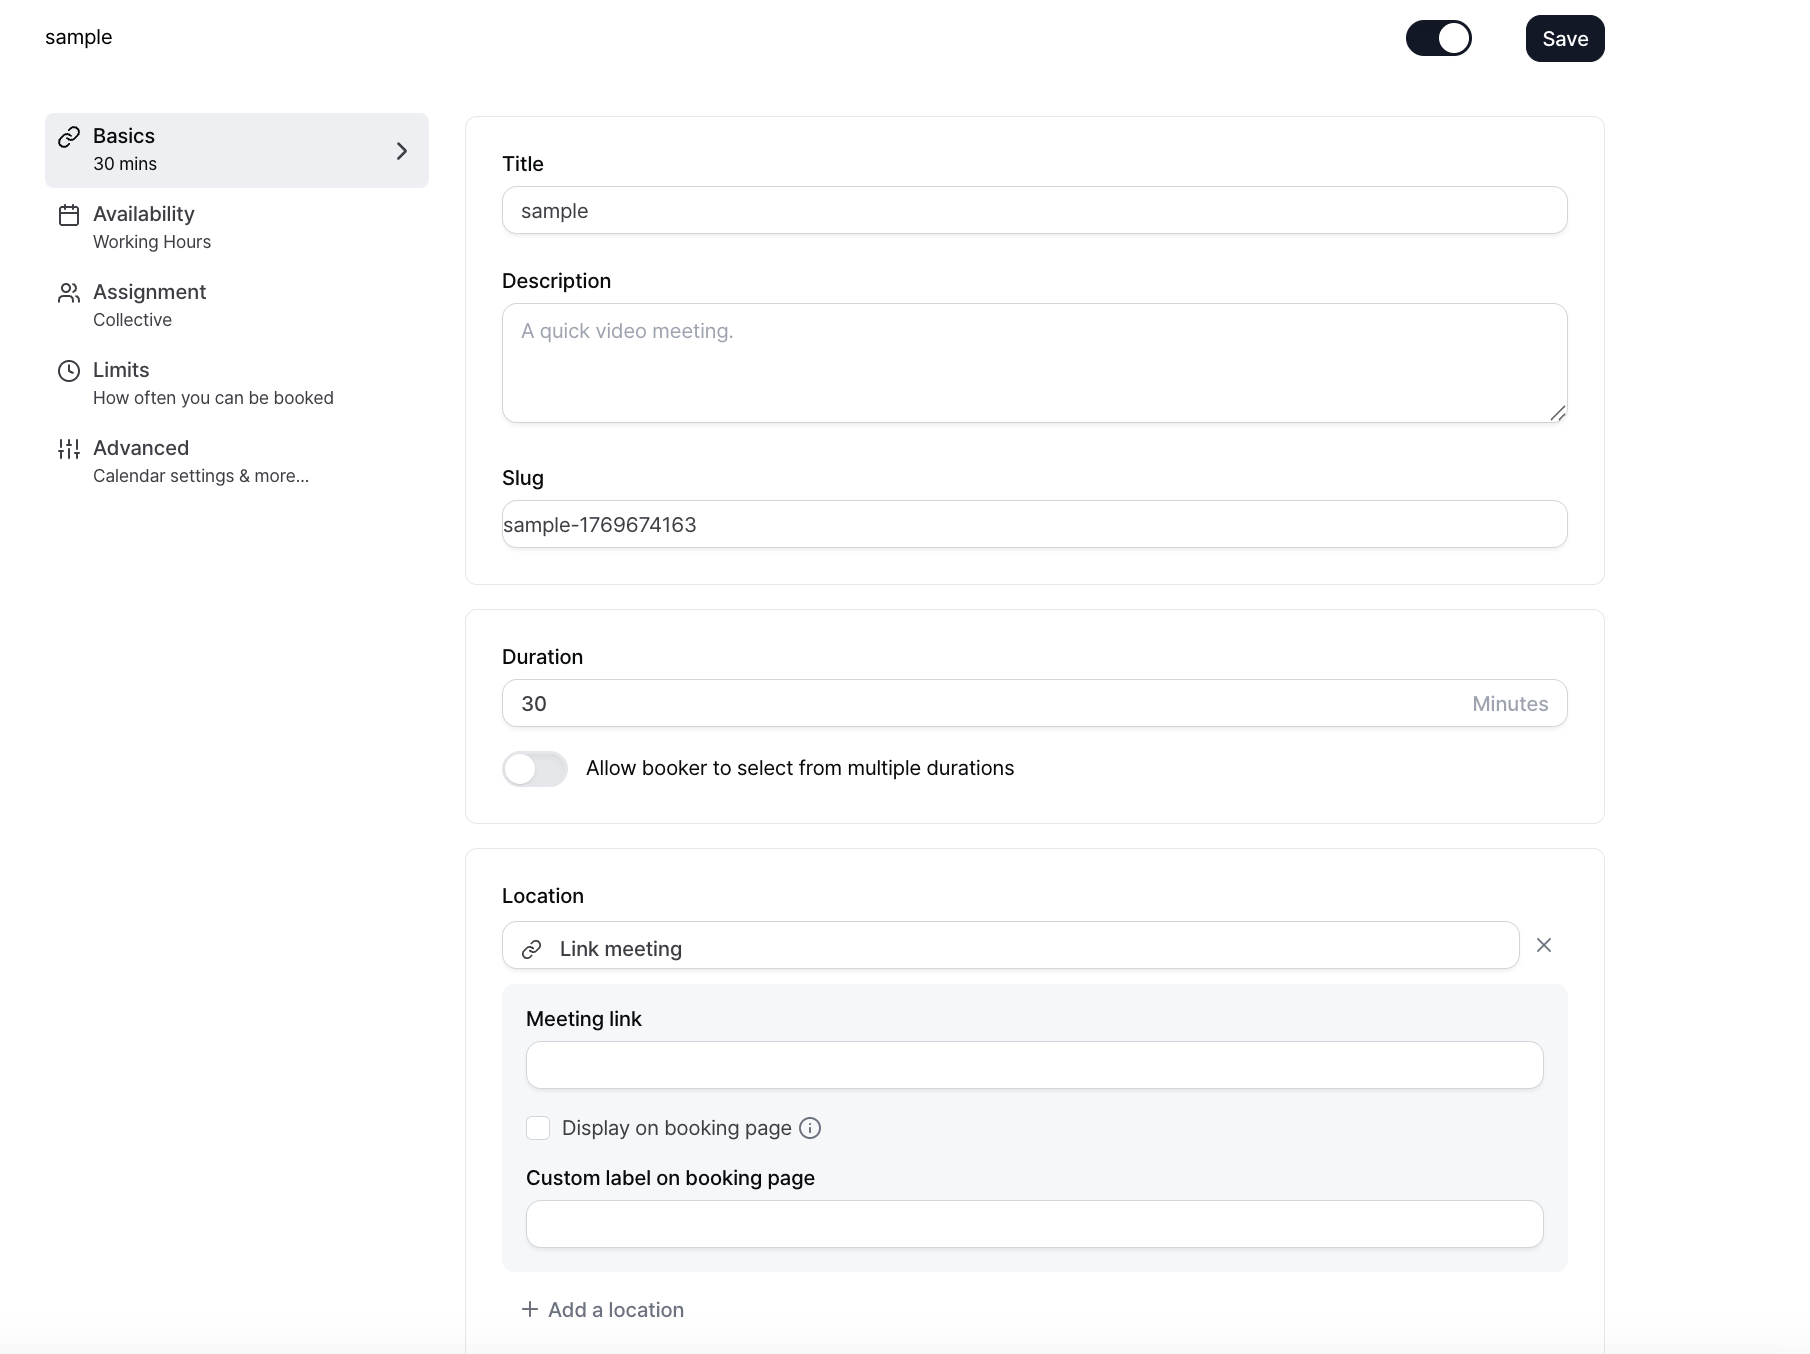
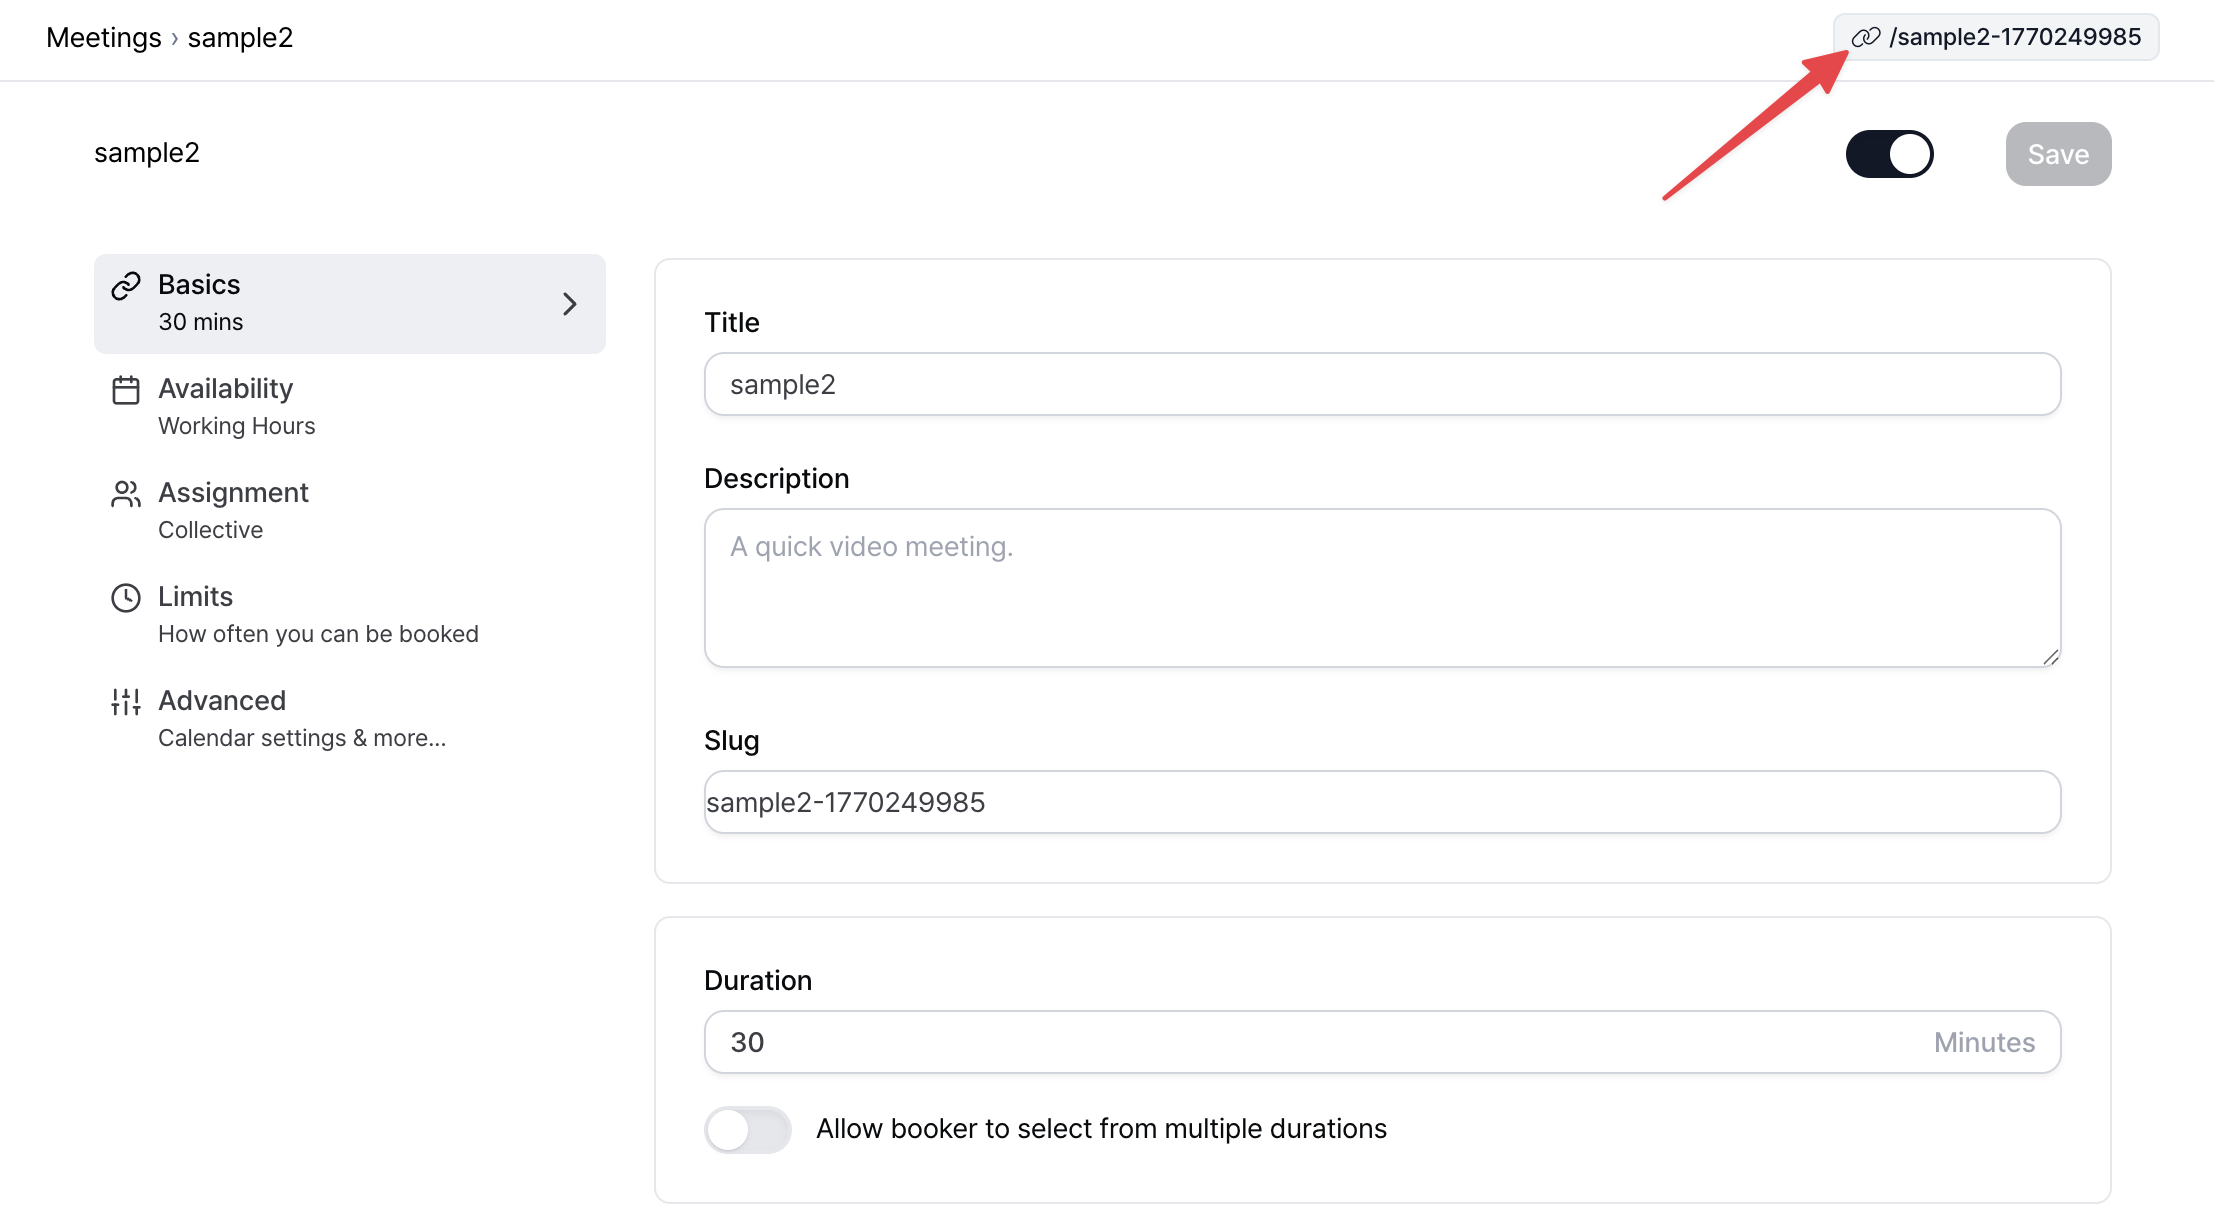
Select Basics from the left menu of the meeting scheduler. The following configuration screen will appear.
1. **Title**: The name of the meeting scheduler displayed inside the Spread app.
2. **Description**: You can add a short description of the meeting.
3. **Slug**: The last part of the meeting link URL. It is generated automatically based on the Title but can be edited.
4. **Duration**: Set the meeting length. You can also allow the person booking the meeting to select the duration.
5. **Location**: Choose how the meeting will take place. You can set video meeting, in person meeting, or a custom meeting link.
### Availability
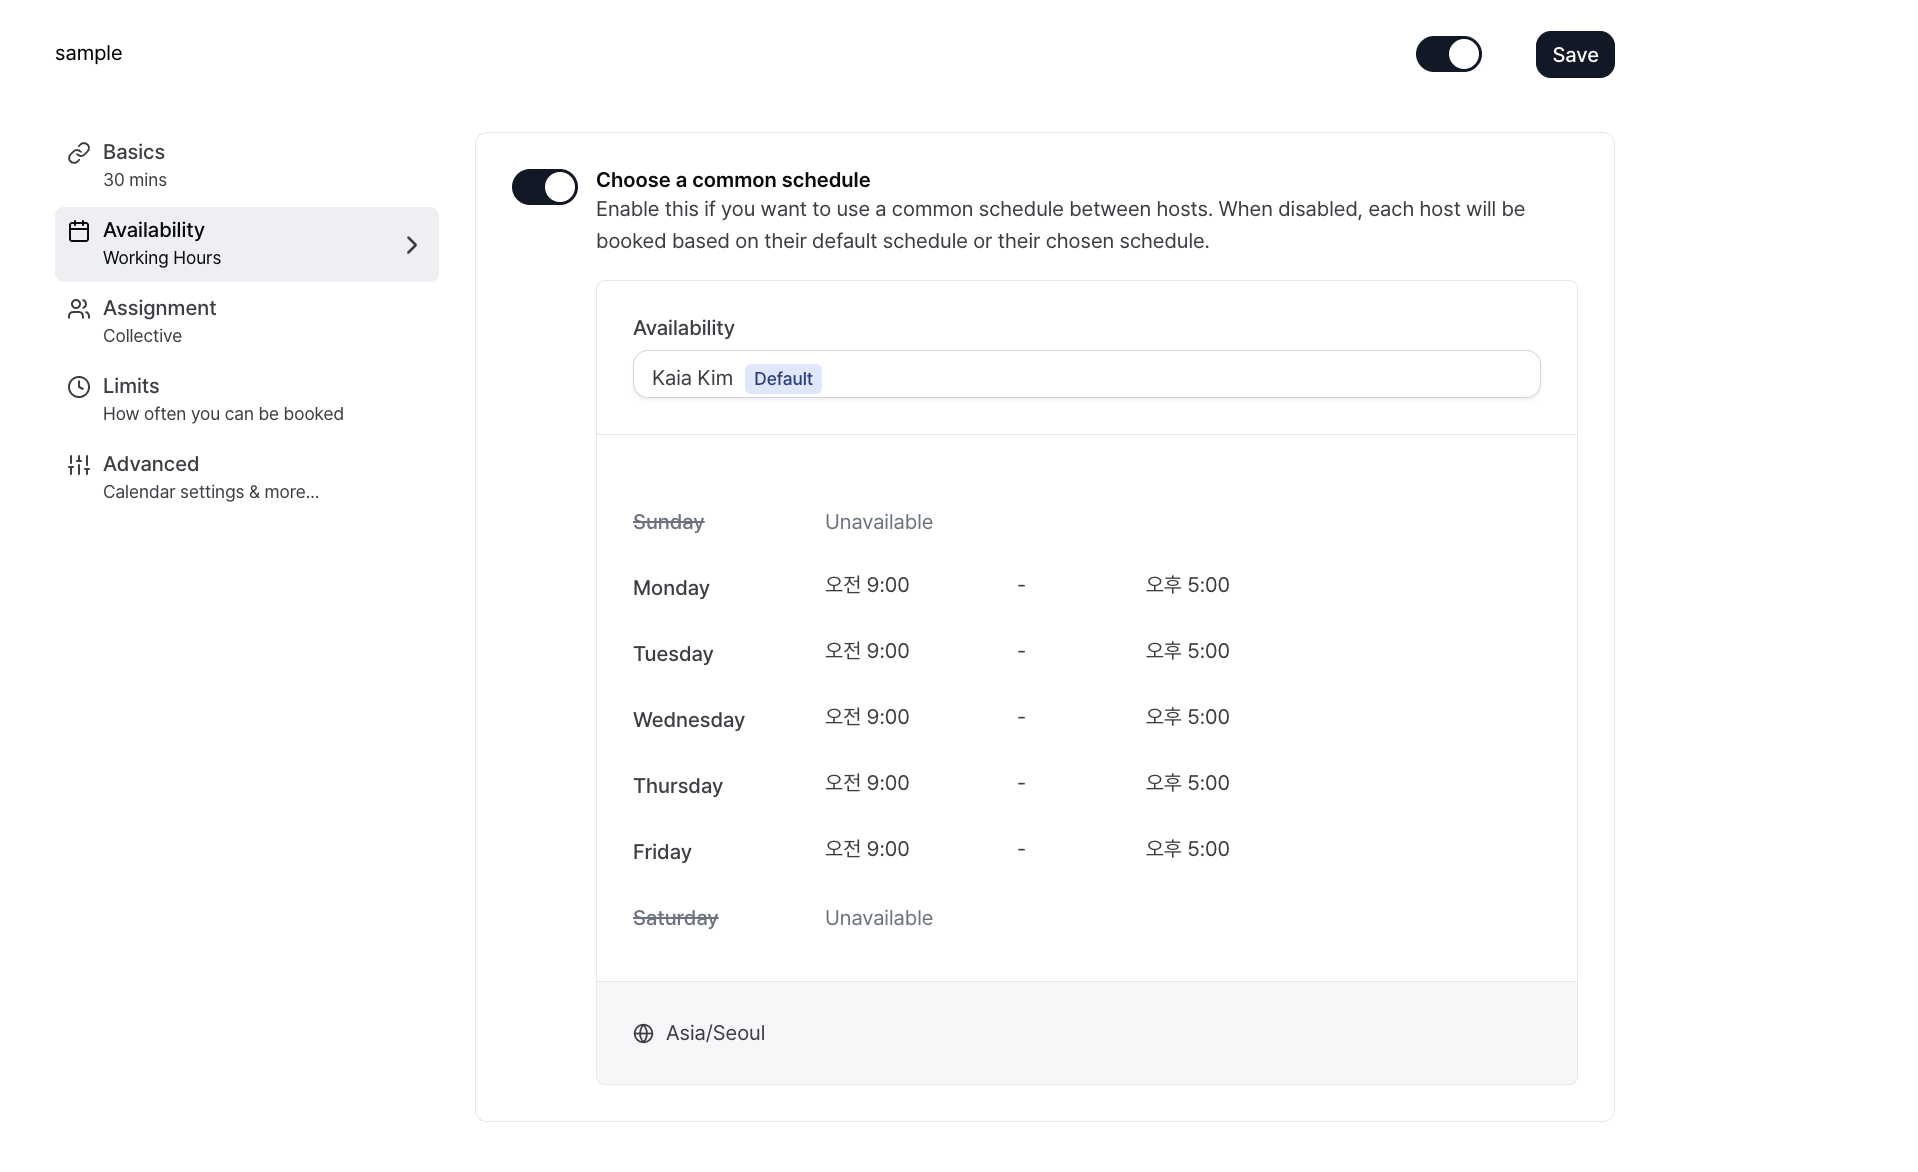
Select Availability from the left menu of the meeting scheduler. The following configuration screen will appear.
On this page, select one of the previously configured Availability schedules. The schedule marked as Default is automatically applied. You can change it using the dropdown menu if needed.
### Assignment
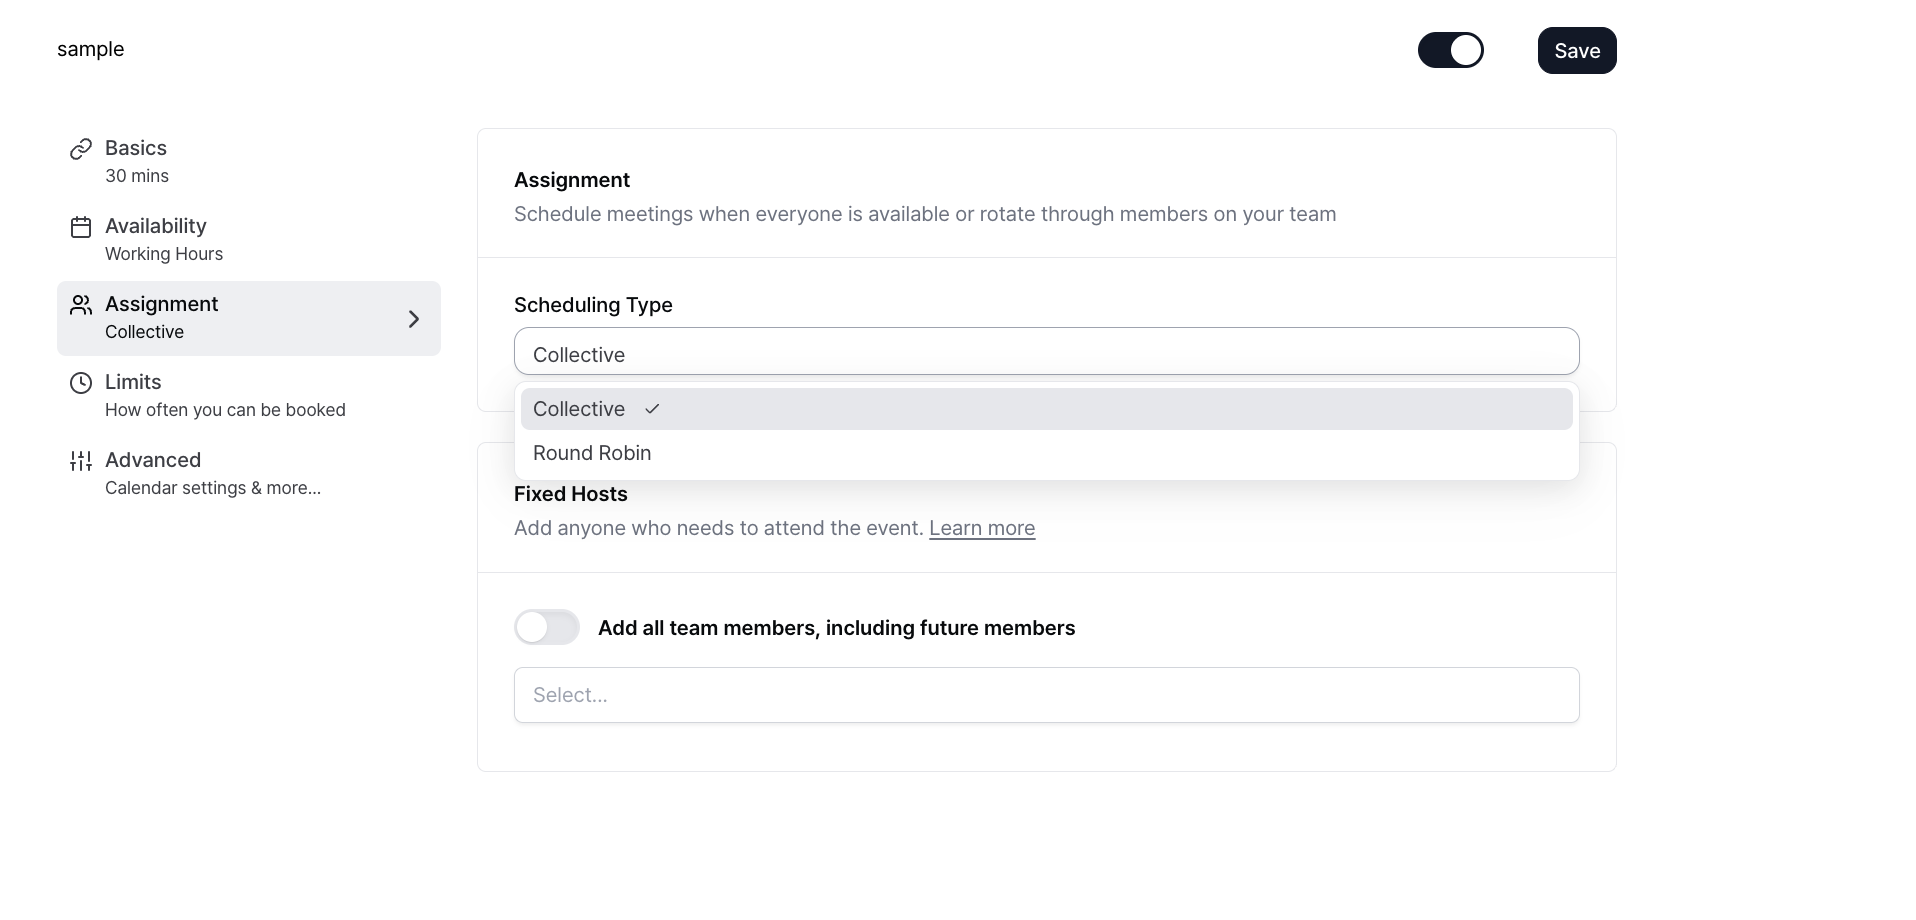
Select Assignment from the left menu to configure how meeting hosts are assigned.
This page allows you to fix a host or automatically distribute meetings among multiple team members depending on the meeting type.
Two assignment methods are available:
* `Collective`: Meetings are scheduled only when all selected hosts are available at the same time. This is suitable for group or internal meetings where all participants must attend.
* `Round Robin`: Meetings are automatically distributed among selected hosts in rotation. This considers each host’s availability and provides more booking options for customers. It is suitable for sales or consultation meetings.
When `Round Robin` is selected, additional options appear:
* `Maximize availability`: Shows all available time slots across hosts to maximize booking opportunities. This is suitable when available time range matters more than equal distribution across hosts.
* `Load balancing`: Distributes meetings evenly among hosts based on the number of bookings. This is used when you want to balance meetings across teammates.
* Include No show: When enabled, meetings marked as no show are included in the Round Robin calculation and reflected in host assignment.
`Fixed Hosts` are hosts who must always participate in the meeting. Hosts added here are included in every booking.
### Limits
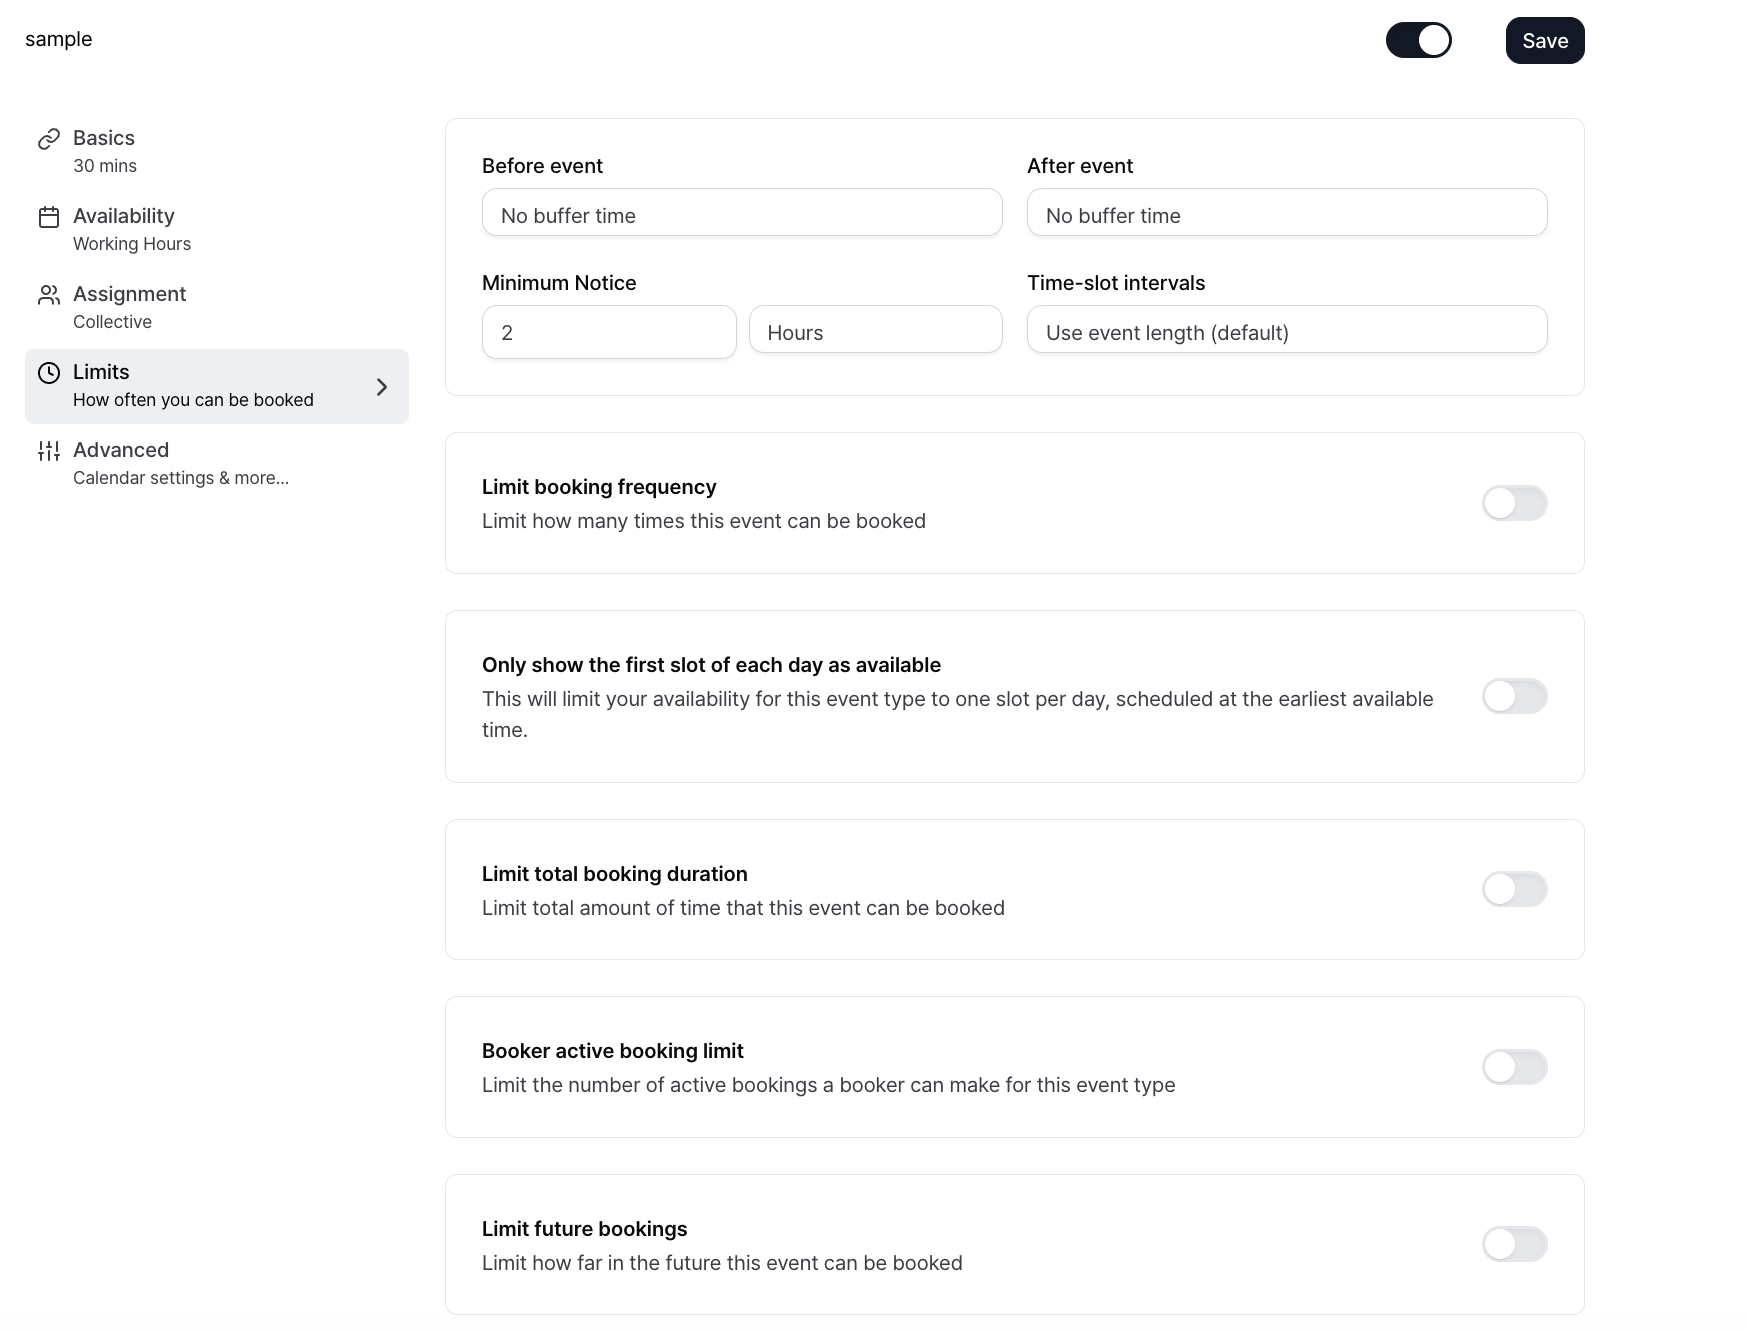
The Limits page allows detailed control over booking behavior and range.
On the Limits page, you can configure the following:
* Buffer time
* `Before event`: Set the buffer time automatically blocked before the meeting starts.
* `After event`: Set the buffer time reserved after the meeting ends.
* `Minimum Notice`
* Set how many hours before the meeting start time a booking must be made.
* Example: 2 Hours means bookings are not allowed within 2 hours of the meeting start.
* `Time slot intervals`
* Set the spacing between available booking slots.
* By default, slots are generated based on event duration. You can also select specific intervals such as 5, 10, or 15 minutes.
* `Limit booking frequency`
* Limit how many times the event can be booked overall.
* Limits can be set daily, weekly, monthly, or yearly.
* `Only show the first slot of each day as available`
* Allows only the earliest available slot each day to be booked.
* One meeting is scheduled per day and assigned to the earliest time.
* `Limit total booking duration`
* Limit the total accumulated meeting time for this event.
* You can set cumulative meeting time limits daily, weekly, monthly, or yearly.
* Example: 60 minutes per day limits total daily bookings to 60 minutes.
* `Booker active booking limit`
* Limit how many active bookings a single person can have for this event at the same time.
* This prevents duplicate bookings by the same person.
* If `Offer to reschedule last active booking to chosen time slot` is enabled, the booker is prompted to move the existing booking to the newly selected time.
* `Limit future bookings`
* Define how far into the future bookings are allowed.
* Allow bookings up to a specific period
* Example: 30 business days into the future means bookings are not allowed beyond 30 business days from today.
* `Always 30 days available`
* Always keep only the next 30 days open for booking.
* `Within a date range`
* Allow bookings only within a specified start and end date range.
### Advanced
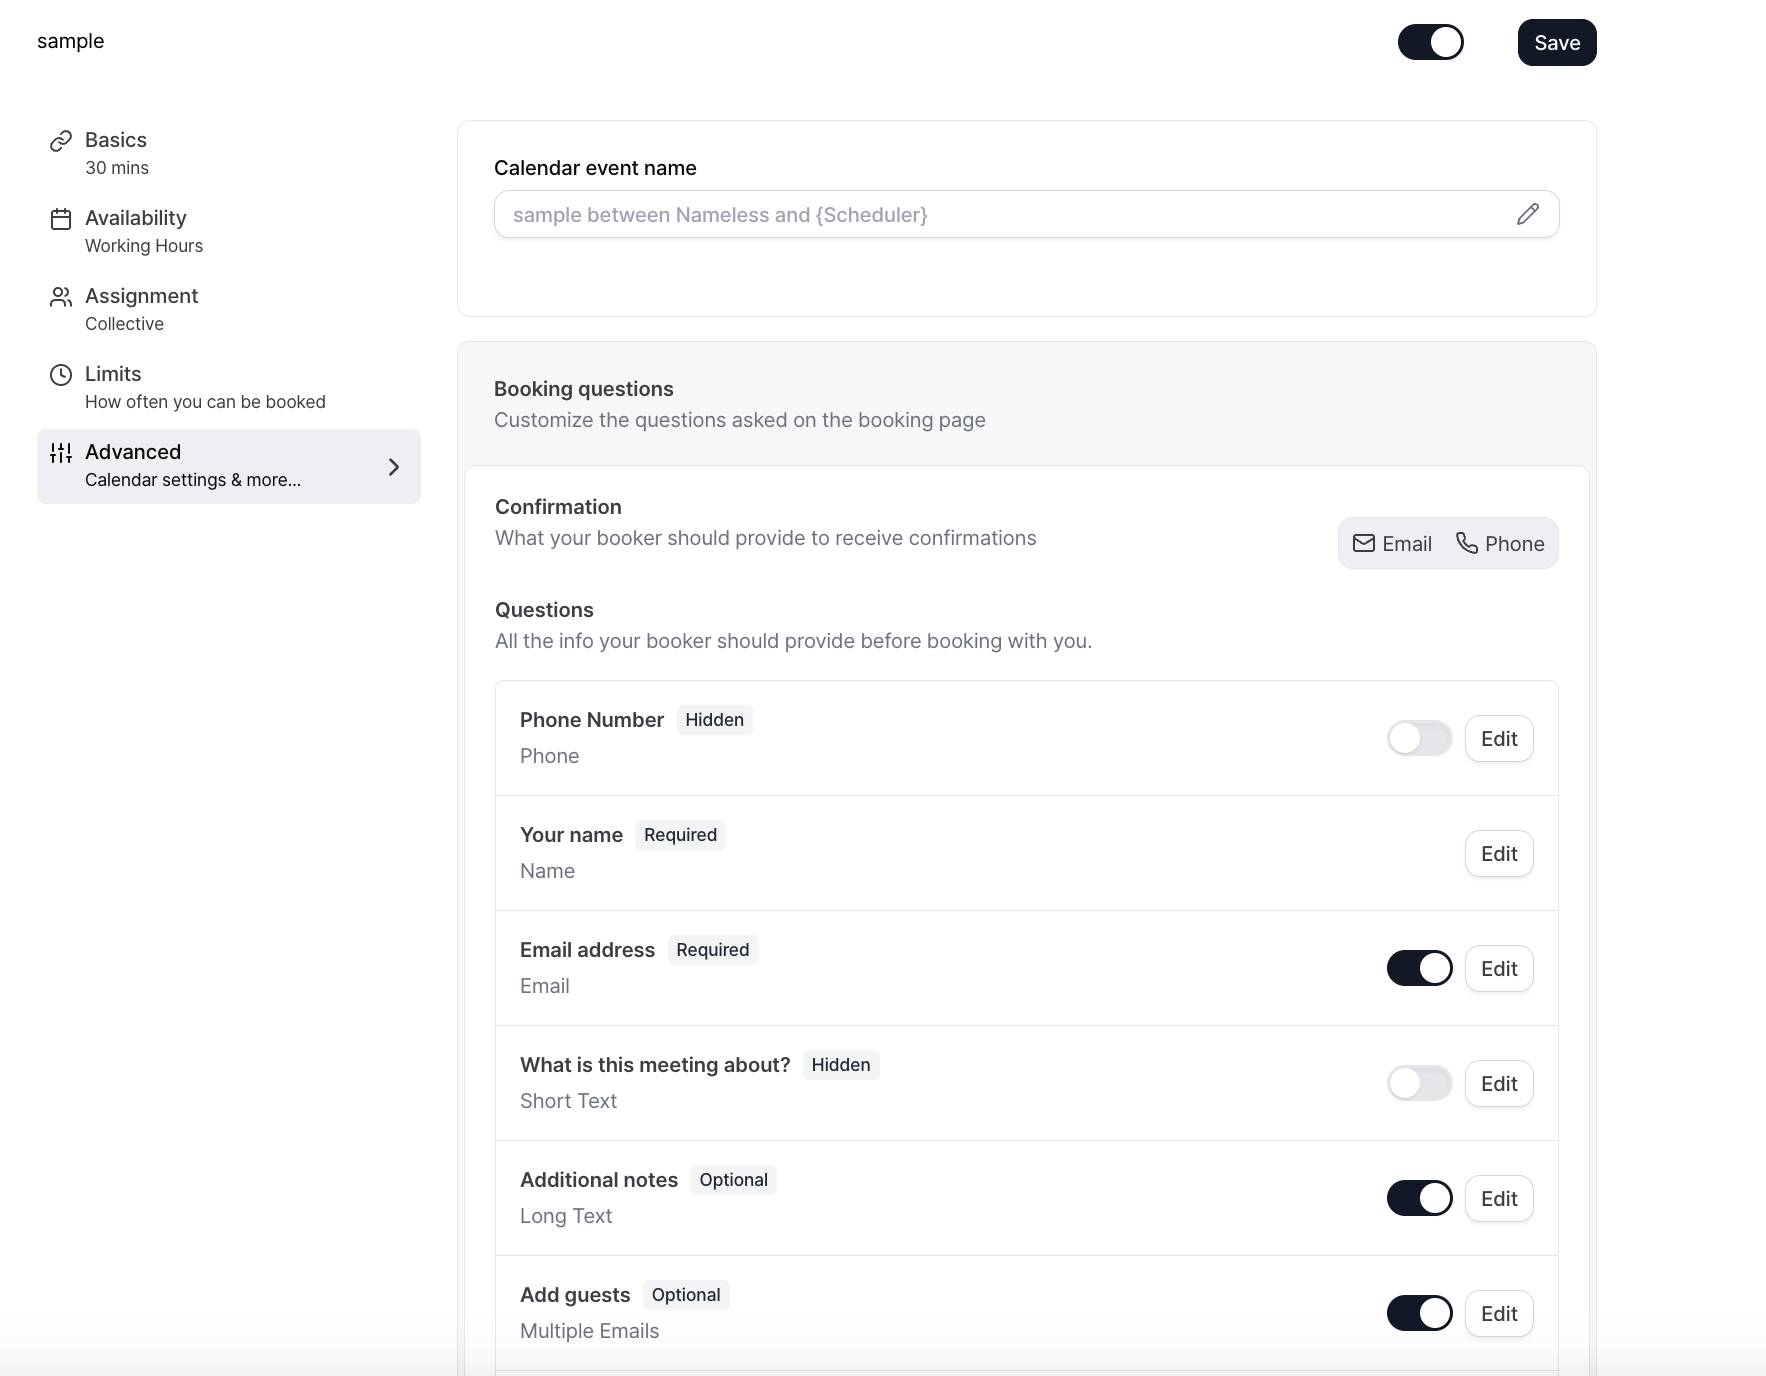
The Advanced settings page provides more detailed control over the entire booking process.
It allows you to configure required booking information, confirmation behavior, notifications, and calendar display behavior.
On this page, you can configure the following:
* Configure questions and input fields required from the customer on the booking page
* Choose whether to verify bookings by email or phone number
* Enable or disable manual approval for bookings
* Control event details and notes displayed in the calendar
* Configure a redirect URL after booking completion
* Disable default email notifications sent to the booker or host
* Configure additional options such as time zone locking, event color, and slot optimization
Using Advanced settings allows you to align the booking flow with your team’s operational process.
## Share the Meeting Scheduler Link
After completing all settings, click the booking link icon in the top right corner to copy the link.
Share the copied link with customers via email or messenger.
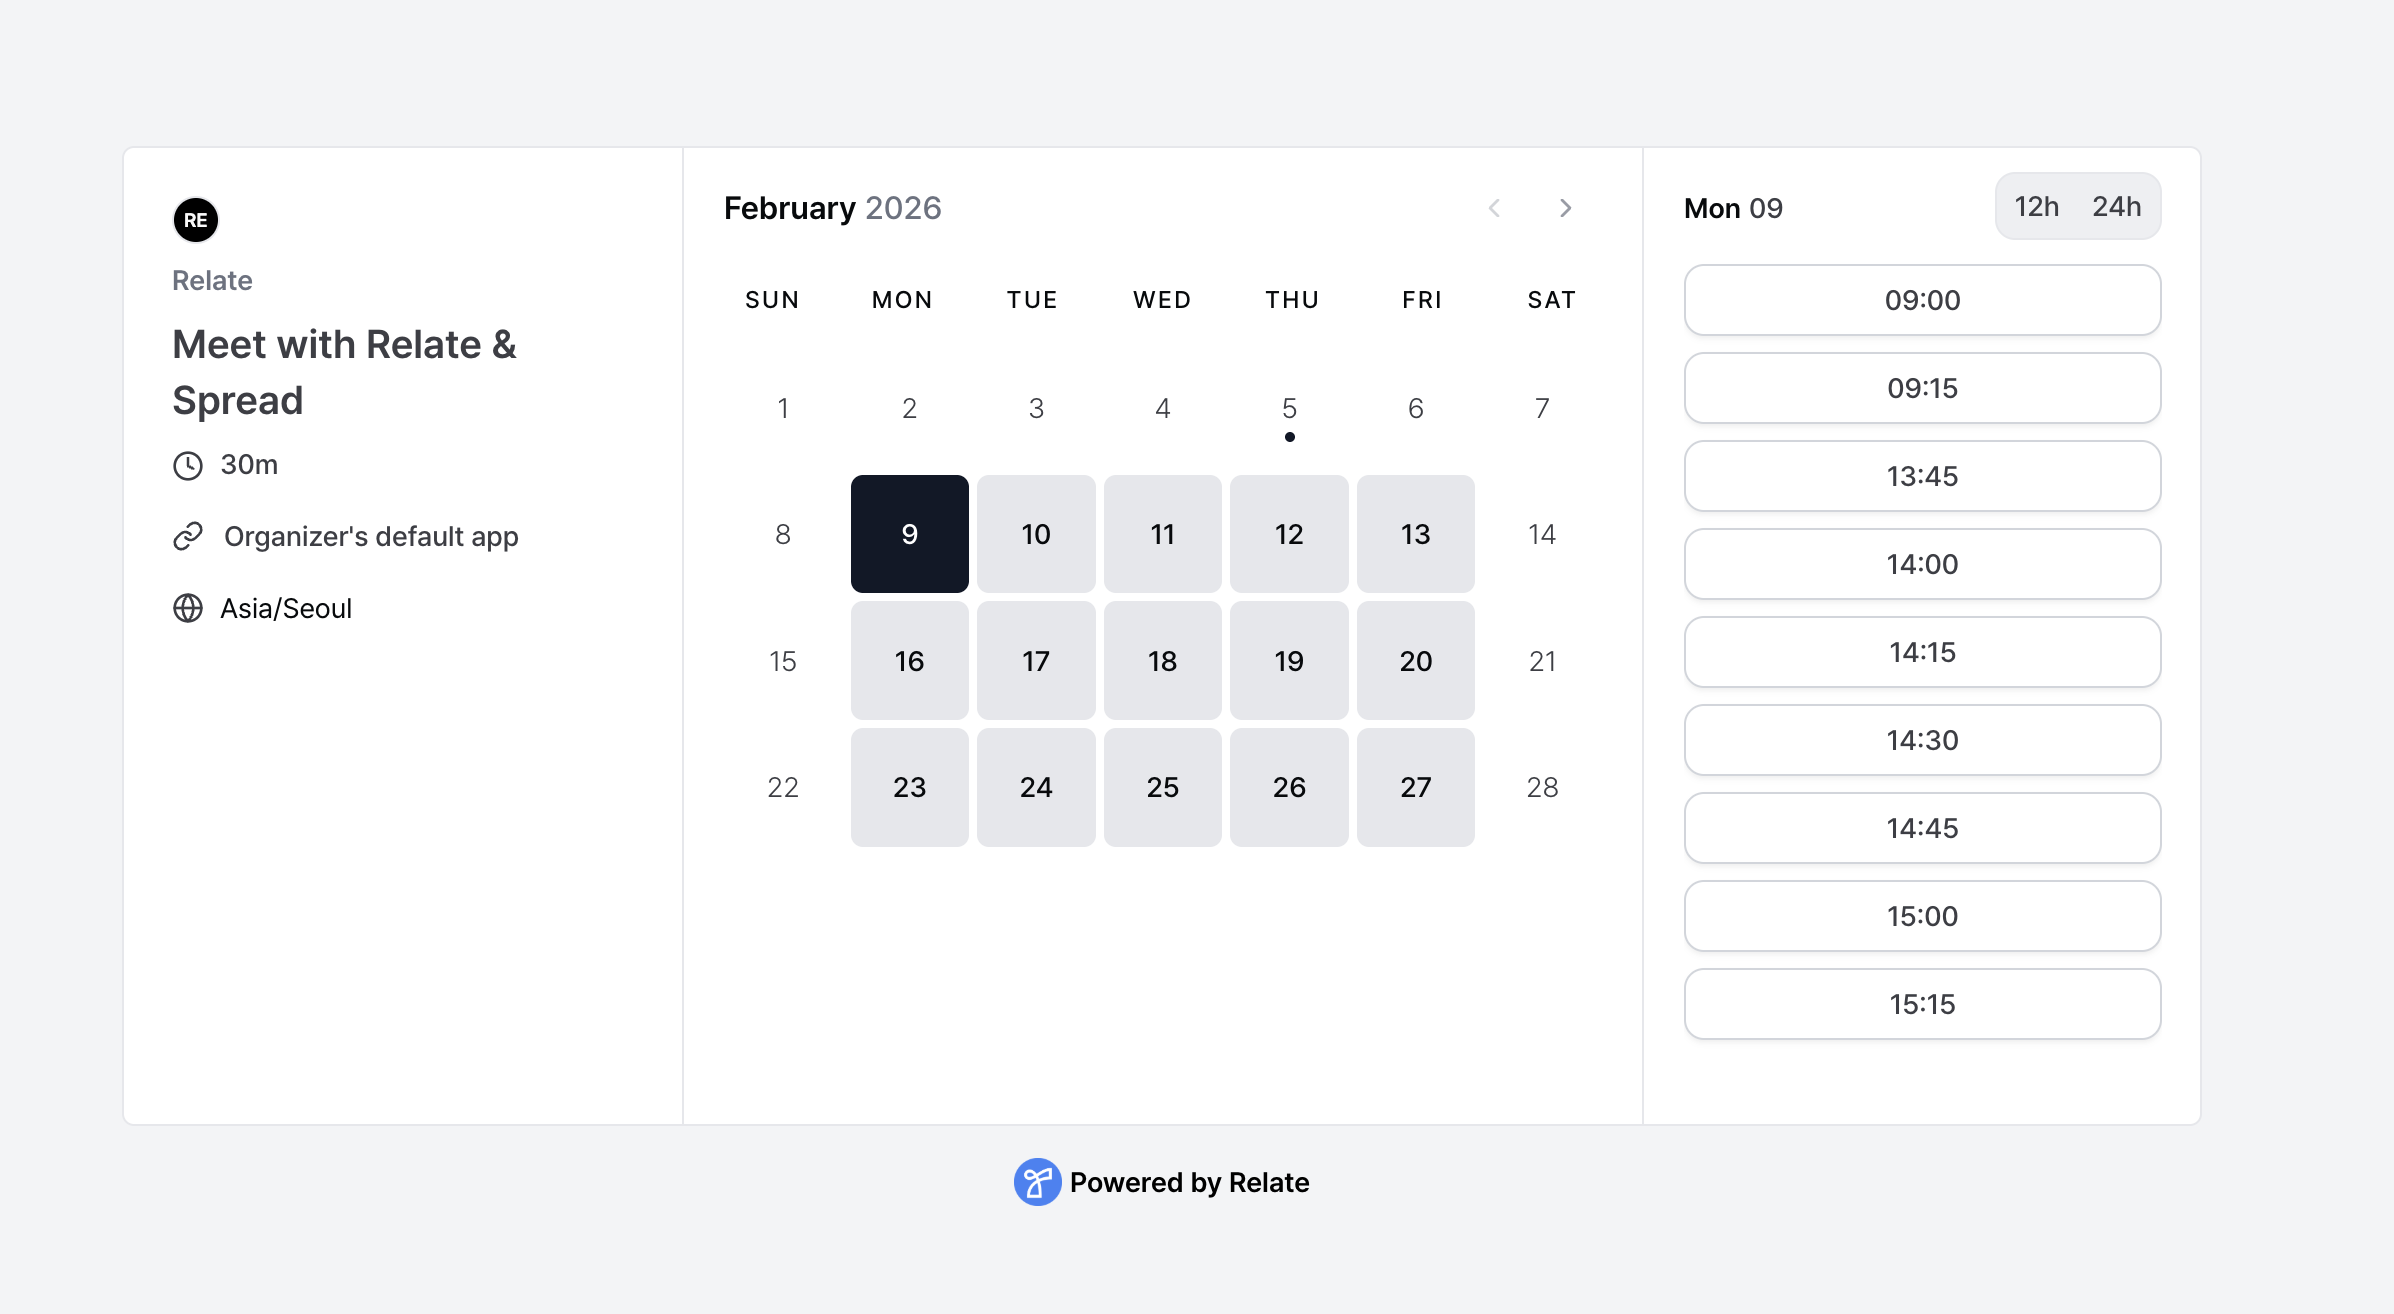
Customers can open the link and book a meeting by selecting their preferred date and time, as shown below.
Once the booking is completed, the meeting is automatically added to the connected calendar and a confirmation message is sent.