> ## Documentation Index
> Fetch the complete documentation index at: https://www.spread.so/docs/llms.txt
> Use this file to discover all available pages before exploring further.
# Set up your sending domain
> How to set up a custom domain for sending emails.
## Overview
Learn how to set up a custom domain for sending emails. If you want to send emails with your own domain, you need to set up a custom domain in Spread.
First, identify the domain you want to use for sending emails in Spread.
Next, update your DNS record to point to Spread's servers.
Finally, verify your domain to ensure that it's working correctly.
**If you don't have a custom domain, you can still send emails with Spread's default domain, @spreadsend.com**.
### Step 1. Add a custom domain to Spread
Go to **Workspace Settings** -> **Campaigns** to access the domain settings.
**Where can I find the workspace settings?**
Click your workspace name in the top left corner in the app and click **Settings**, or use `Cmd + ,`
#### Add a custom domain
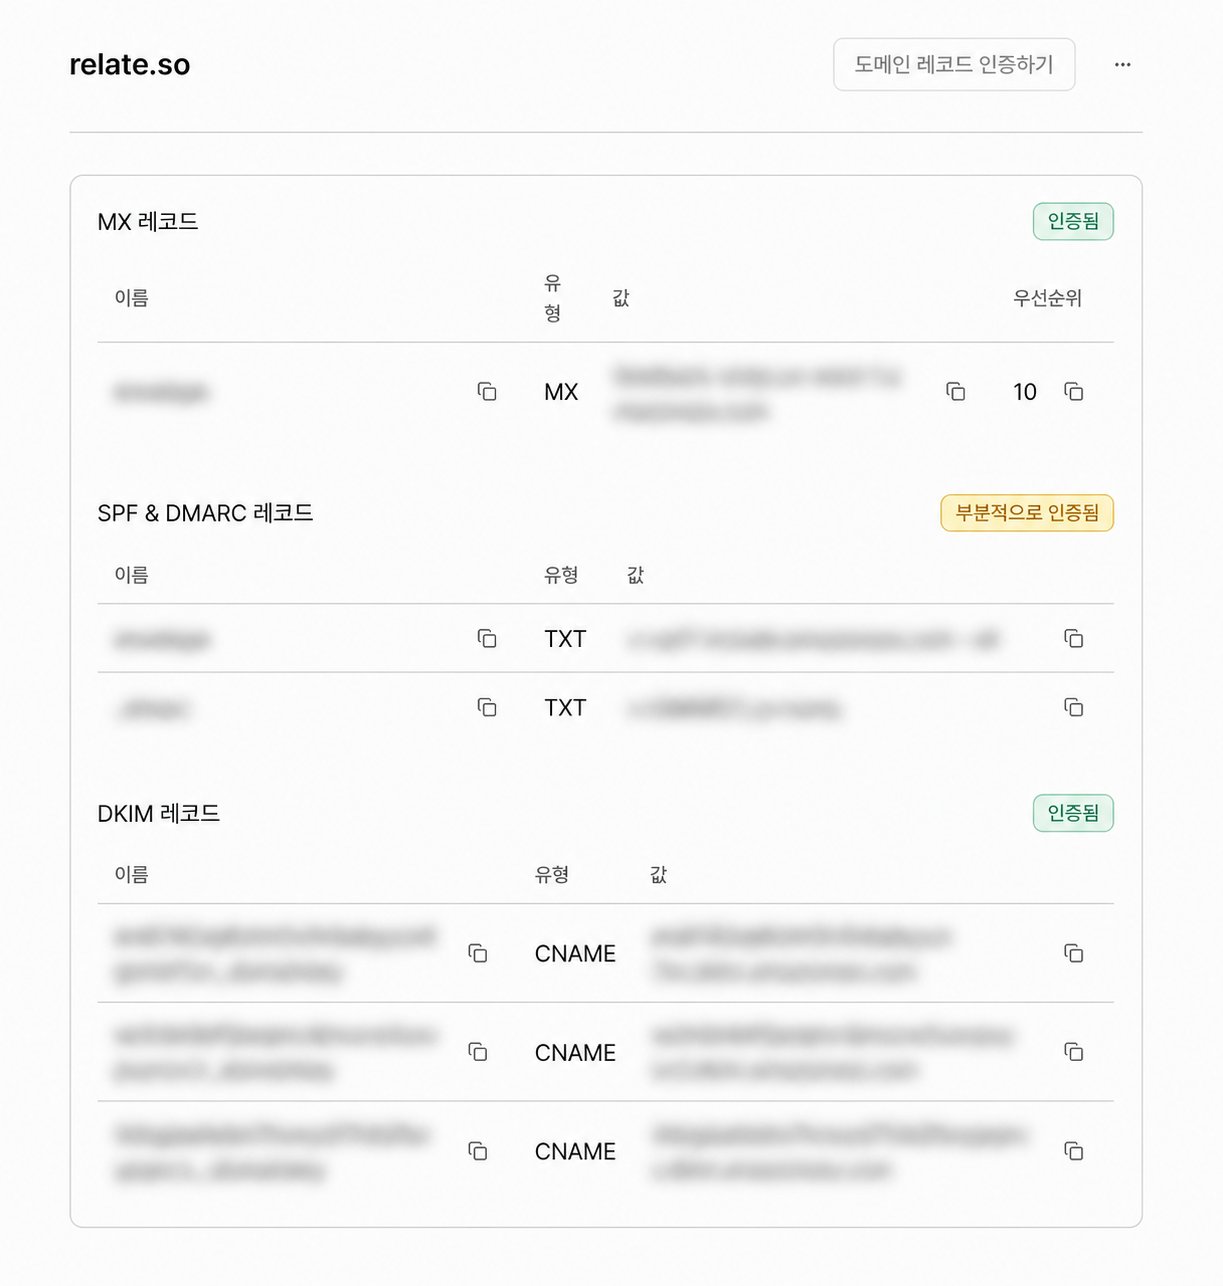
Add the domain you want to use for sending emails in Spread. Once you add it, you will see the content you need to update in your DNS records.
 ### Step 2. Update your DNS records
Copy and paste the MX, SPF & DMARC, DKIM records one by one to the DNS Record page in your domain management page.
Below are examples of Cloudflare and GoDaddy, but if you are using another domain management page and need additional help, send an email to [we@spread.so](mailto:we@spread.so).
Spread recommends using Cloudflare (free) for stable domain management. If you are not using Cloudflare, you can start using it by transferring your domain to Cloudflare.
First, go to the DNS page in your Cloudflare dashboard.
Click **Add record** and select the type (TXT, MX or CNAME). Then, copy and paste the **Name** and **Value** from the Spread domain settings page.
Refer to the [Cloudflare DNS record guide](https://developers.cloudflare.com/dns/manage-dns-records/how-to/create-dns-records/#create-dns-records) for more information.
Finally, set the proxy to `DNS Only` for the CNAME record. (Orange button)
Go to the menu of the domain you want to connect and click `Advanced DNS` page.
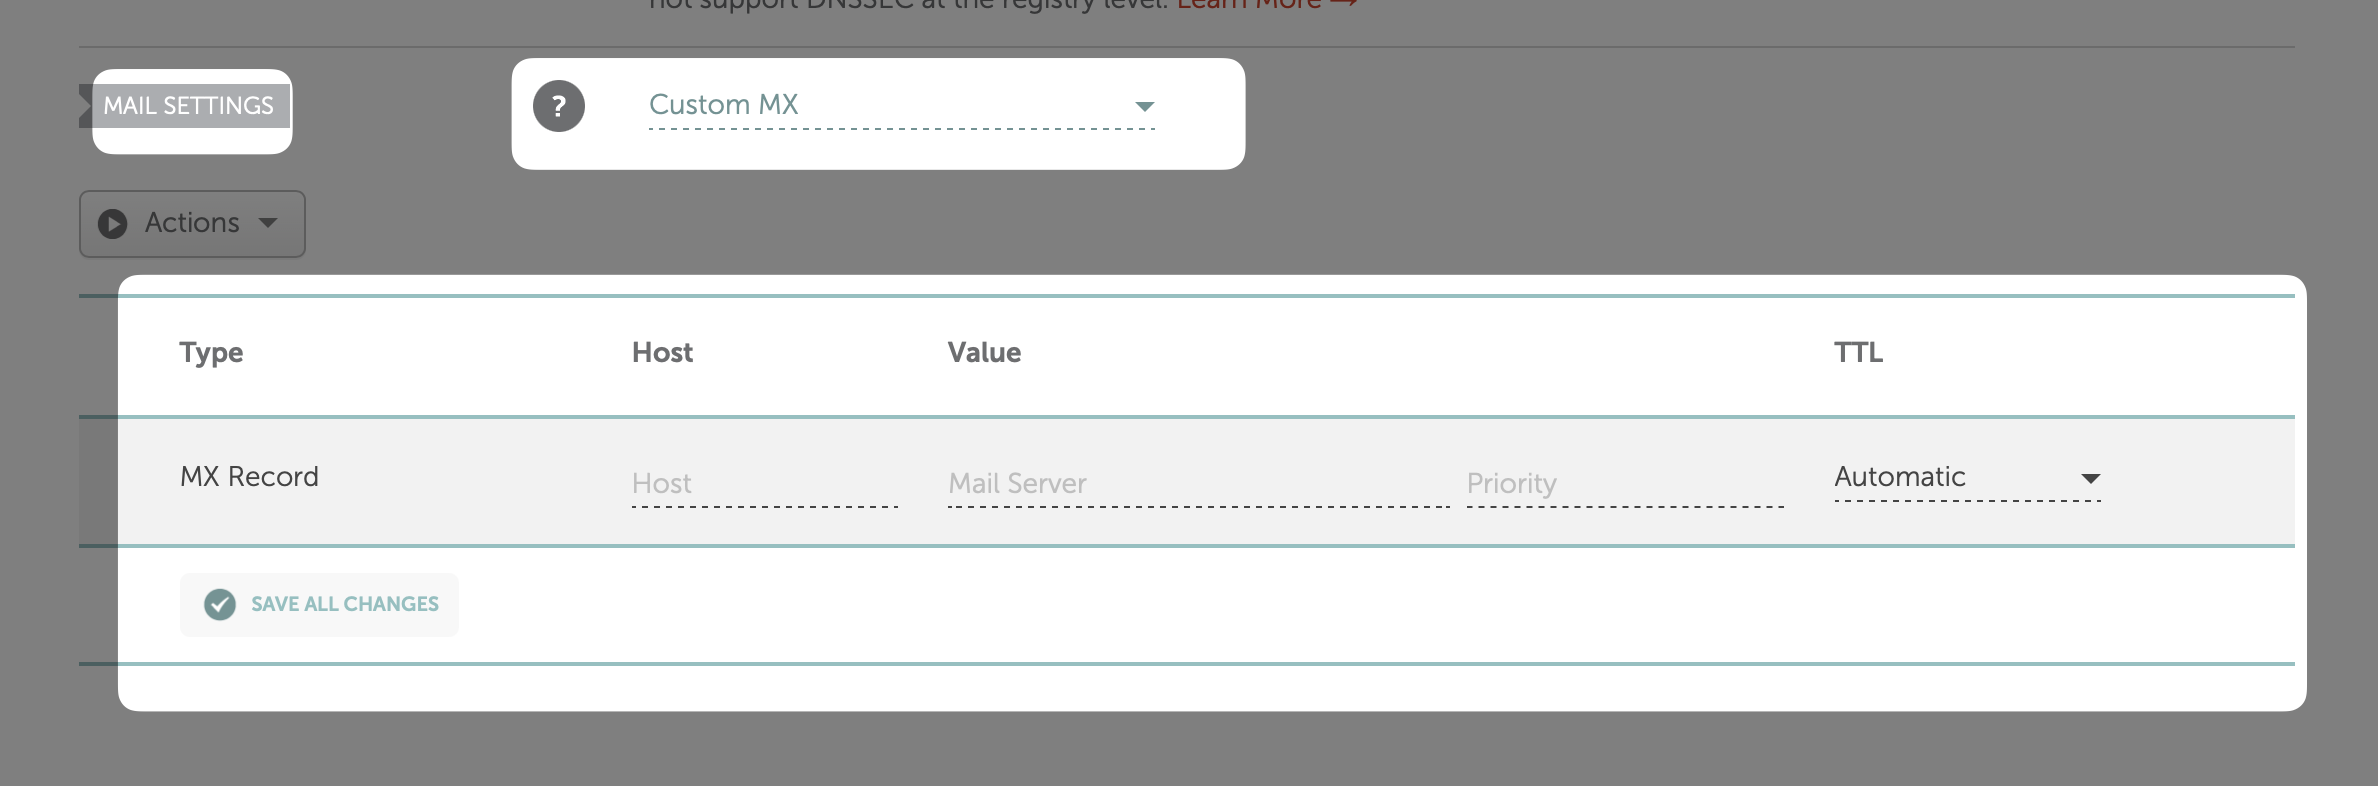
In `Mail Settings`, change to **Custom MX**. If you are using Namecheap and Gmail/Gsuite auto-connect, first disconnect the auto-connect and then change it. After that, click `Save All Changes` button to save the changes.
If your Gsuite record is already verified, check the appropriate MX record in [this document](https://support.google.com/a/answer/174125).
### How to add records
#### How to add MX Record
Click `Add new record` in the `Mail Settings` section and copy and paste the MX Record value from Spread to Host and Value.
#### How to add SPF, DKIM, and DMARC Record
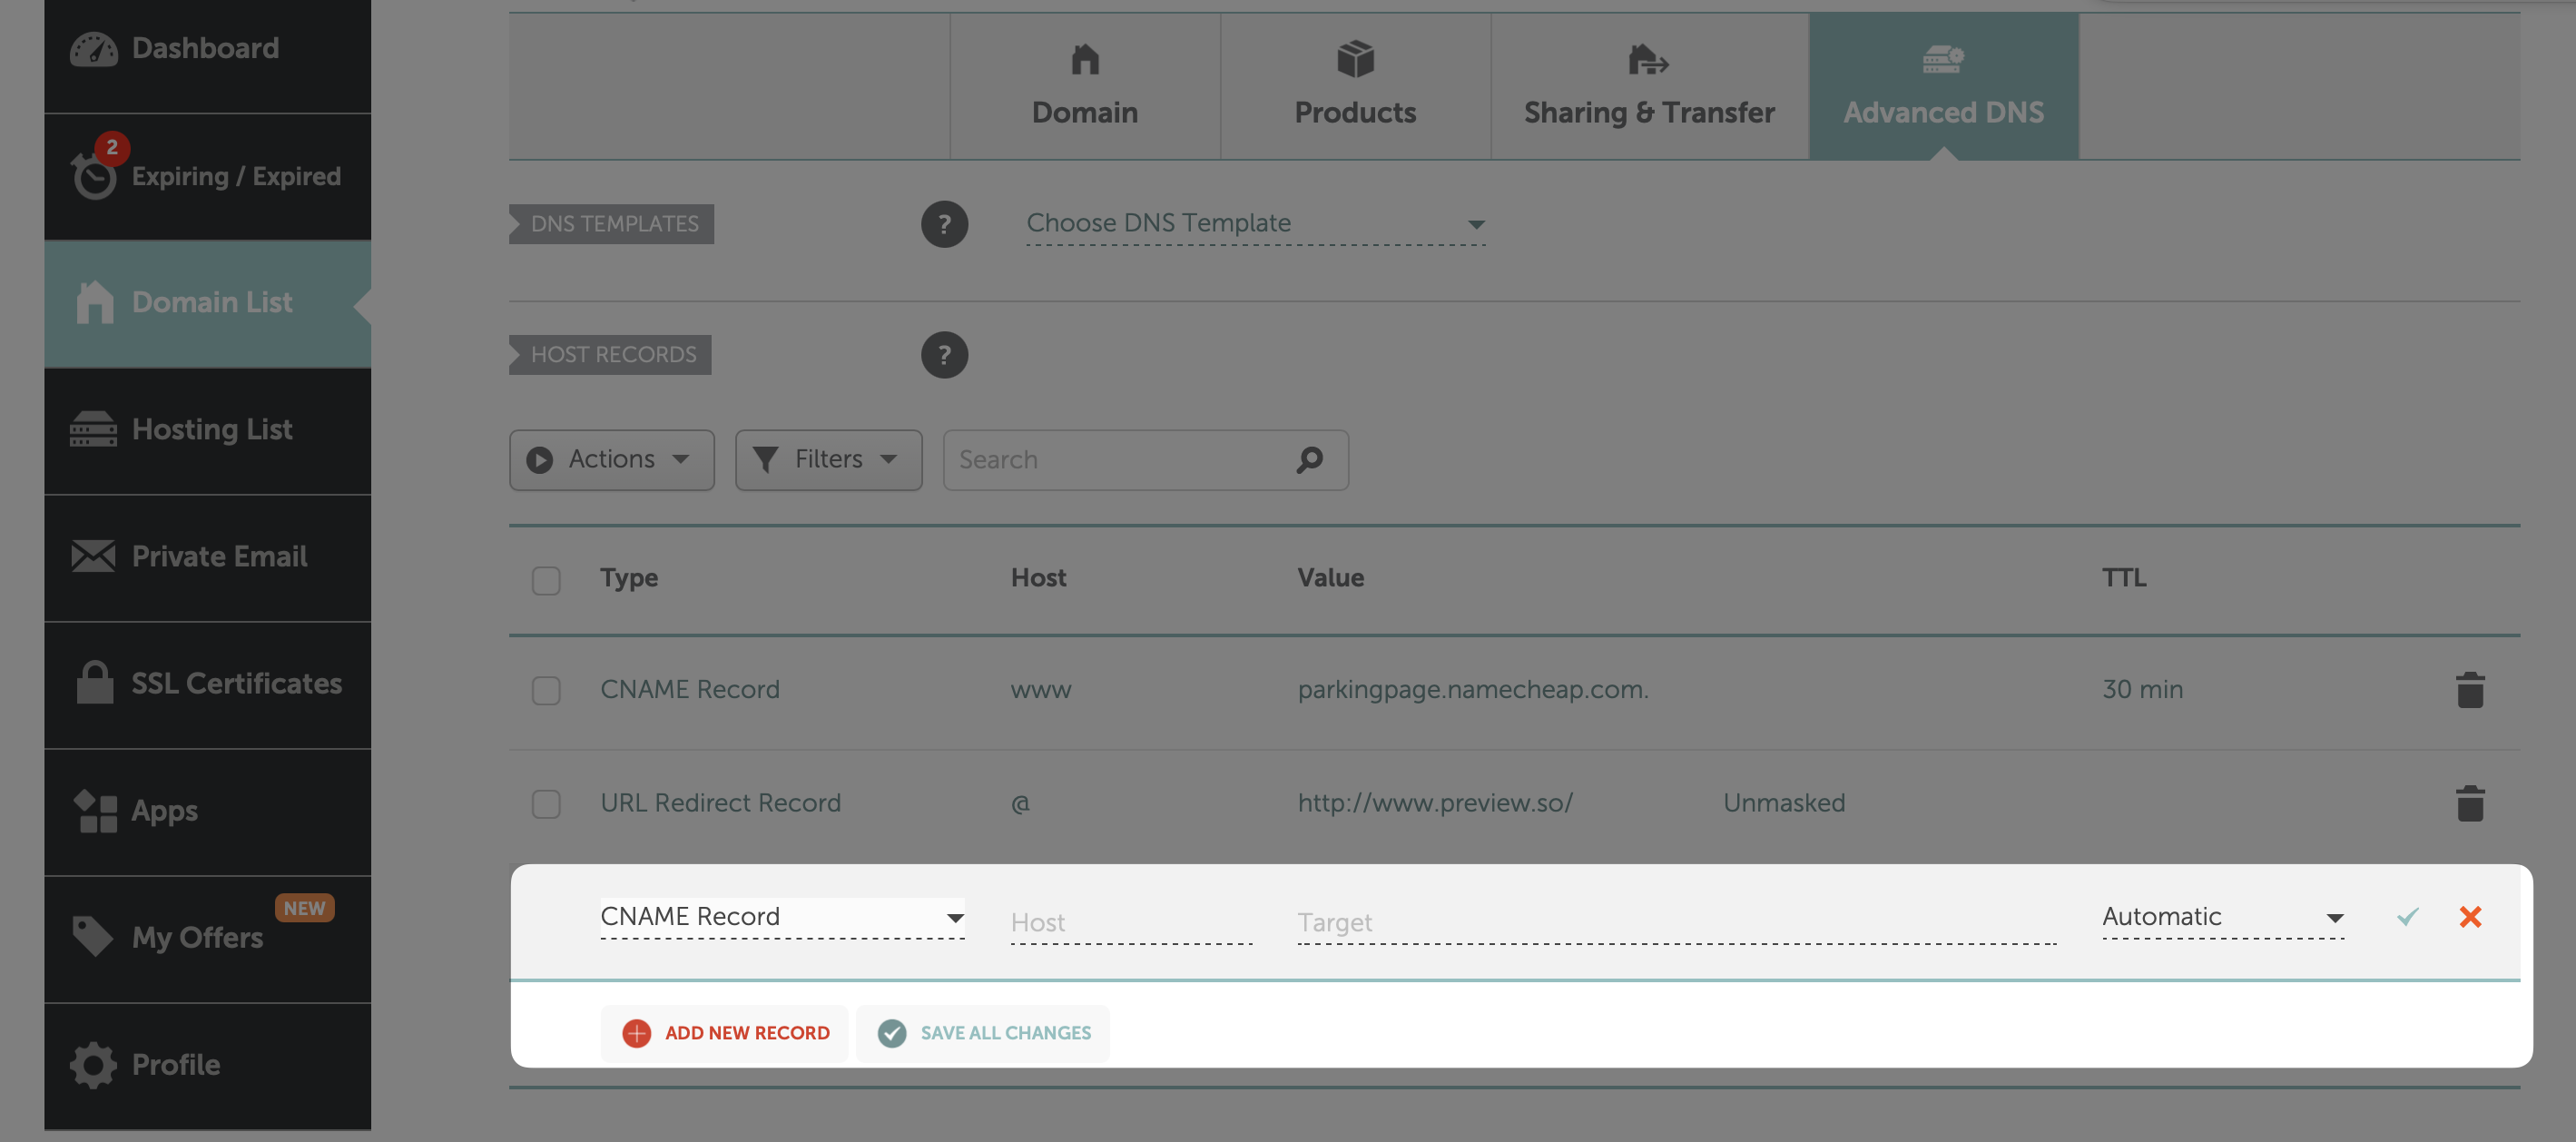
Click `Add new record` in the `Host Records` section and copy and paste the TXT and CNAME Record values from Spread to Host and Value.
### Step 3. Verify your domain
Once you have finished adding the records, click the `Record Verification` button at the bottom of the Spread domain settings page to check if the settings are correct. The record verification can take up to 1 hour.
Once the verification is complete, you will see a green `Verified` in the record section.
### Step 4. Resolve SPF and DMARC 'Partially Verified' issue
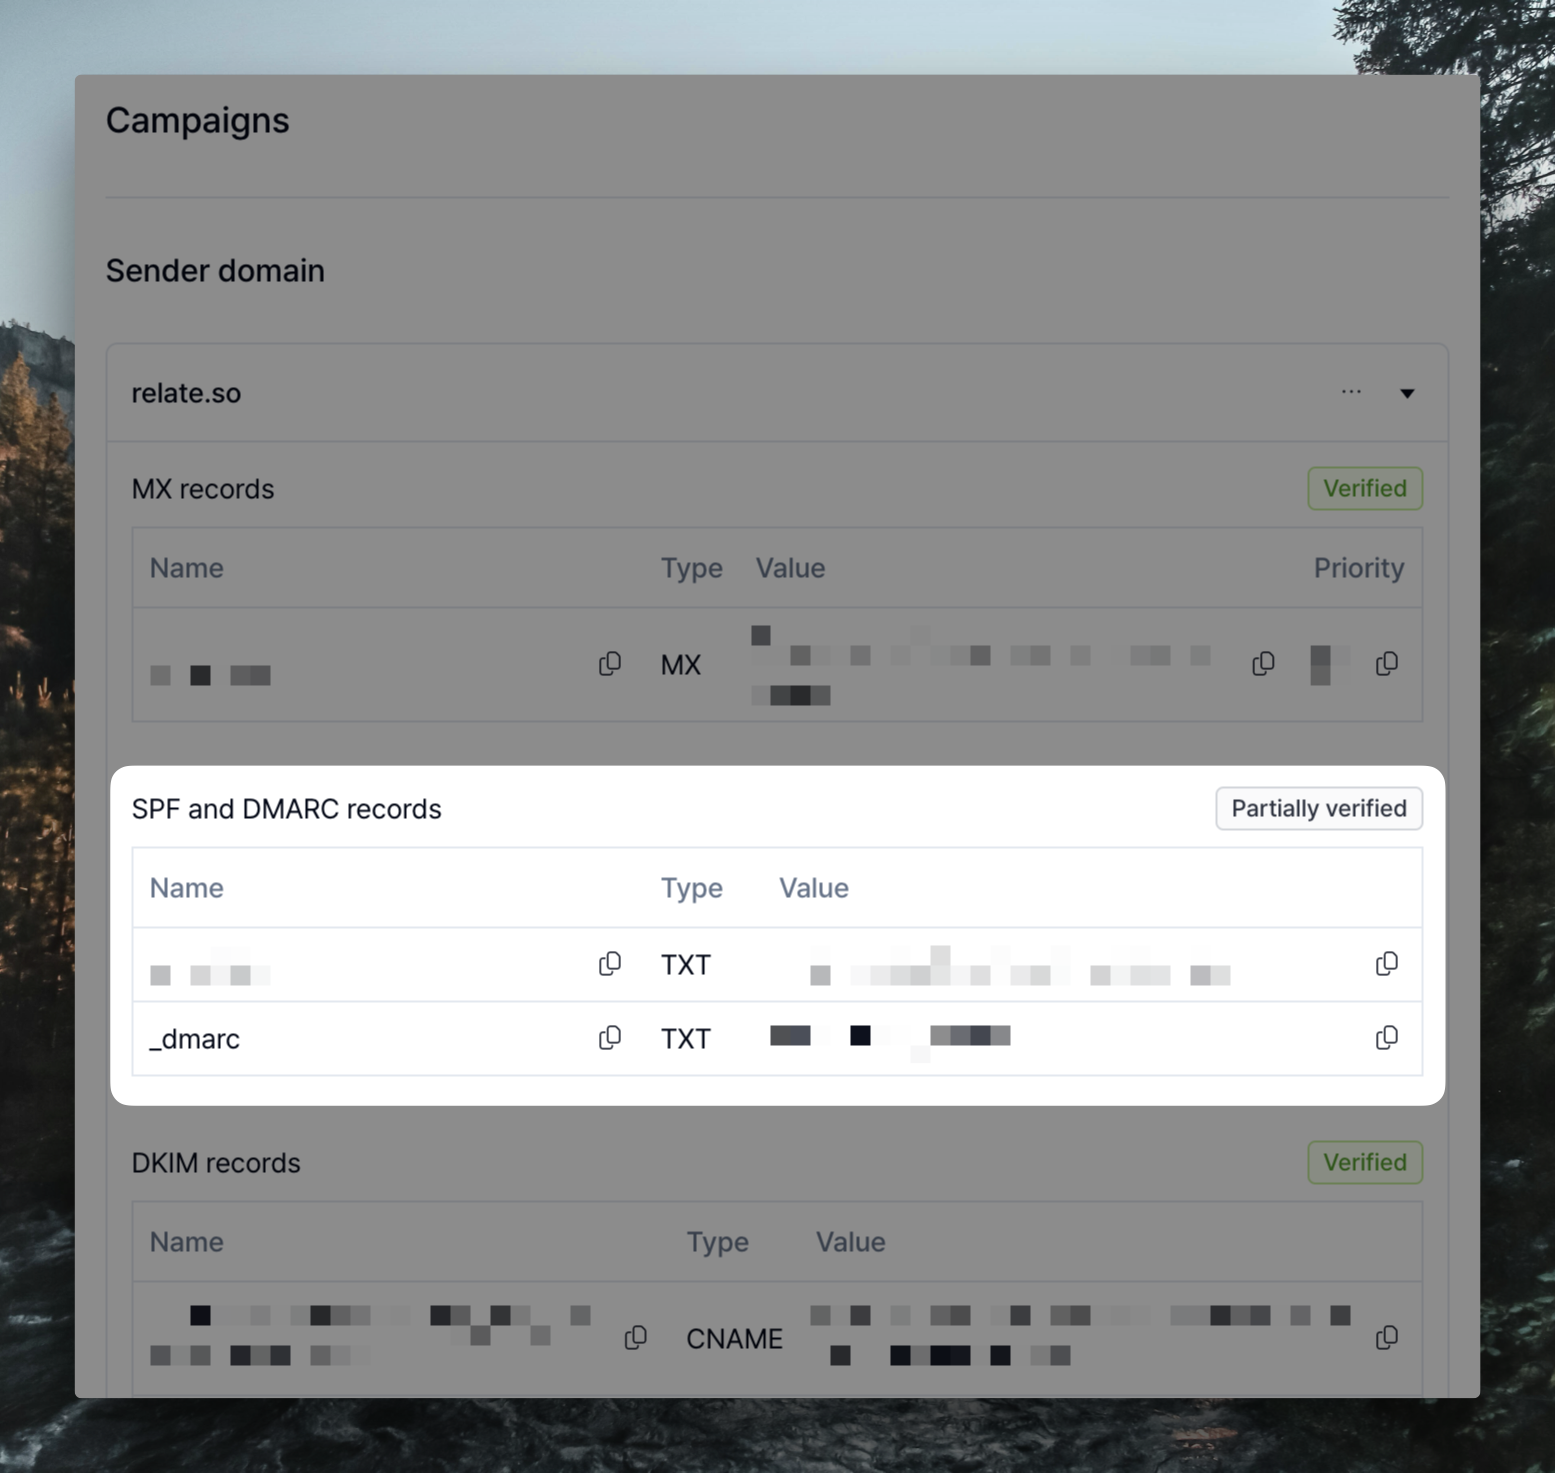
Even though you have followed the above steps, you may see that SPF and DMARC records are `Partially Verified`. In this case, the records are not completed. Please check the records by following the steps below.
First, check the records by going to [DNS CHECKER](https://dnschecker.org/all-dns-records-of-domain.php?query=_dmarc.relate.so\&rtype=TXT\&dns=google) and put **\_dmarc.yourdomain.com** (e.g. \_dmarc.spread.so) in TXT type.
Here, check if the guide code is copied correctly to Spread. If there is a different part, modify it. For example, if p=none; is provided but the semicolon (;) is not included, there is an error.
#### If you have custom DMARC policy
If you have a custom DMARC policy, this might be the reason you're seeing `Partially Verified`. In this case, consider modifying the DMARC policy or reach out to us and we can resolve this for you.
If this method does not work, please contact us through [we@spread.so](mailto:we@spread.so) or the contact button at the bottom right of the app.
### Step 2. Update your DNS records
Copy and paste the MX, SPF & DMARC, DKIM records one by one to the DNS Record page in your domain management page.
Below are examples of Cloudflare and GoDaddy, but if you are using another domain management page and need additional help, send an email to [we@spread.so](mailto:we@spread.so).
Spread recommends using Cloudflare (free) for stable domain management. If you are not using Cloudflare, you can start using it by transferring your domain to Cloudflare.
First, go to the DNS page in your Cloudflare dashboard.
Click **Add record** and select the type (TXT, MX or CNAME). Then, copy and paste the **Name** and **Value** from the Spread domain settings page.
Refer to the [Cloudflare DNS record guide](https://developers.cloudflare.com/dns/manage-dns-records/how-to/create-dns-records/#create-dns-records) for more information.
Finally, set the proxy to `DNS Only` for the CNAME record. (Orange button)
Go to the menu of the domain you want to connect and click `Advanced DNS` page.
In `Mail Settings`, change to **Custom MX**. If you are using Namecheap and Gmail/Gsuite auto-connect, first disconnect the auto-connect and then change it. After that, click `Save All Changes` button to save the changes.
If your Gsuite record is already verified, check the appropriate MX record in [this document](https://support.google.com/a/answer/174125).
### How to add records
#### How to add MX Record
Click `Add new record` in the `Mail Settings` section and copy and paste the MX Record value from Spread to Host and Value.

#### How to add SPF, DKIM, and DMARC Record
Click `Add new record` in the `Host Records` section and copy and paste the TXT and CNAME Record values from Spread to Host and Value.

### Step 3. Verify your domain
Once you have finished adding the records, click the `Record Verification` button at the bottom of the Spread domain settings page to check if the settings are correct. The record verification can take up to 1 hour.
Once the verification is complete, you will see a green `Verified` in the record section.
### Step 4. Resolve SPF and DMARC 'Partially Verified' issue

Even though you have followed the above steps, you may see that SPF and DMARC records are `Partially Verified`. In this case, the records are not completed. Please check the records by following the steps below.
First, check the records by going to [DNS CHECKER](https://dnschecker.org/all-dns-records-of-domain.php?query=_dmarc.relate.so\&rtype=TXT\&dns=google) and put **\_dmarc.yourdomain.com** (e.g. \_dmarc.spread.so) in TXT type.
Here, check if the guide code is copied correctly to Spread. If there is a different part, modify it. For example, if p=none; is provided but the semicolon (;) is not included, there is an error.
#### If you have custom DMARC policy
If you have a custom DMARC policy, this might be the reason you're seeing `Partially Verified`. In this case, consider modifying the DMARC policy or reach out to us and we can resolve this for you.
If this method does not work, please contact us through [we@spread.so](mailto:we@spread.so) or the contact button at the bottom right of the app.